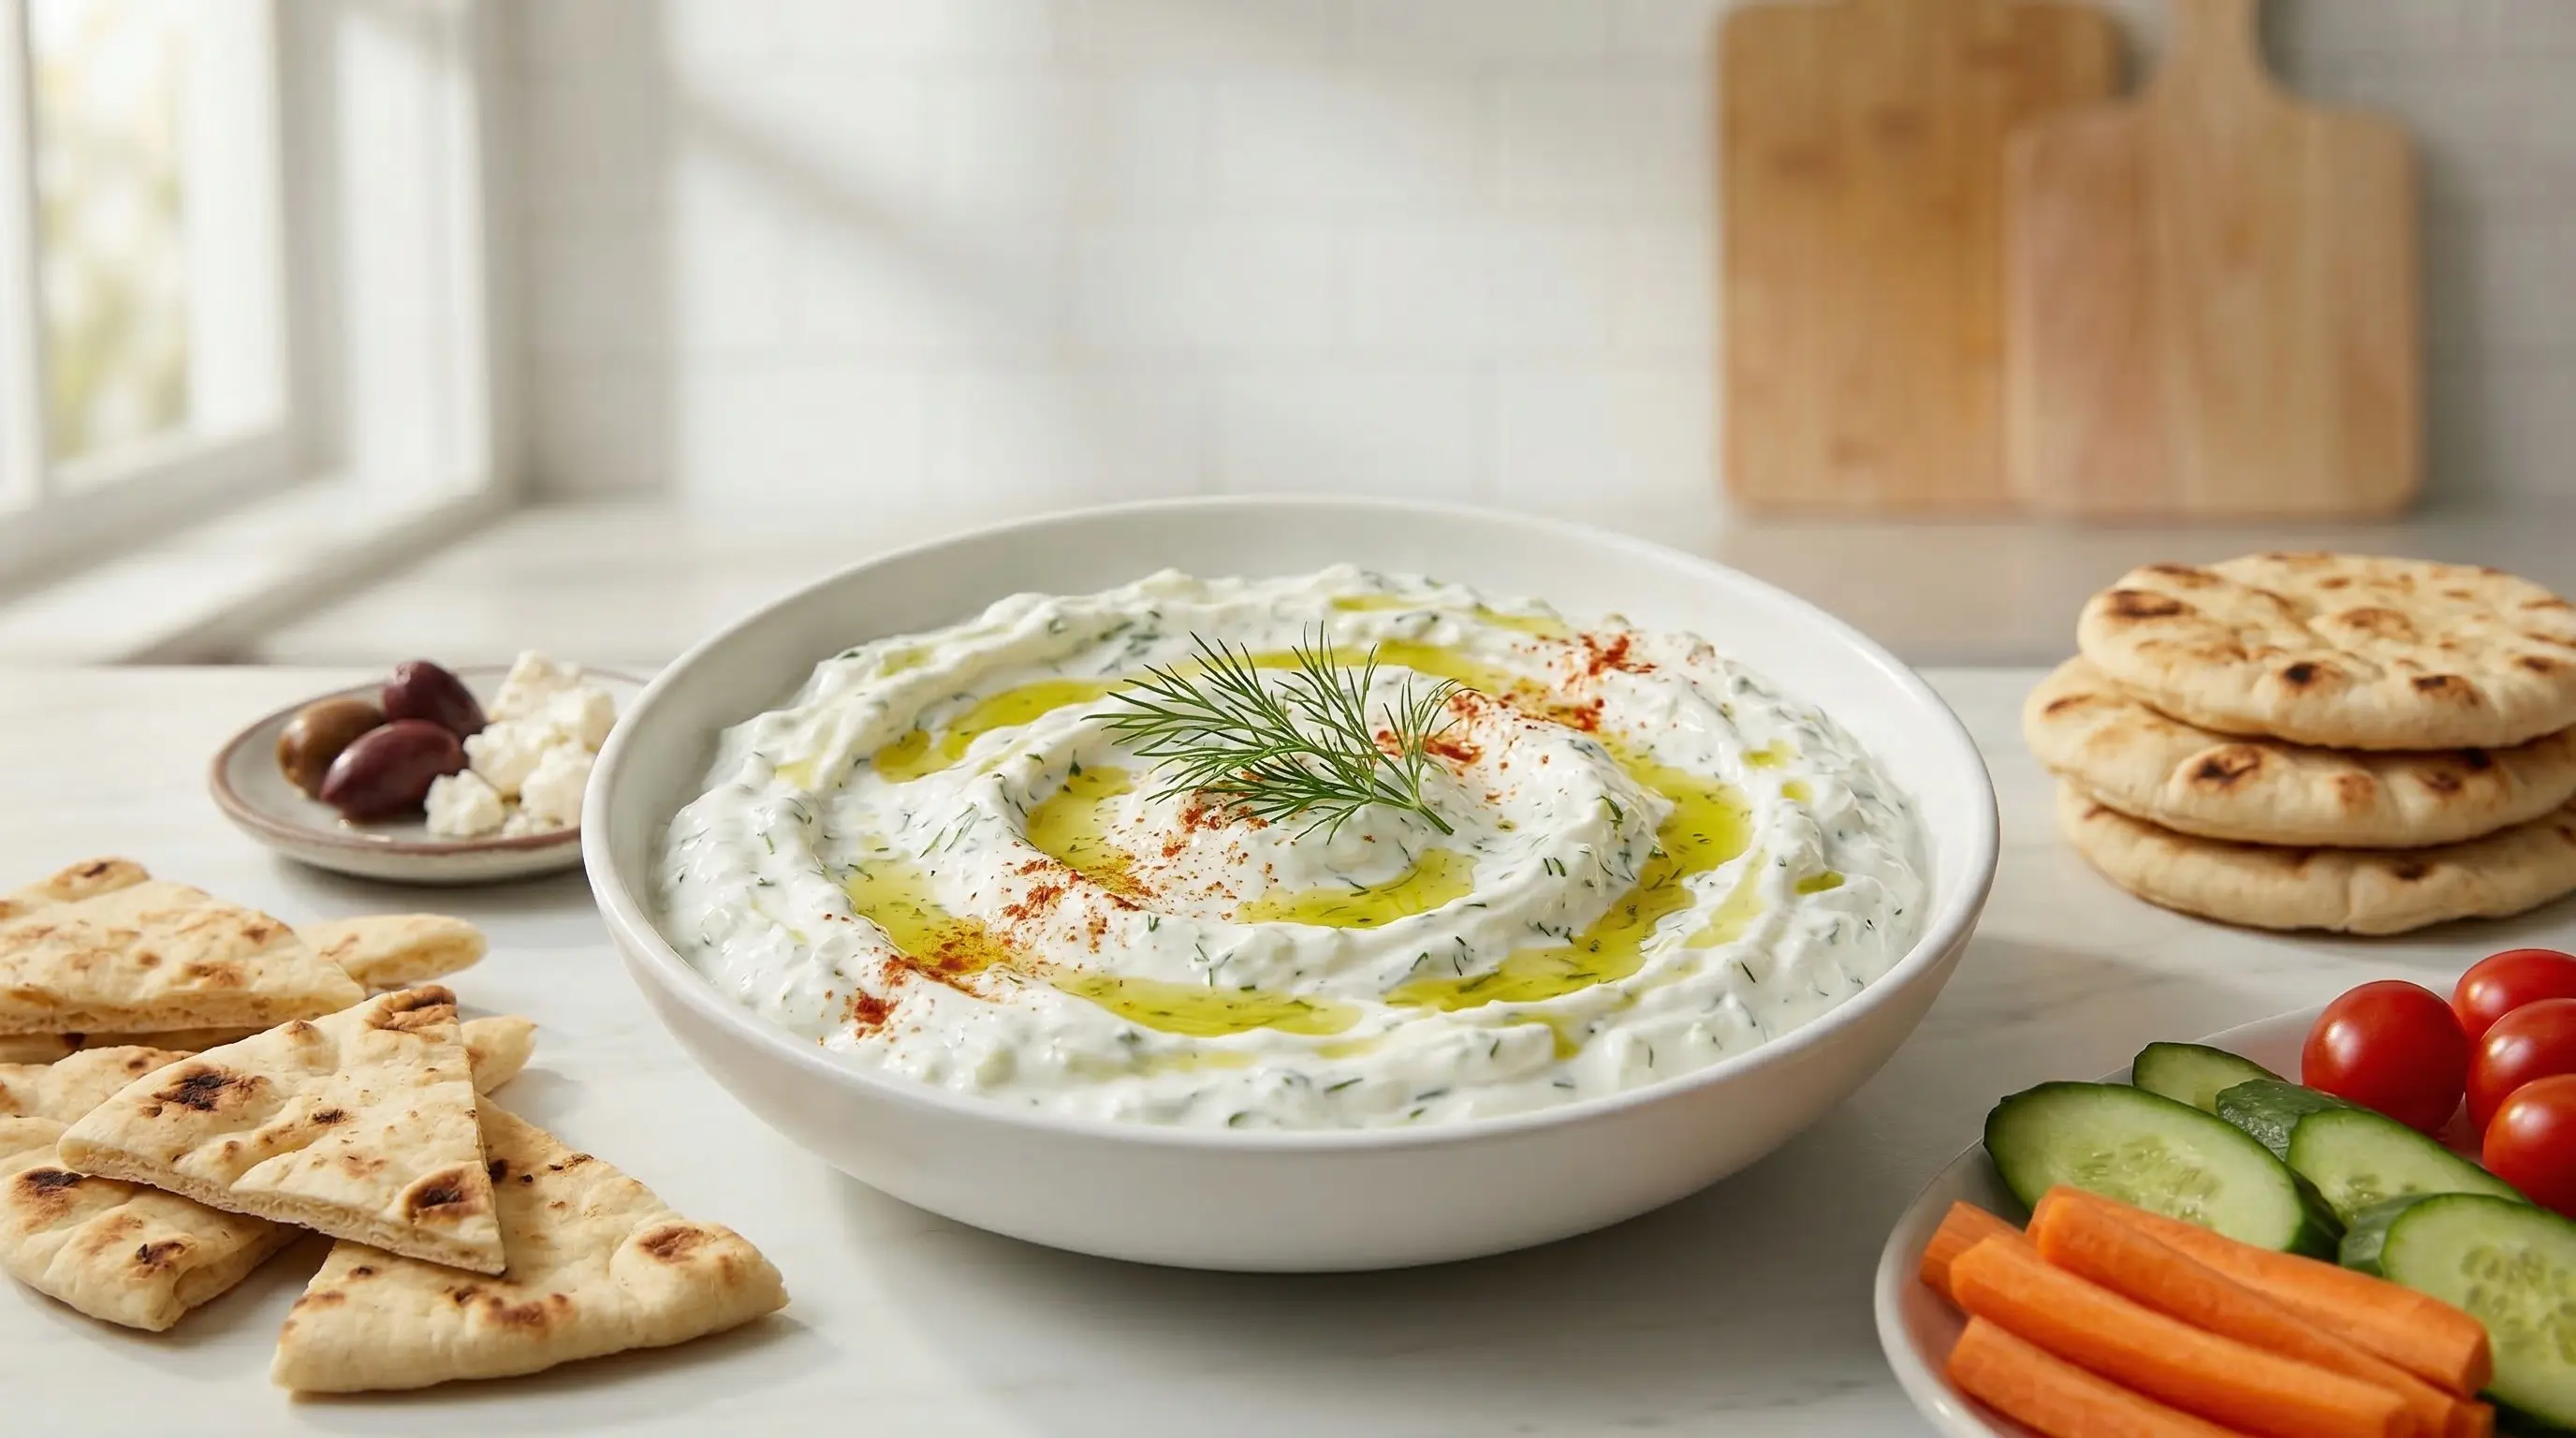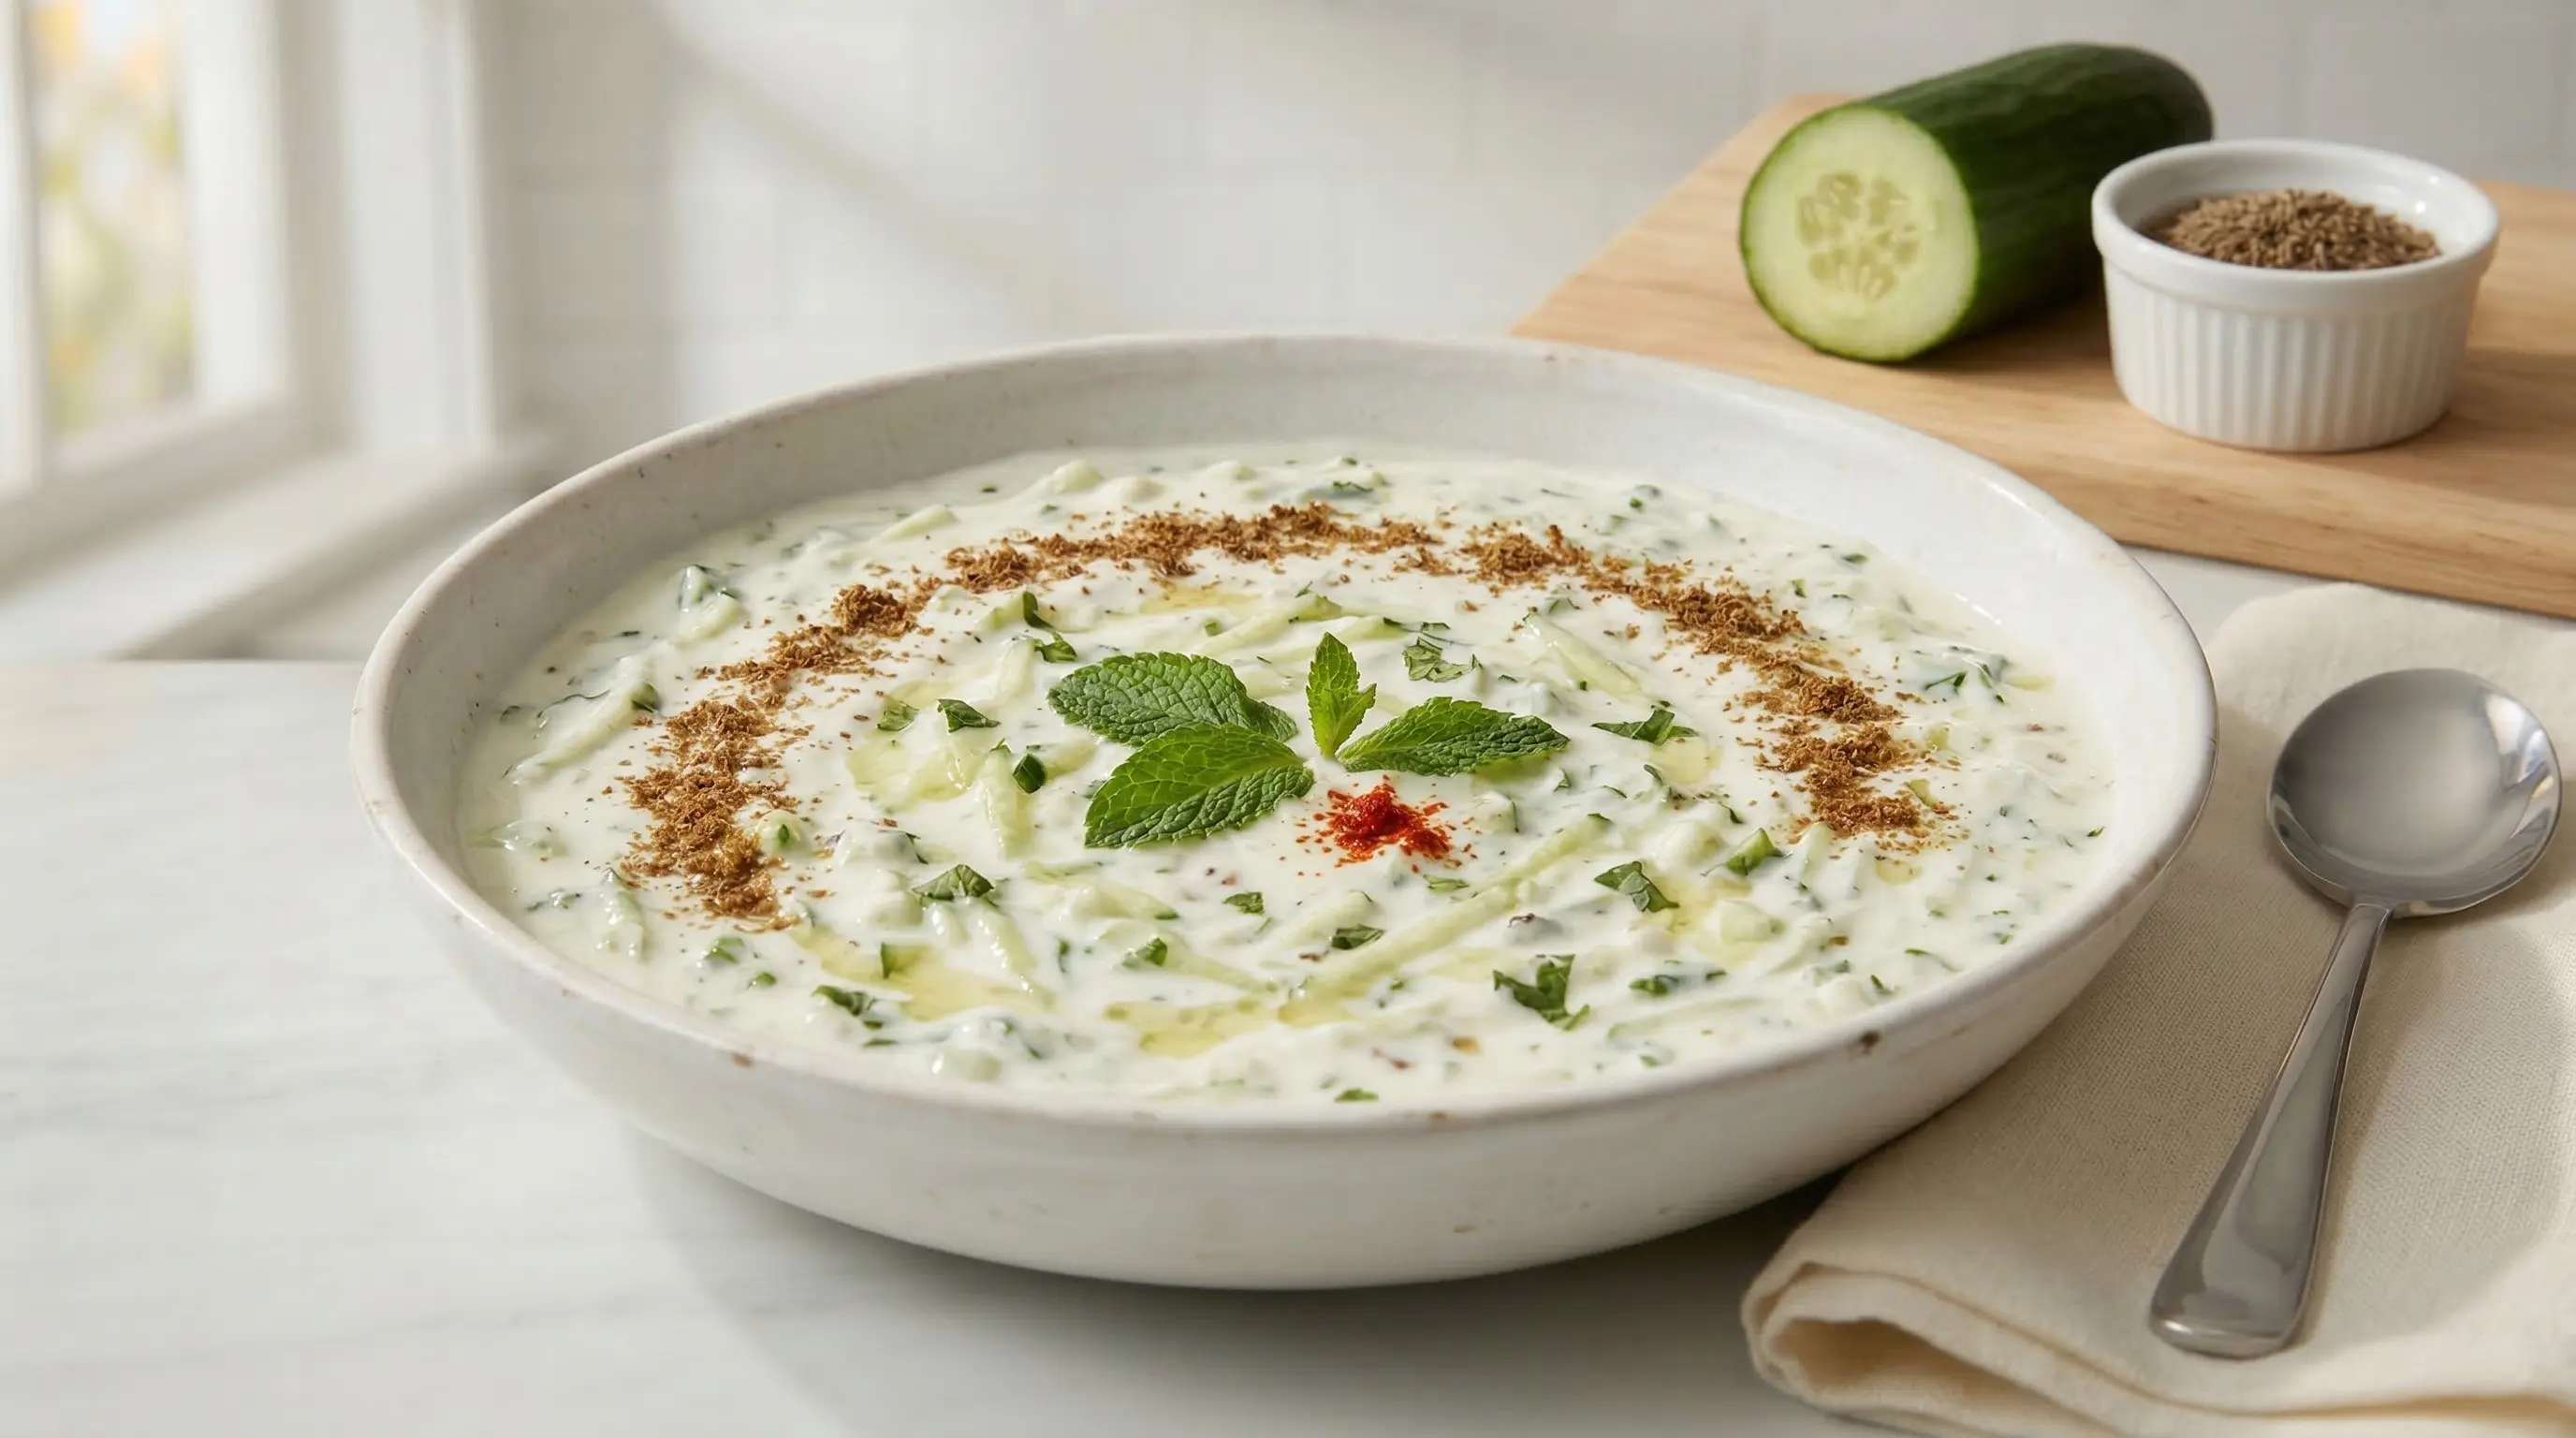
Raita
Learn how to make authentic raita, the cooling Indian yogurt condiment with cucumber, cumin, and fresh herbs. This refreshing side dish is the perfect companion to spicy curries and biryanis!
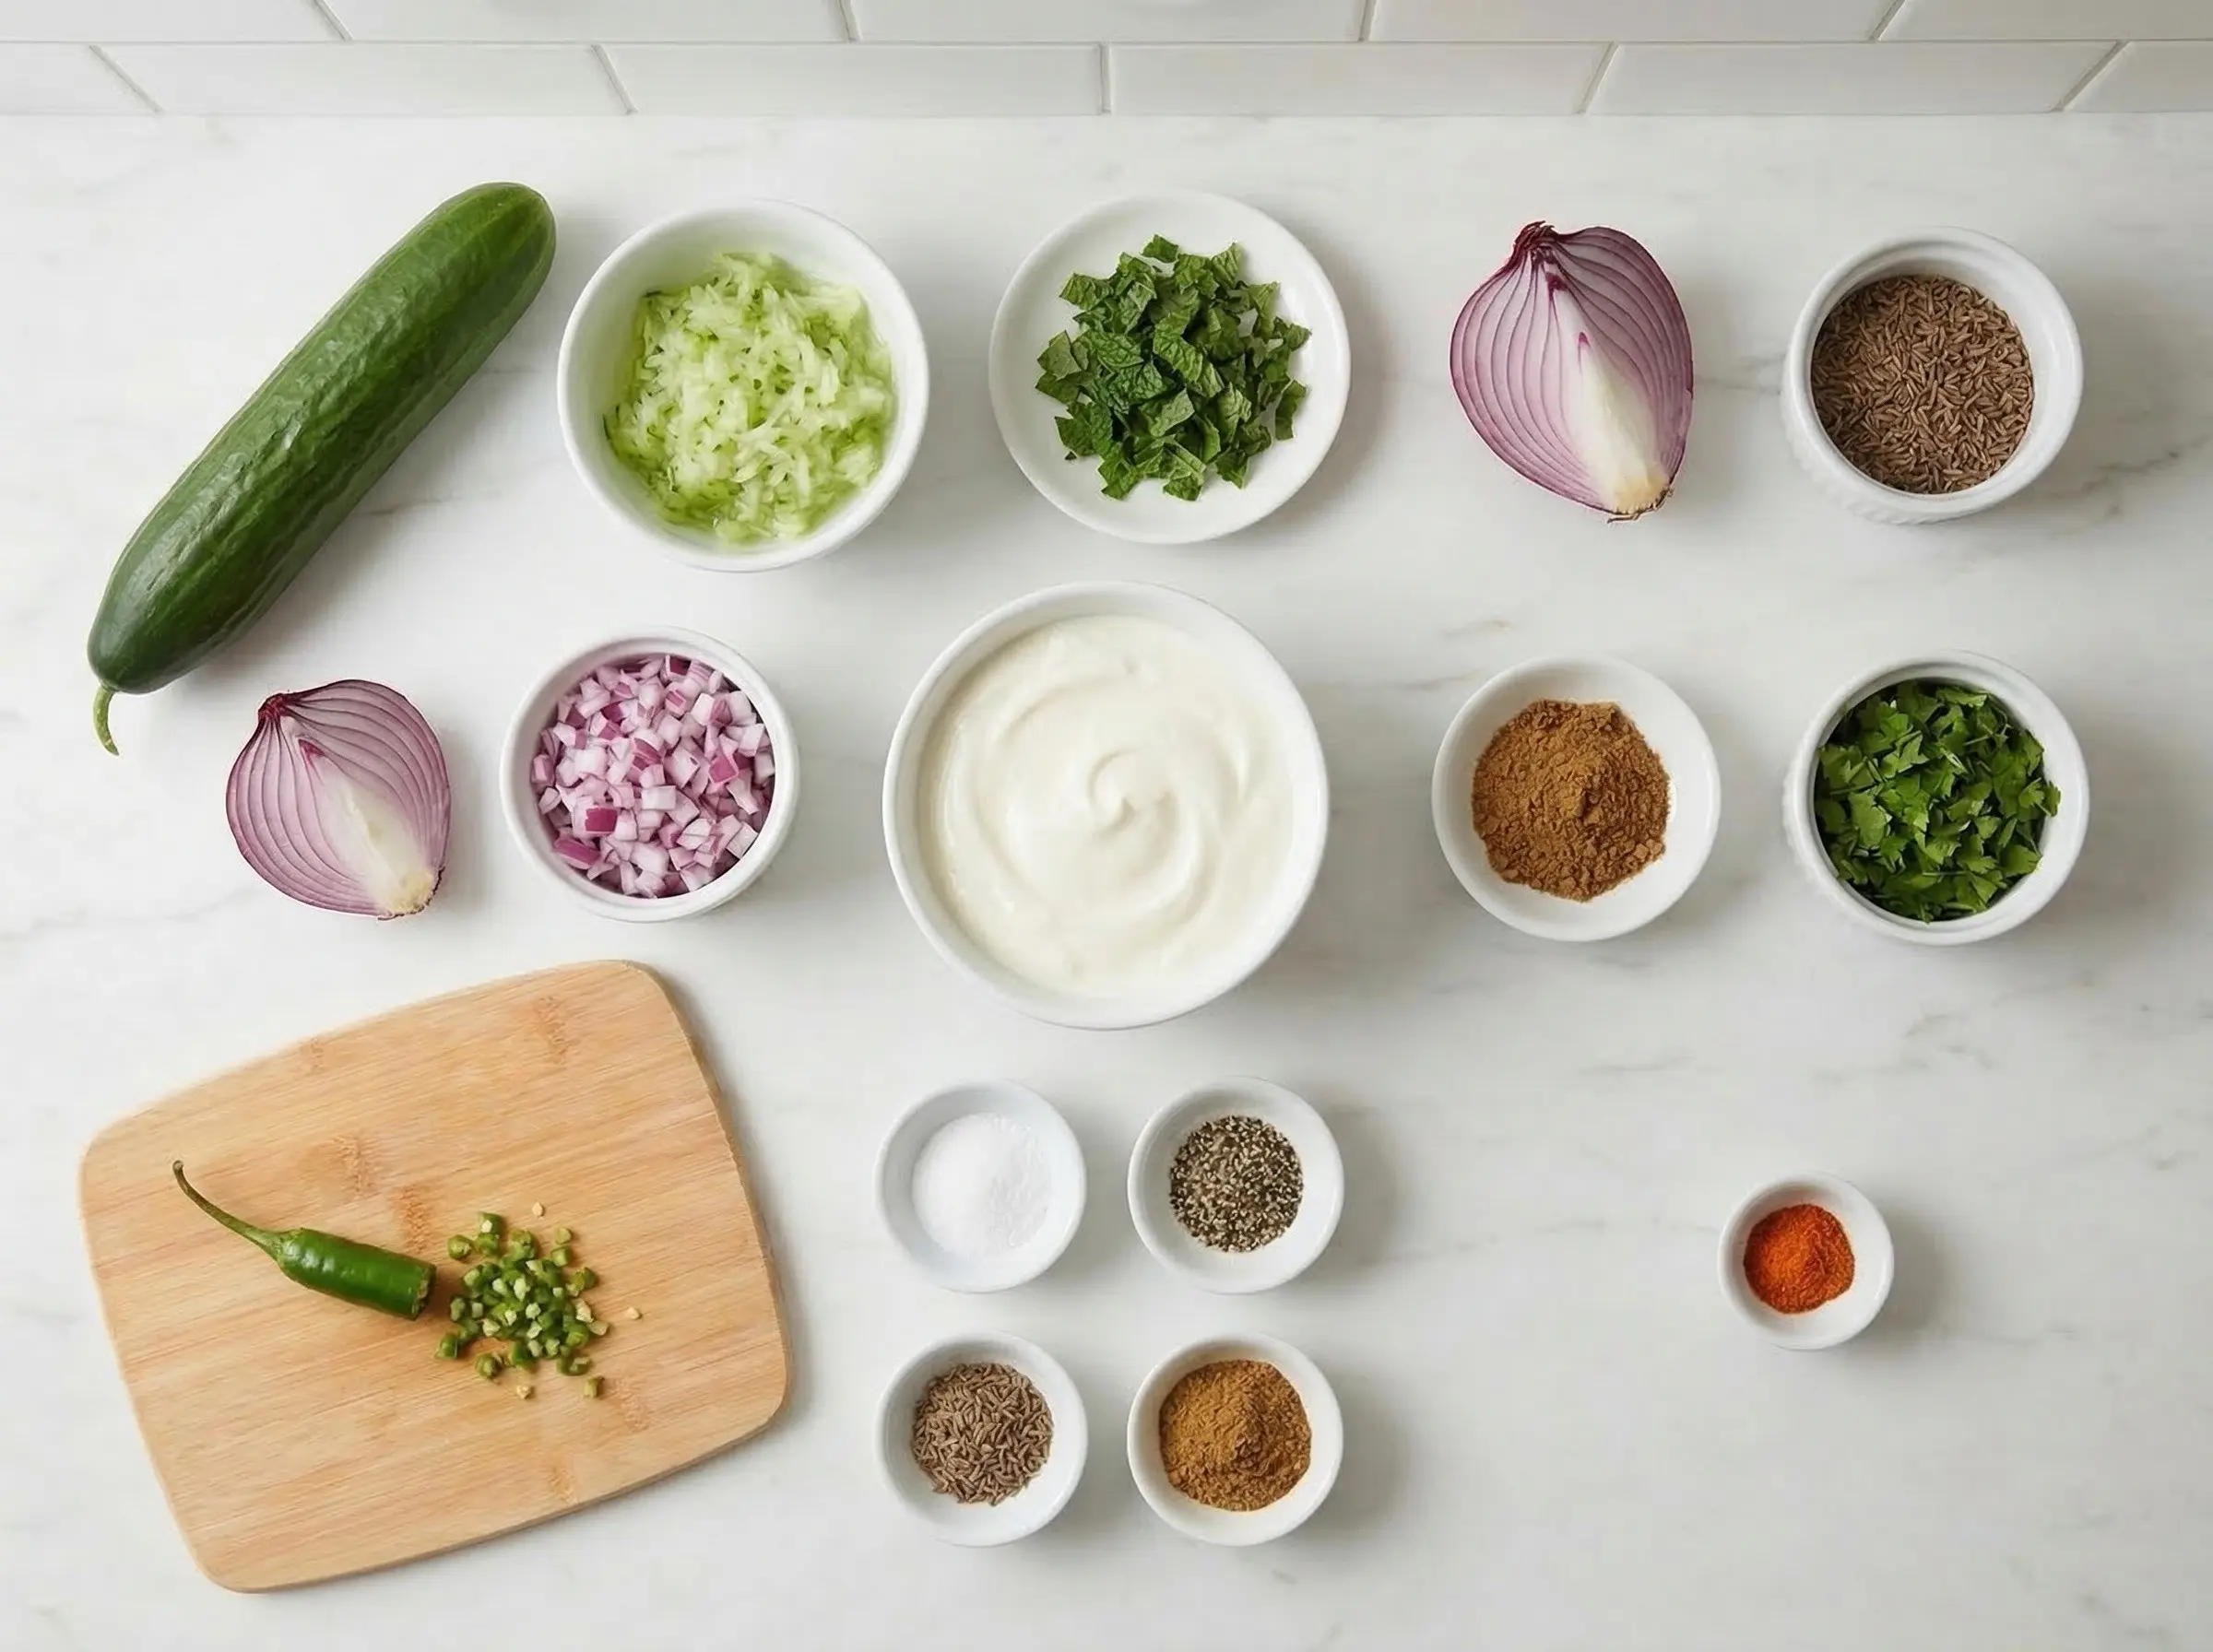
Ingredients
The Story
Raita is the cooling counterpoint at the heart of Indian cuisine, a yogurt-based condiment that has balanced the heat and spice of the subcontinent's foods for thousands of years. The word "raita" derives from the Sanskrit "rajika," meaning black mustard seed, though modern raitas rely more heavily on cumin for their distinctive flavor. The dish belongs to a broader family of yogurt preparations found across South Asia, the Middle East, and the Mediterranean - cousins to Greek tzatziki, Turkish cacık, and Persian mast-o-khiar. In India, raita is not merely a side dish but a fundamental component of meal composition, providing the cooling "shita" element that Ayurvedic tradition considers essential for balancing the heating "ushna" qualities of spiced foods. Raita varies endlessly across India's regions and households. Cucumber raita (kheera raita) is perhaps the most universal, but variations abound - boondi raita studded with crispy chickpea flour droplets, aloo raita with boiled potatoes, lauki raita with bottle gourd, palak raita with spinach, or fruit raitas with pomegranate or banana. In the north, raitas tend to be milder and often feature mint. In the south, they may include curry leaves, mustard seeds, and a touch of heat. Every family has their own proportions and preferences, passed down through generations. At weddings and feasts, elaborate raitas might feature multiple vegetables, nuts, and dried fruits, showcasing the cook's skill. What makes raita so extraordinary is its ability to transform the dining experience. A bite of fiery vindaloo followed by a spoonful of cool, creamy raita creates a sensory journey that neither component could achieve alone. The yogurt provides probiotics and protein while its lactic acid aids digestion of heavy or spiced meals. The cucumber adds fresh crunch and hydration. The cumin contributes earthy warmth that bridges Indian flavors. The herbs - mint, cilantro, or both - add bright, aromatic lift. Properly made raita should be cool but not ice-cold, thick but spoonable, seasoned but not salty, with the vegetables retaining their texture rather than becoming soggy. It is simplicity perfected - proof that the greatest culinary traditions understand that sometimes the supporting players are as important as the star.
Instructions
Step 1
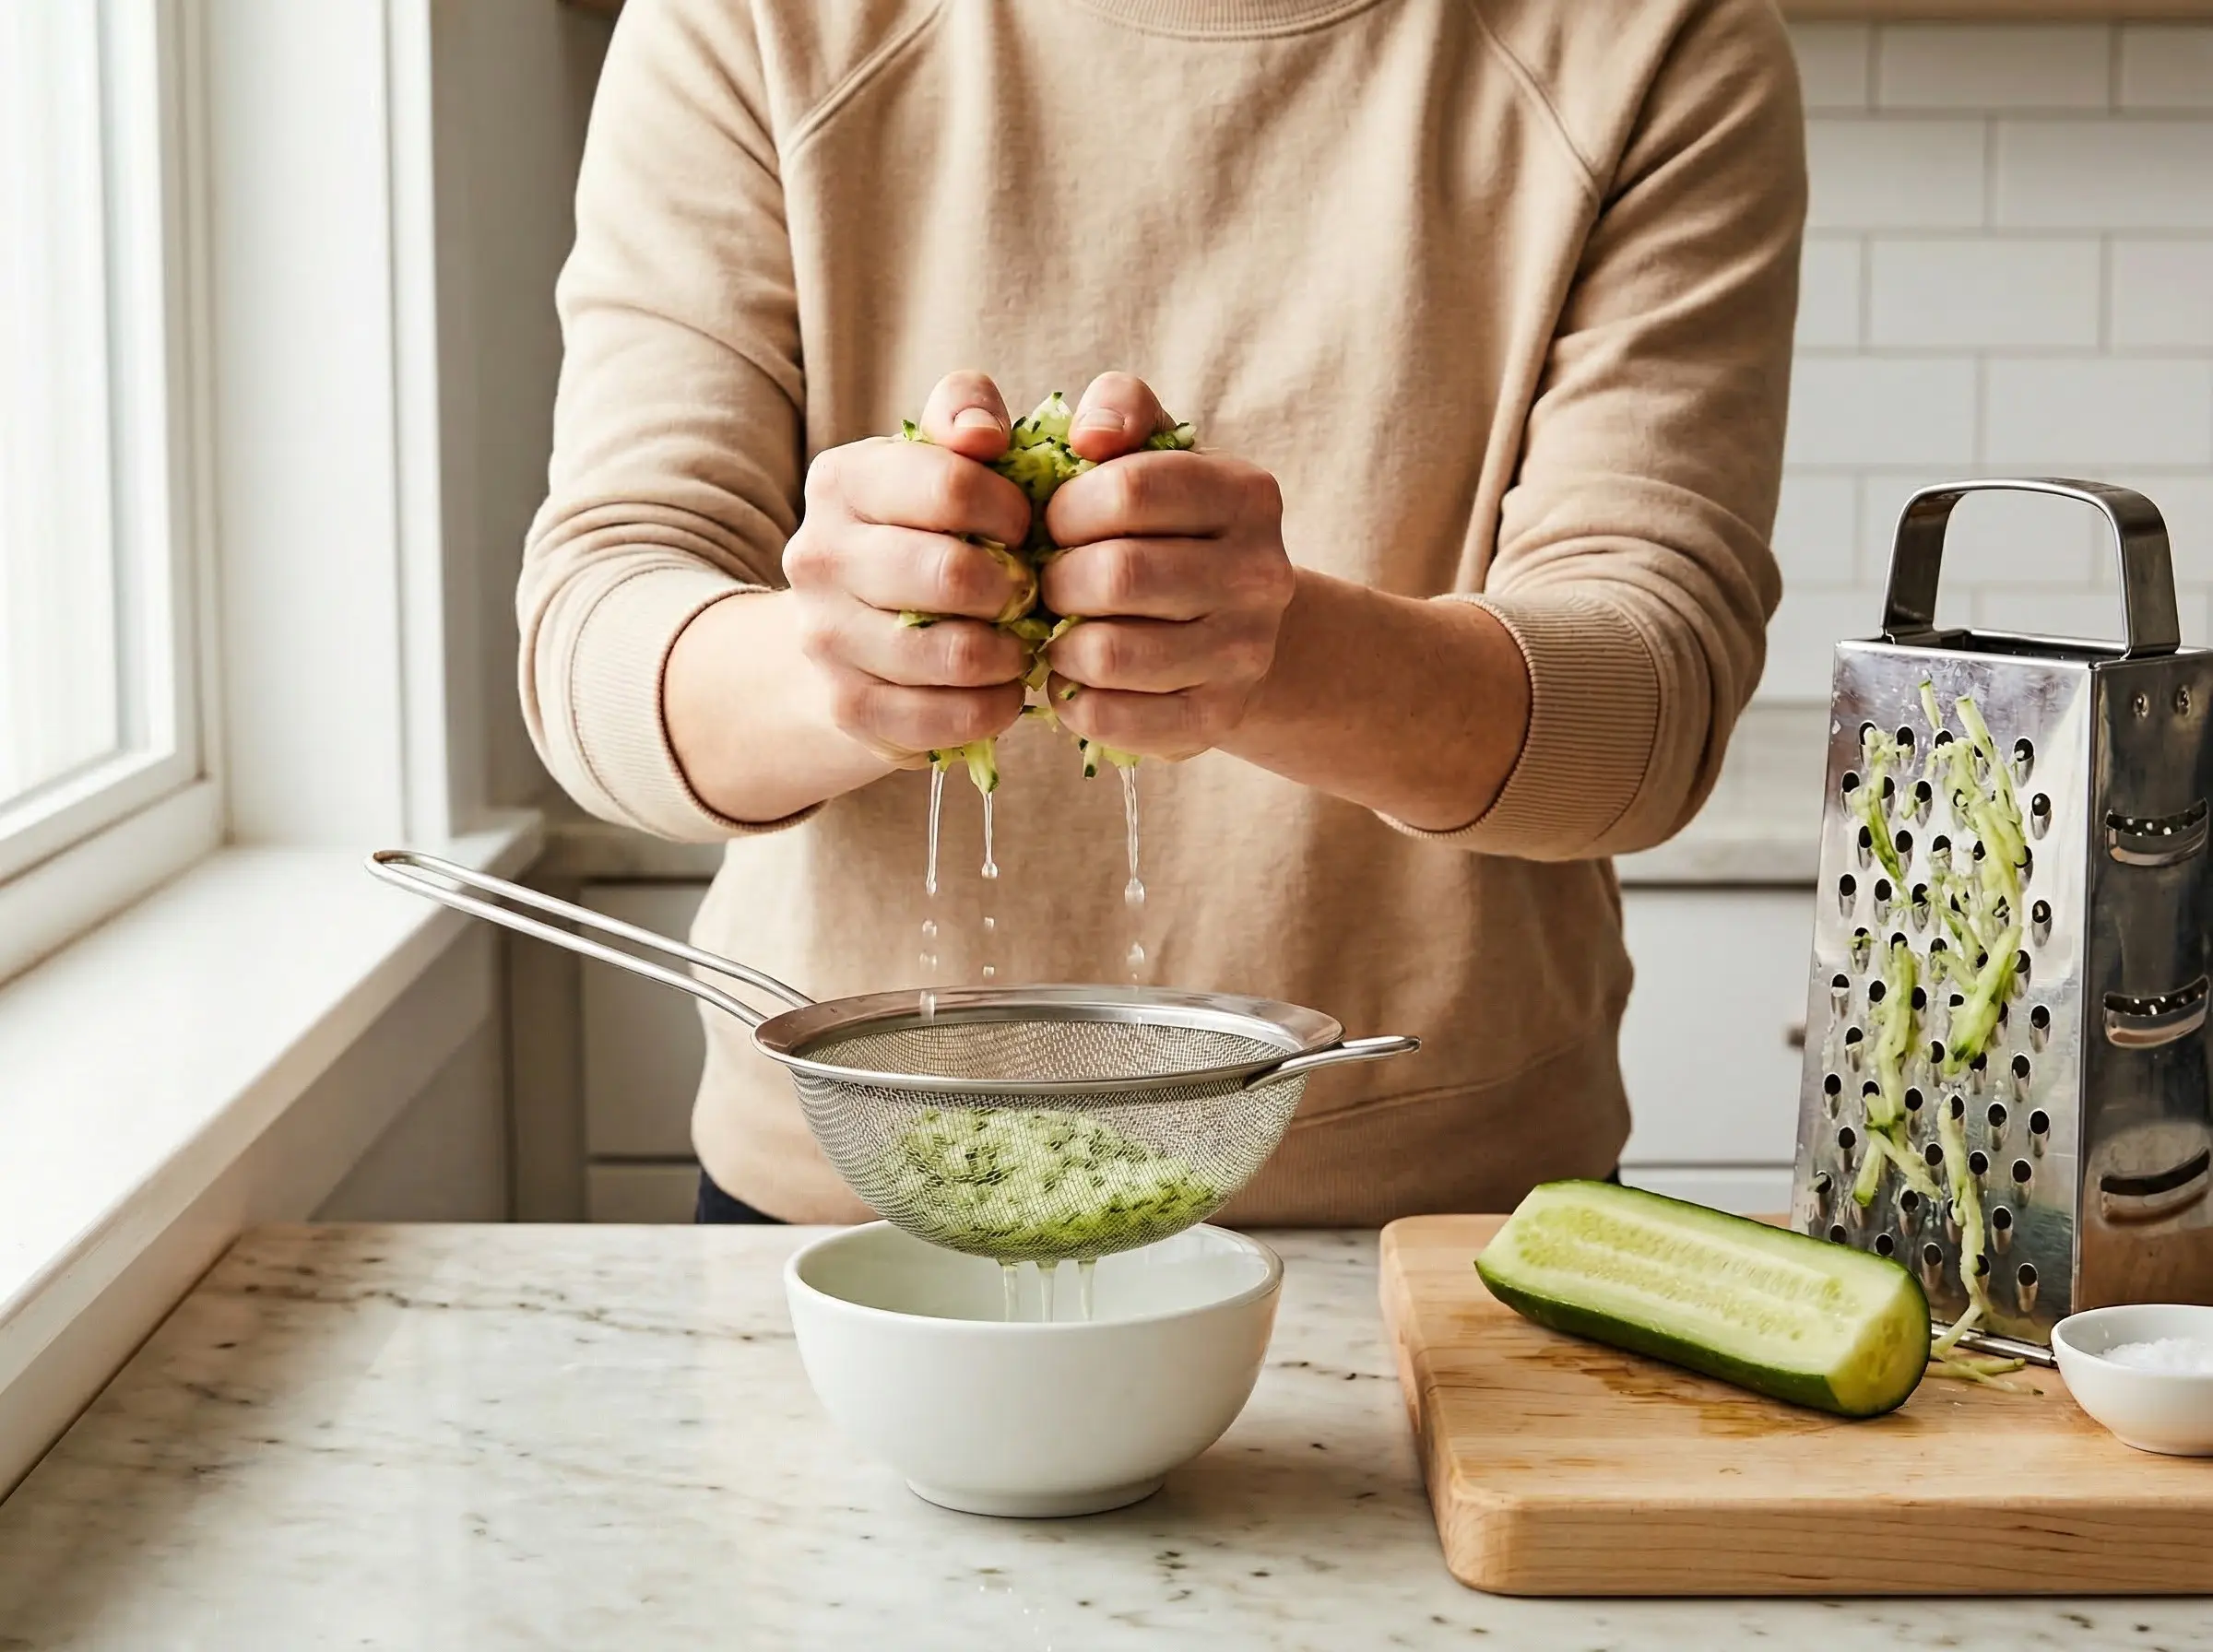
Prepare the cucumber. Peel the cucumber if the skin is thick or waxed; English cucumbers can be left unpeeled. Cut in half lengthwise and scrape out the seeds with a spoon - the seeds hold excess water that can make raita thin. Grate the cucumber on the large holes of a box grater, or finely dice if you prefer more texture. Place the grated or diced cucumber in a fine-mesh strainer over a bowl, sprinkle with a pinch of salt, and let drain for 10-15 minutes. Squeeze gently to remove excess moisture. This step prevents watery raita.
Step 2
Toast the cumin seeds. Heat a small dry skillet over medium heat. Add the cumin seeds and toast for 1-2 minutes, shaking the pan frequently, until fragrant and slightly darker in color. Watch carefully as they can burn quickly. The toasted seeds will smell intensely aromatic - this blooming process releases the essential oils and transforms the cumin flavor from flat to complex. Remove from heat and let cool for a minute, then crush lightly with a mortar and pestle or the back of a spoon. Alternatively, use pre-ground cumin, but toasting whole seeds produces superior flavor.
Step 3
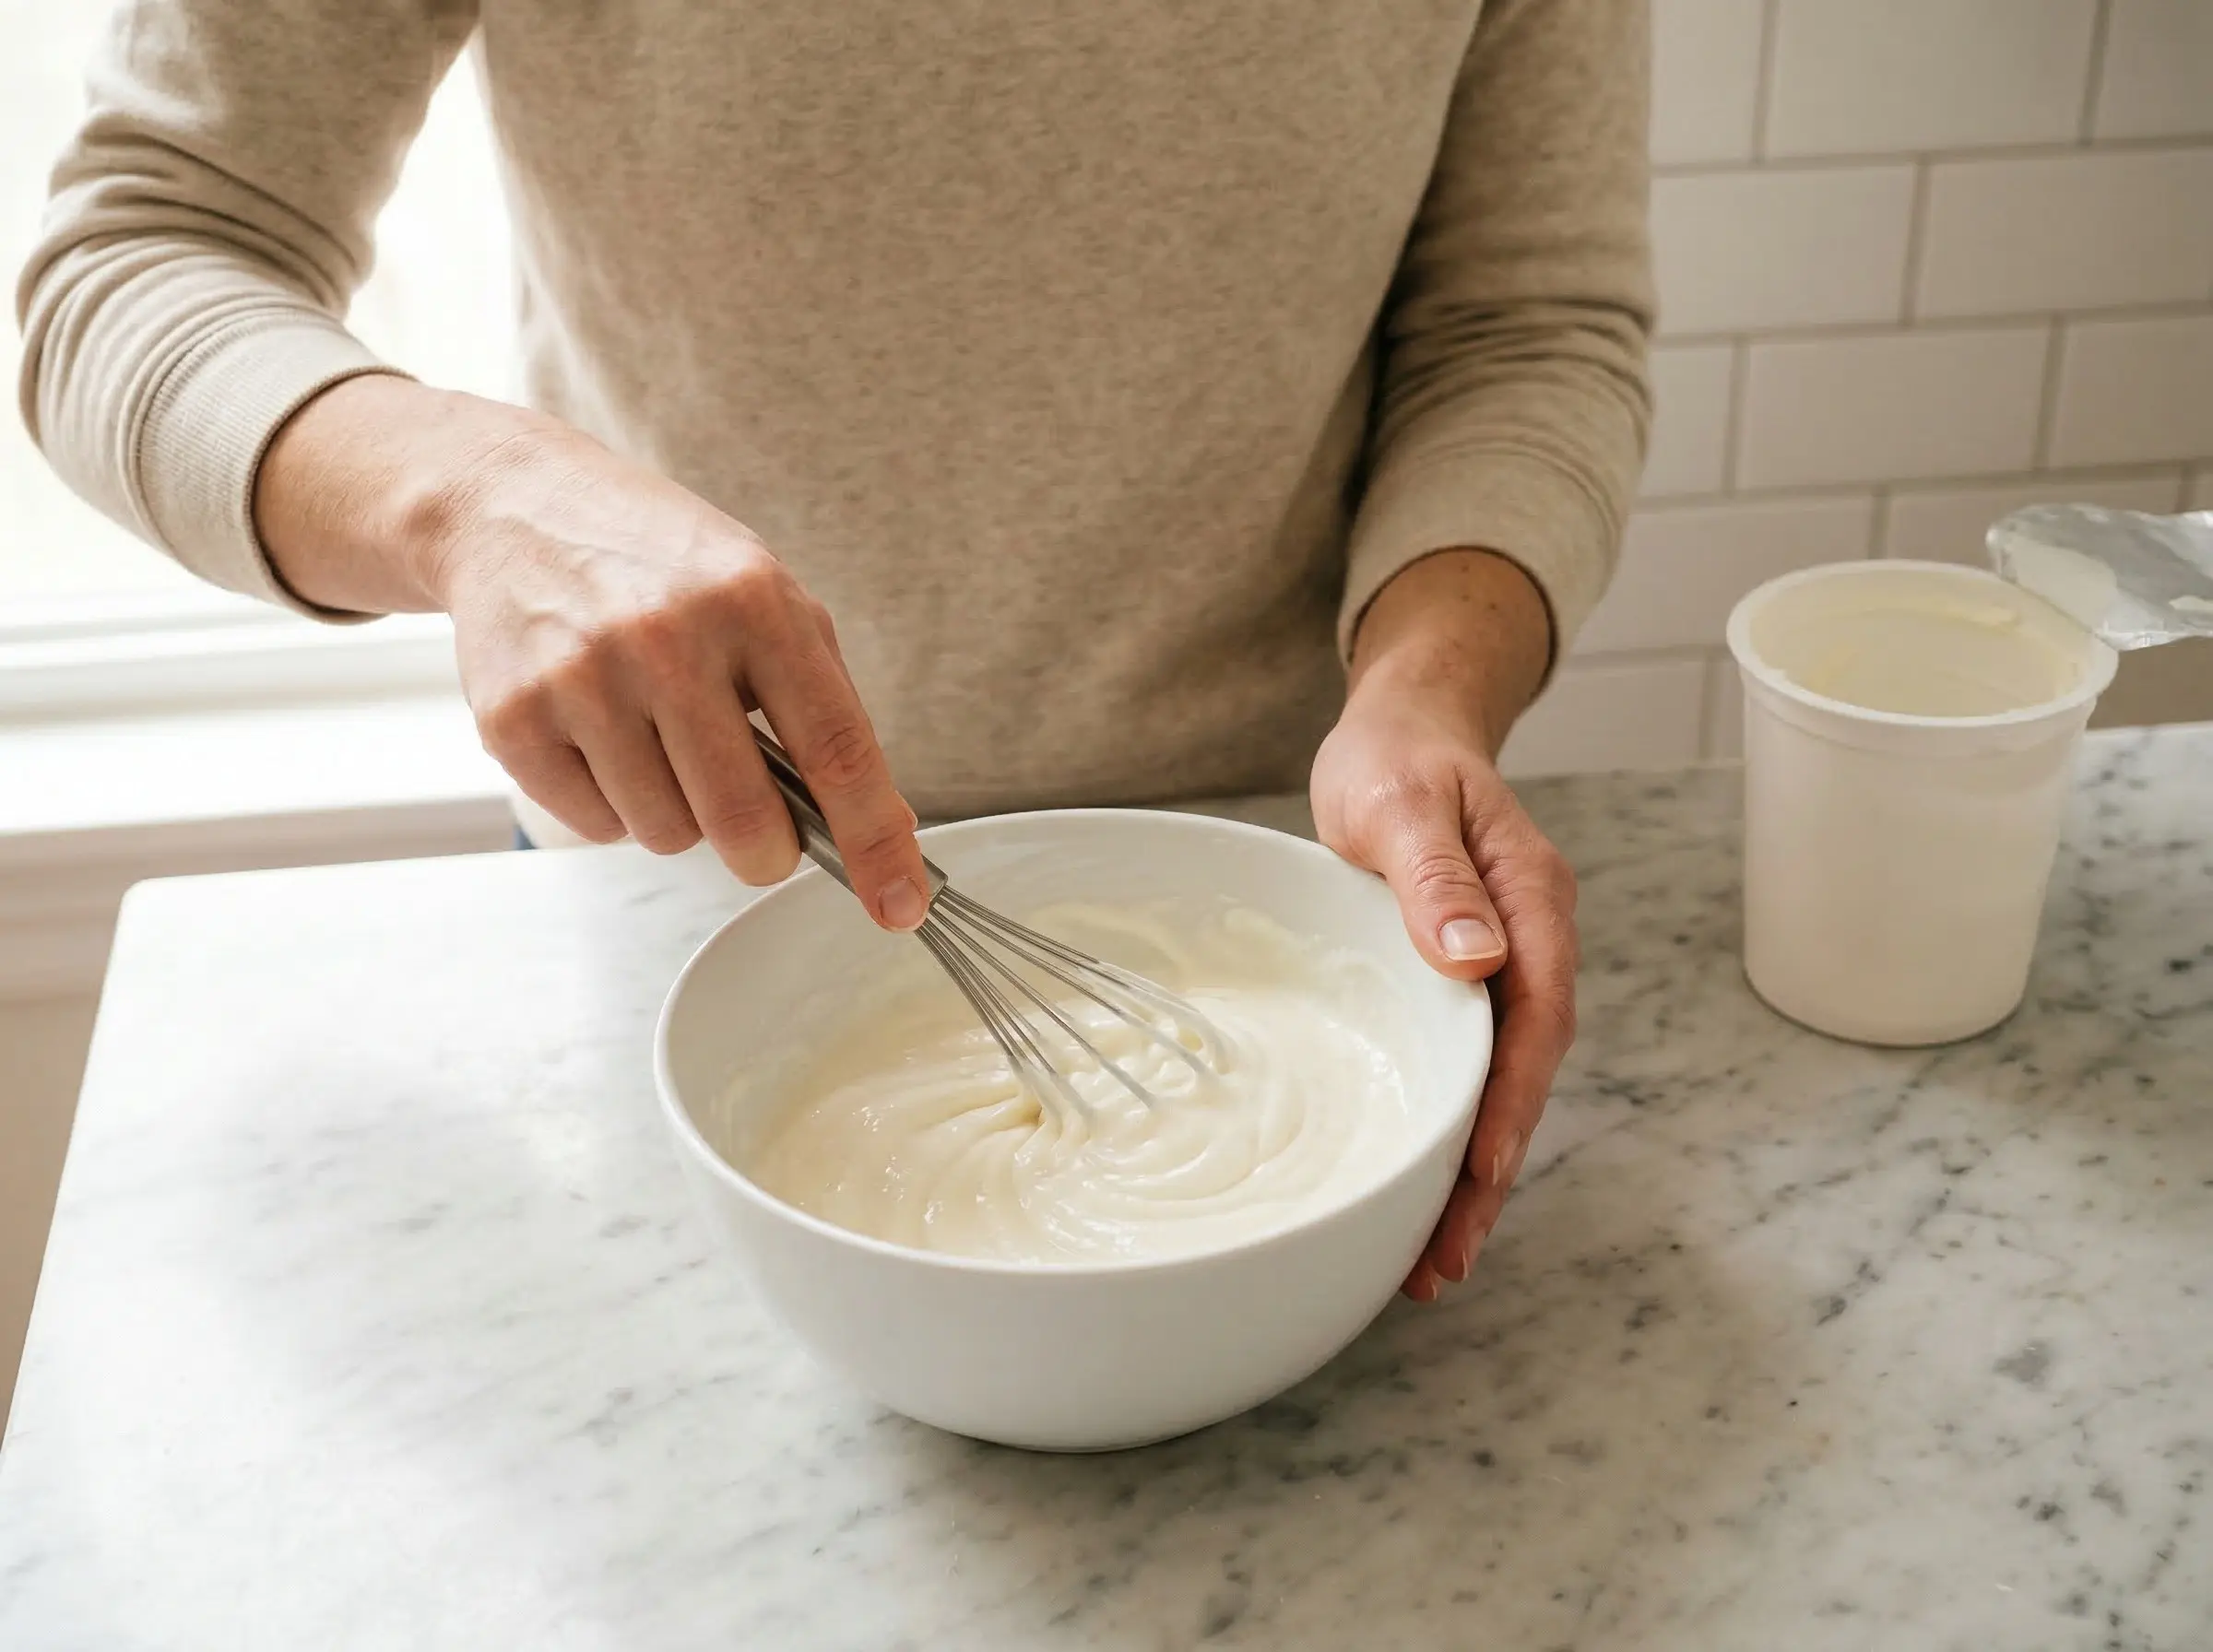
Prepare the yogurt base. Spoon the yogurt into a medium bowl. If the yogurt is very thick (like Greek yogurt), whisk it until smooth and creamy. If it has separated, simply stir to recombine. The yogurt should be smooth and pourable but not runny. Full-fat yogurt produces the creamiest, most authentic raita - low-fat versions will be thinner and more tart.
Step 4
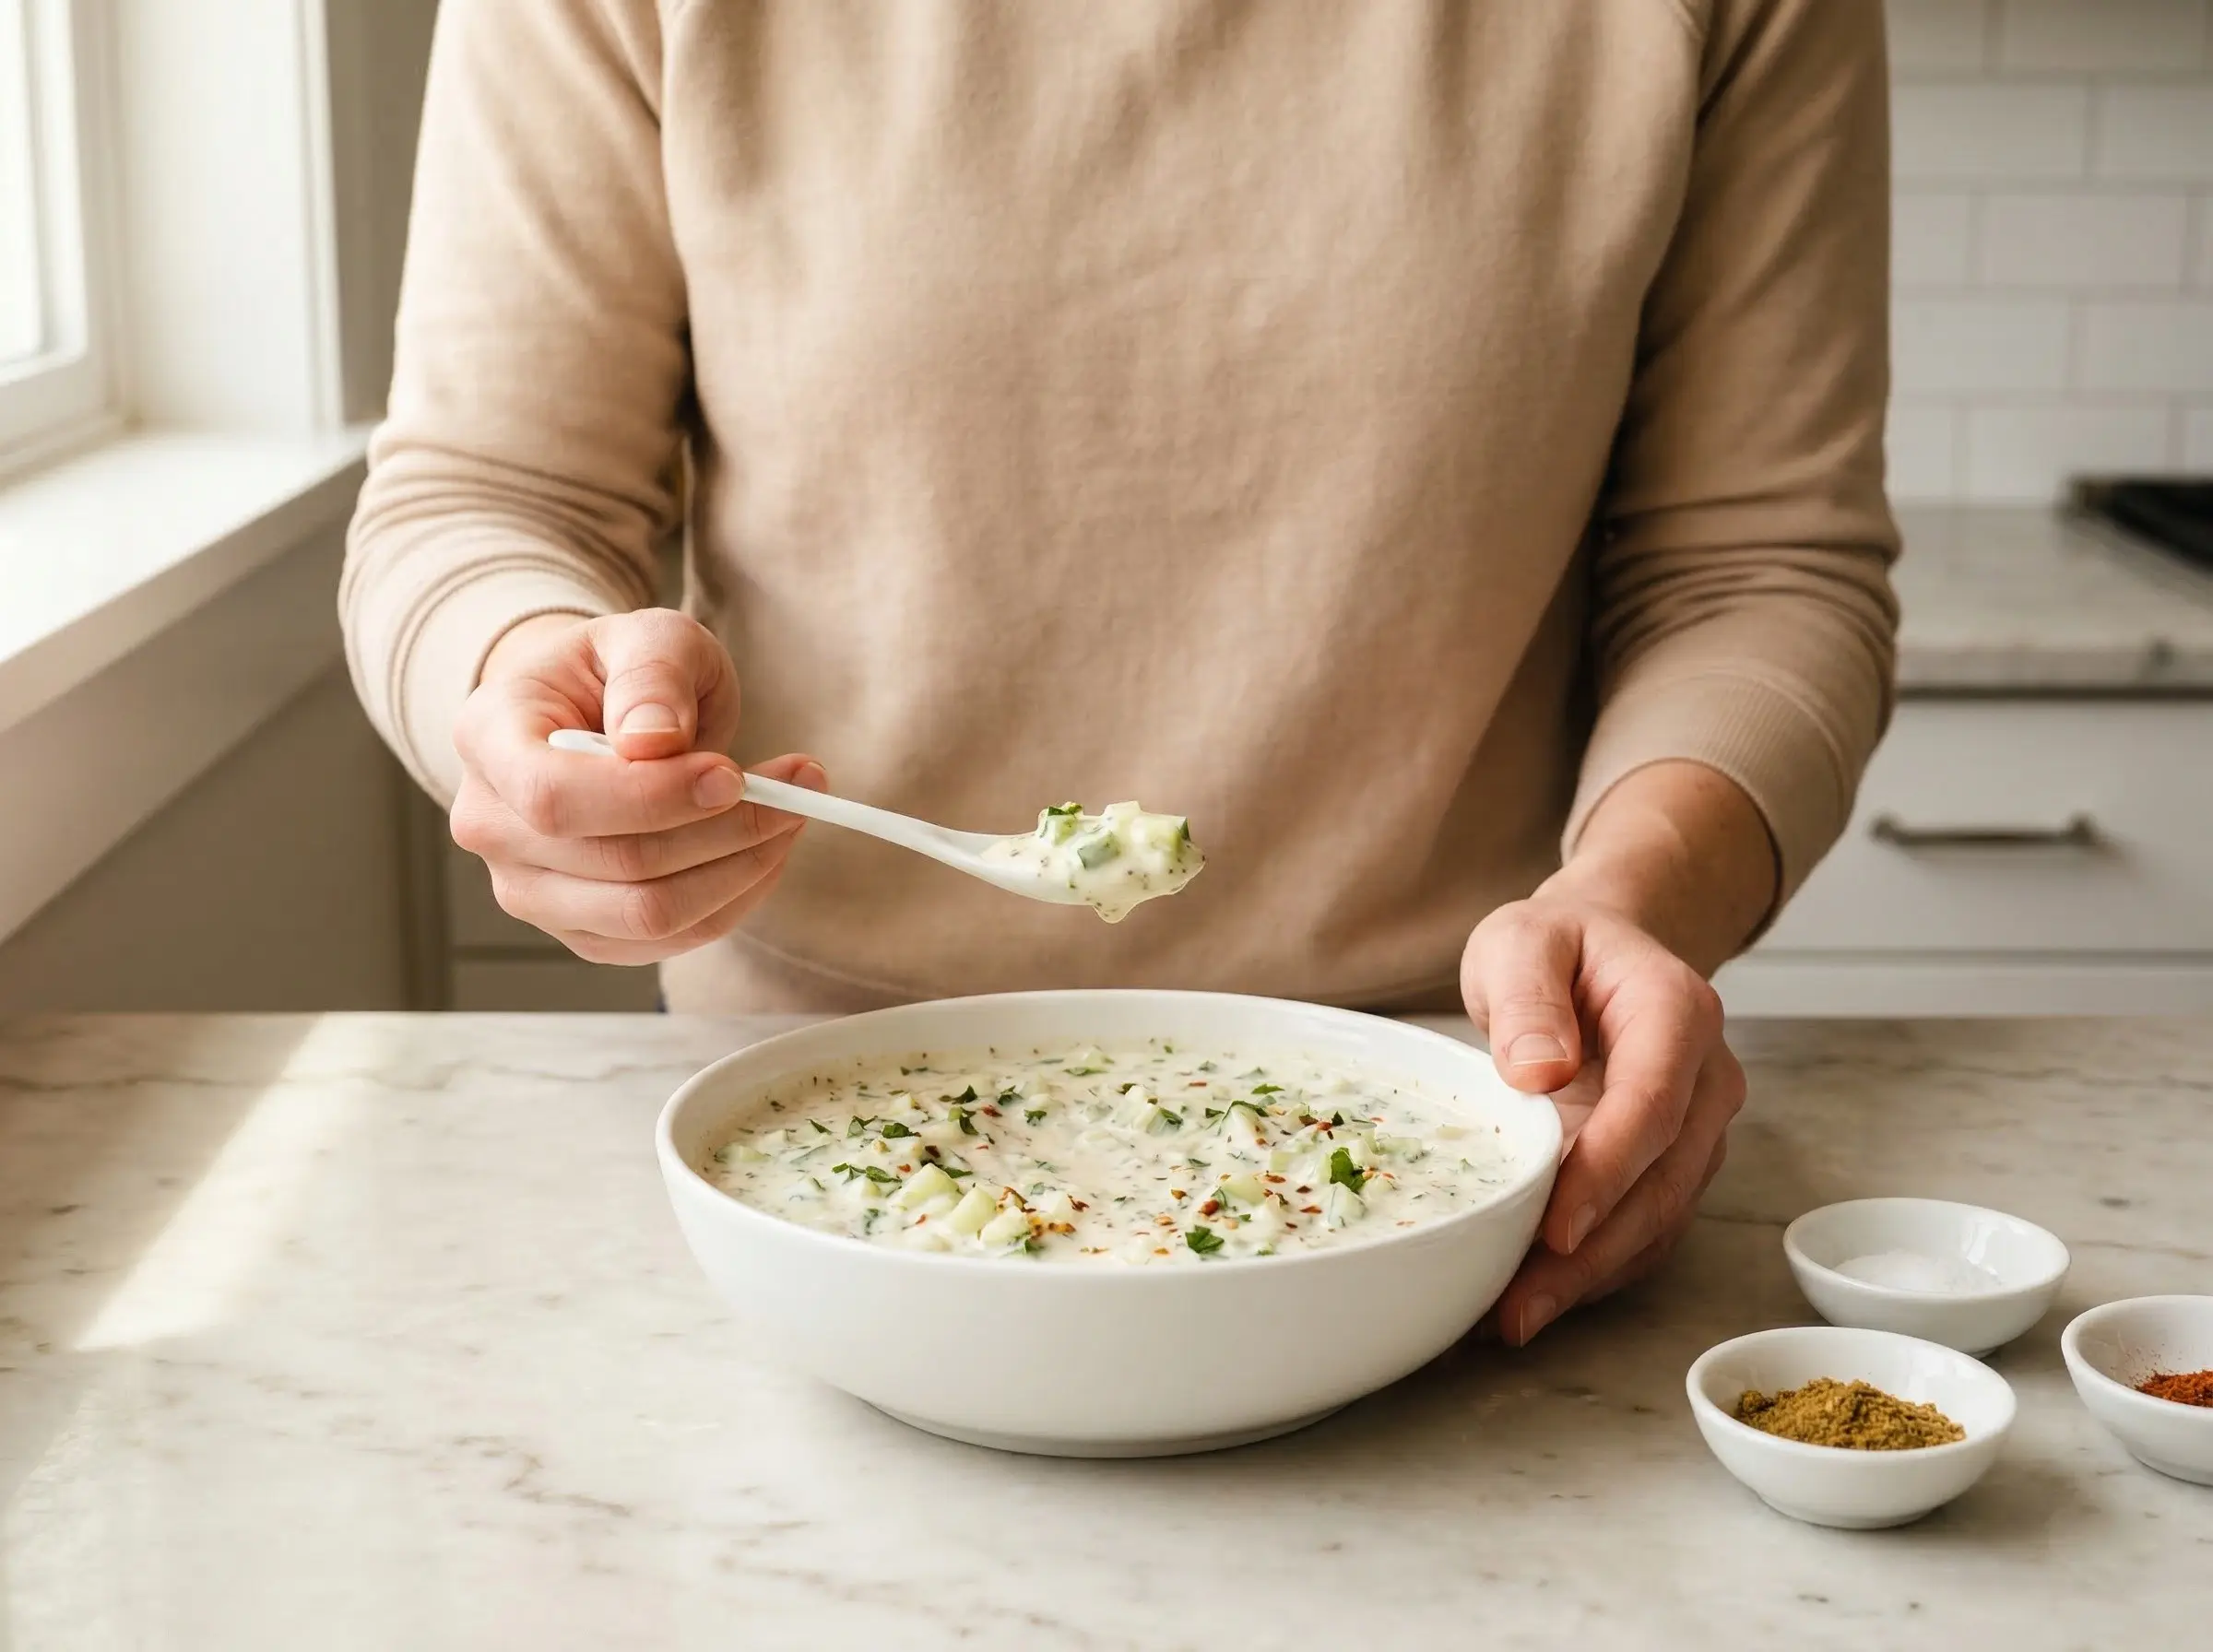
Combine all ingredients. Add the drained cucumber, toasted cumin seeds, ground cumin, chopped mint, cilantro, salt, and black pepper to the yogurt. If using, add the chaat masala, cayenne, diced red onion, and green chili. Fold gently until everything is evenly distributed - do not over-stir or the raita can become gummy. The mixture should be creamy with visible flecks of green herbs and cucumber throughout.
Step 5
Taste and adjust seasoning. This step is essential. Taste the raita and adjust the balance - it may need more salt to bring out the flavors, more cumin for earthiness, more mint for freshness, or a pinch more cayenne for gentle heat. The raita should taste cool, refreshing, and well-seasoned but not salty. The cumin should be present but not overwhelming. Keep in mind that flavors will meld and mellow as the raita rests.
Step 6
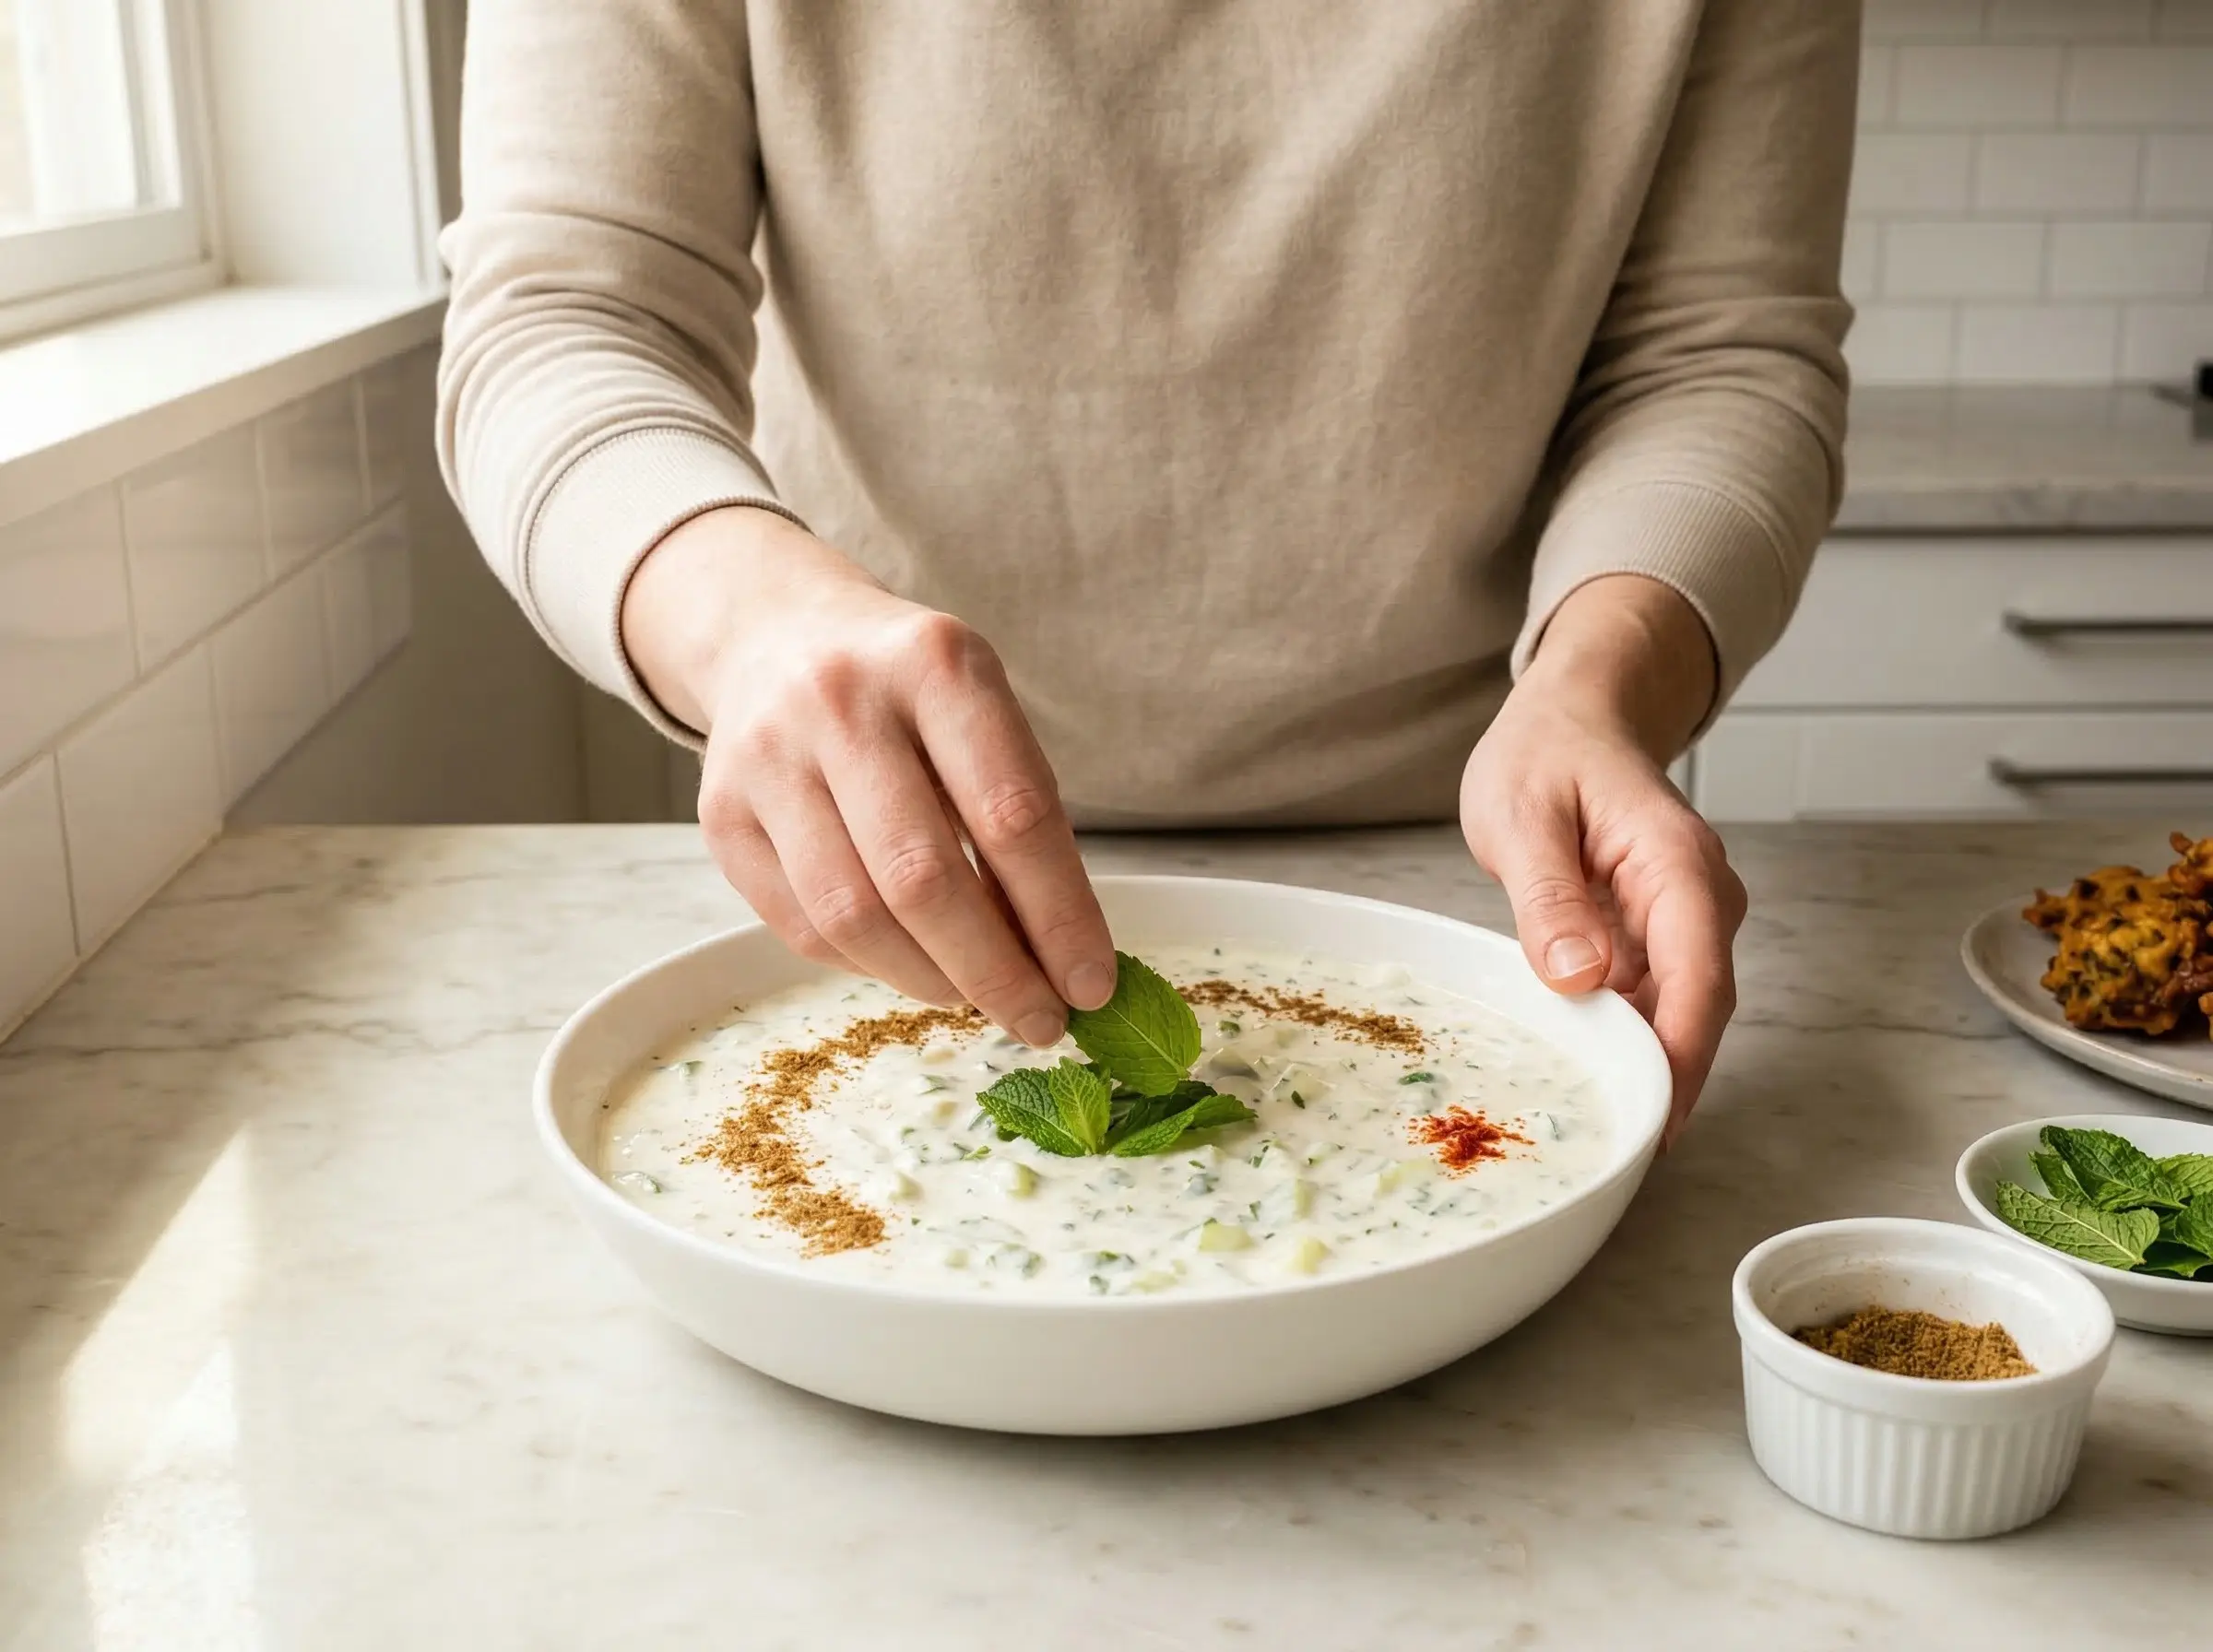
Chill and serve. Cover and refrigerate the raita for at least 20-30 minutes before serving. This resting time allows the flavors to meld and the raita to chill properly - raita should be served cold for maximum cooling effect. Transfer to a serving bowl and garnish with a sprinkle of ground cumin, a few whole mint leaves, or a drizzle of olive oil if desired. Serve alongside biryani, curry, dal, kebabs, or any spiced Indian dish. Raita is also delicious with naan bread or as a dip for pakoras and samosas. It keeps refrigerated for up to 3 days, though the cucumber may release additional liquid over time - simply stir before serving. For best texture, add cucumber just before serving if making ahead.
You Might Also Like