Classic Beef Empanadas
Learn how to make authentic beef empanadas with flaky pastry and a savory spiced meat filling. These golden, hand-held pies are perfect for parties, snacks, or meals!
Ingredients

The Story
Empanadas are one of the most iconic foods across Latin America, Spain, and Portugal, with a history spanning over a thousand years. The word "empanada" comes from the Spanish verb "empanar," meaning to wrap or coat in bread. The concept of meat-filled pastries likely originated in the Middle East and traveled to the Iberian Peninsula with the Moors during their centuries-long presence in Spain. By medieval times, empanadas were well-established in Spanish cuisine, mentioned in cookbooks dating back to the 13th century. When Spanish and Portuguese colonizers arrived in the Americas, they brought their empanada traditions with them, and the dish took root across the continent, evolving into countless regional variations. Each Latin American country has developed its own distinctive empanada style, making the humble turnover a source of national pride and friendly rivalry. Argentine empanadas are perhaps the most famous internationally, typically featuring a beef filling called "picadillo" or "carne picada" seasoned with cumin, paprika, and often including hard-boiled eggs, olives, and raisins. Chilean empanadas are larger with a beef, onion, egg, and olive filling called "pino." Colombian empanadas use corn-based dough and are always fried. Mexican empanadas can be sweet or savory. Even within Argentina, each province has its own variation - Salta empanadas use potatoes and are spicier, Tucumán empanadas are smaller and fried, while Buenos Aires style are typically baked with a juicier filling. What makes beef empanadas so universally beloved is their perfect combination of crispy, flaky pastry and savory, aromatic filling. The dough must be tender enough to bite through easily while remaining sturdy enough to contain the juicy filling without breaking. The beef filling should be well-seasoned, moist but not wet, with a balanced blend of spices that varies by region and family tradition. The hand-crimping of empanadas, called the "repulgue," is considered an art form - each cook has their signature fold, and experienced empanada makers can produce beautiful, identical pastries with remarkable speed. Whether baked until golden or fried until crispy, empanadas represent the soul of Latin American comfort food.
Instructions
Step 1
Start by making the empanada dough, which needs time to rest before rolling. In a large bowl, whisk together the flour and salt. Add the cold cubed butter and work it into the flour using your fingertips, a pastry cutter, or two knives. Rub and cut the butter into the flour until the mixture resembles coarse breadcrumbs with some pea-sized pieces of butter remaining - these create flaky layers when baked. In a small bowl, beat the egg with the cold water. Make a well in the center of the flour mixture and pour in the egg mixture. Stir with a fork, then use your hands to bring the dough together. Knead briefly just until the dough forms a smooth ball - do not overwork it or the pastry will be tough. Flatten the dough into a disc, wrap tightly in plastic wrap, and refrigerate for at least 1 hour or up to 24 hours. This resting time allows the gluten to relax and the butter to firm up, making the dough easier to roll.

Step 2
While the dough rests, prepare the beef filling. Heat a tablespoon of oil in a large skillet over medium-high heat. Add the ground beef and cook, breaking it up with a wooden spoon, for 6-8 minutes until browned and no pink remains. Use a slotted spoon to transfer the cooked beef to a bowl, leaving the fat in the pan. Add the diced onion and bell pepper to the same skillet and cook for 5-6 minutes until softened and the onion is translucent. Add the minced garlic and cook for another minute until fragrant. Return the beef to the pan and add the cumin, paprika, oregano, salt, black pepper, and cayenne if using. Stir well to coat everything in the spices and cook for 1-2 minutes until fragrant. The spices should bloom and become very aromatic.
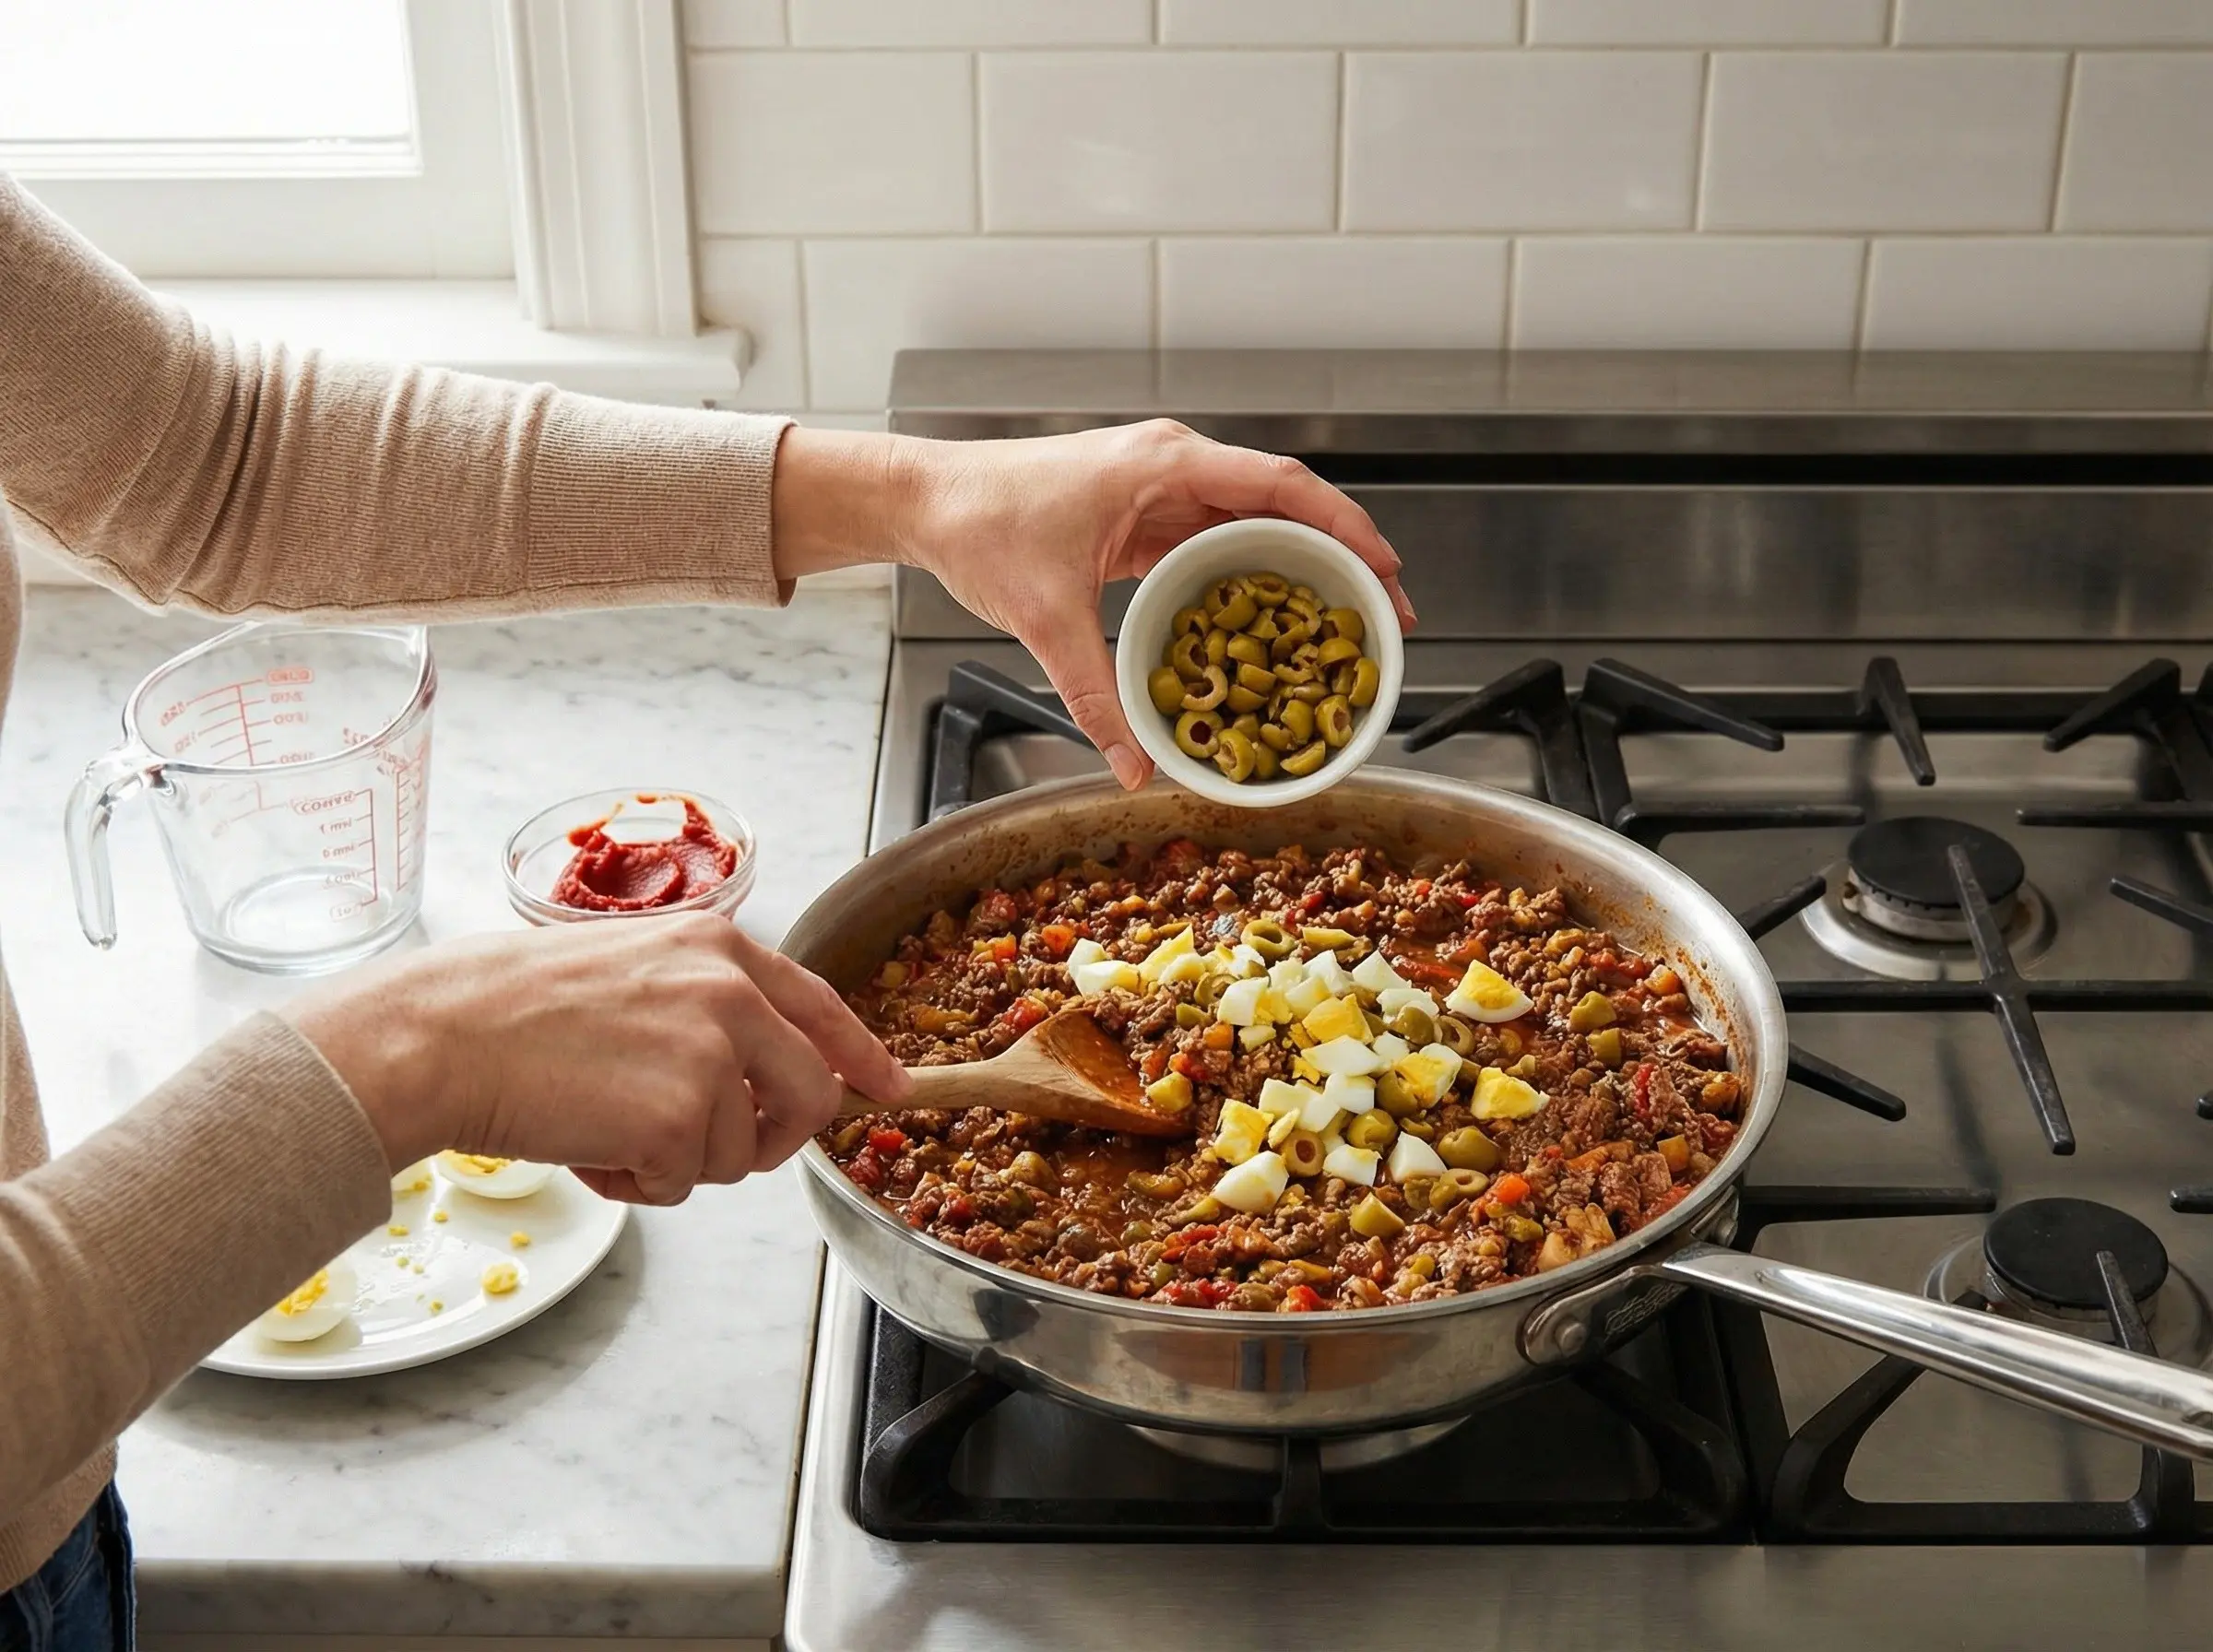
Step 3
Add the tomato paste to the beef mixture and stir to combine, cooking for 1-2 minutes until the paste darkens slightly. Pour in the beef broth and stir, scraping up any browned bits from the bottom of the pan. Simmer for 5-7 minutes until most of the liquid has evaporated and the filling is moist but not wet - this is important because a wet filling will make the empanada dough soggy. Remove from heat and stir in the chopped green olives and chopped hard-boiled eggs. These traditional additions add briny flavor and texture. Taste and adjust seasoning as needed. Transfer the filling to a bowl and let it cool completely to room temperature, then refrigerate for at least 30 minutes. The filling must be cold when you assemble the empanadas to prevent the dough from becoming soft.
Step 4
Once the dough has rested and the filling has cooled, you are ready to assemble. Remove the dough from the refrigerator and let it sit for 5 minutes to soften slightly. On a lightly floured surface, roll out the dough to about 1/8 inch thickness. Using a 5-inch round cookie cutter, bowl, or plate as a guide, cut out circles of dough. Gather the scraps, gently press together, re-roll, and cut more circles. You should get 12-14 circles. Keep the cut circles covered with a damp towel or plastic wrap to prevent drying. If the dough becomes too soft and sticky while working, refrigerate it for 10-15 minutes before continuing.
Step 5
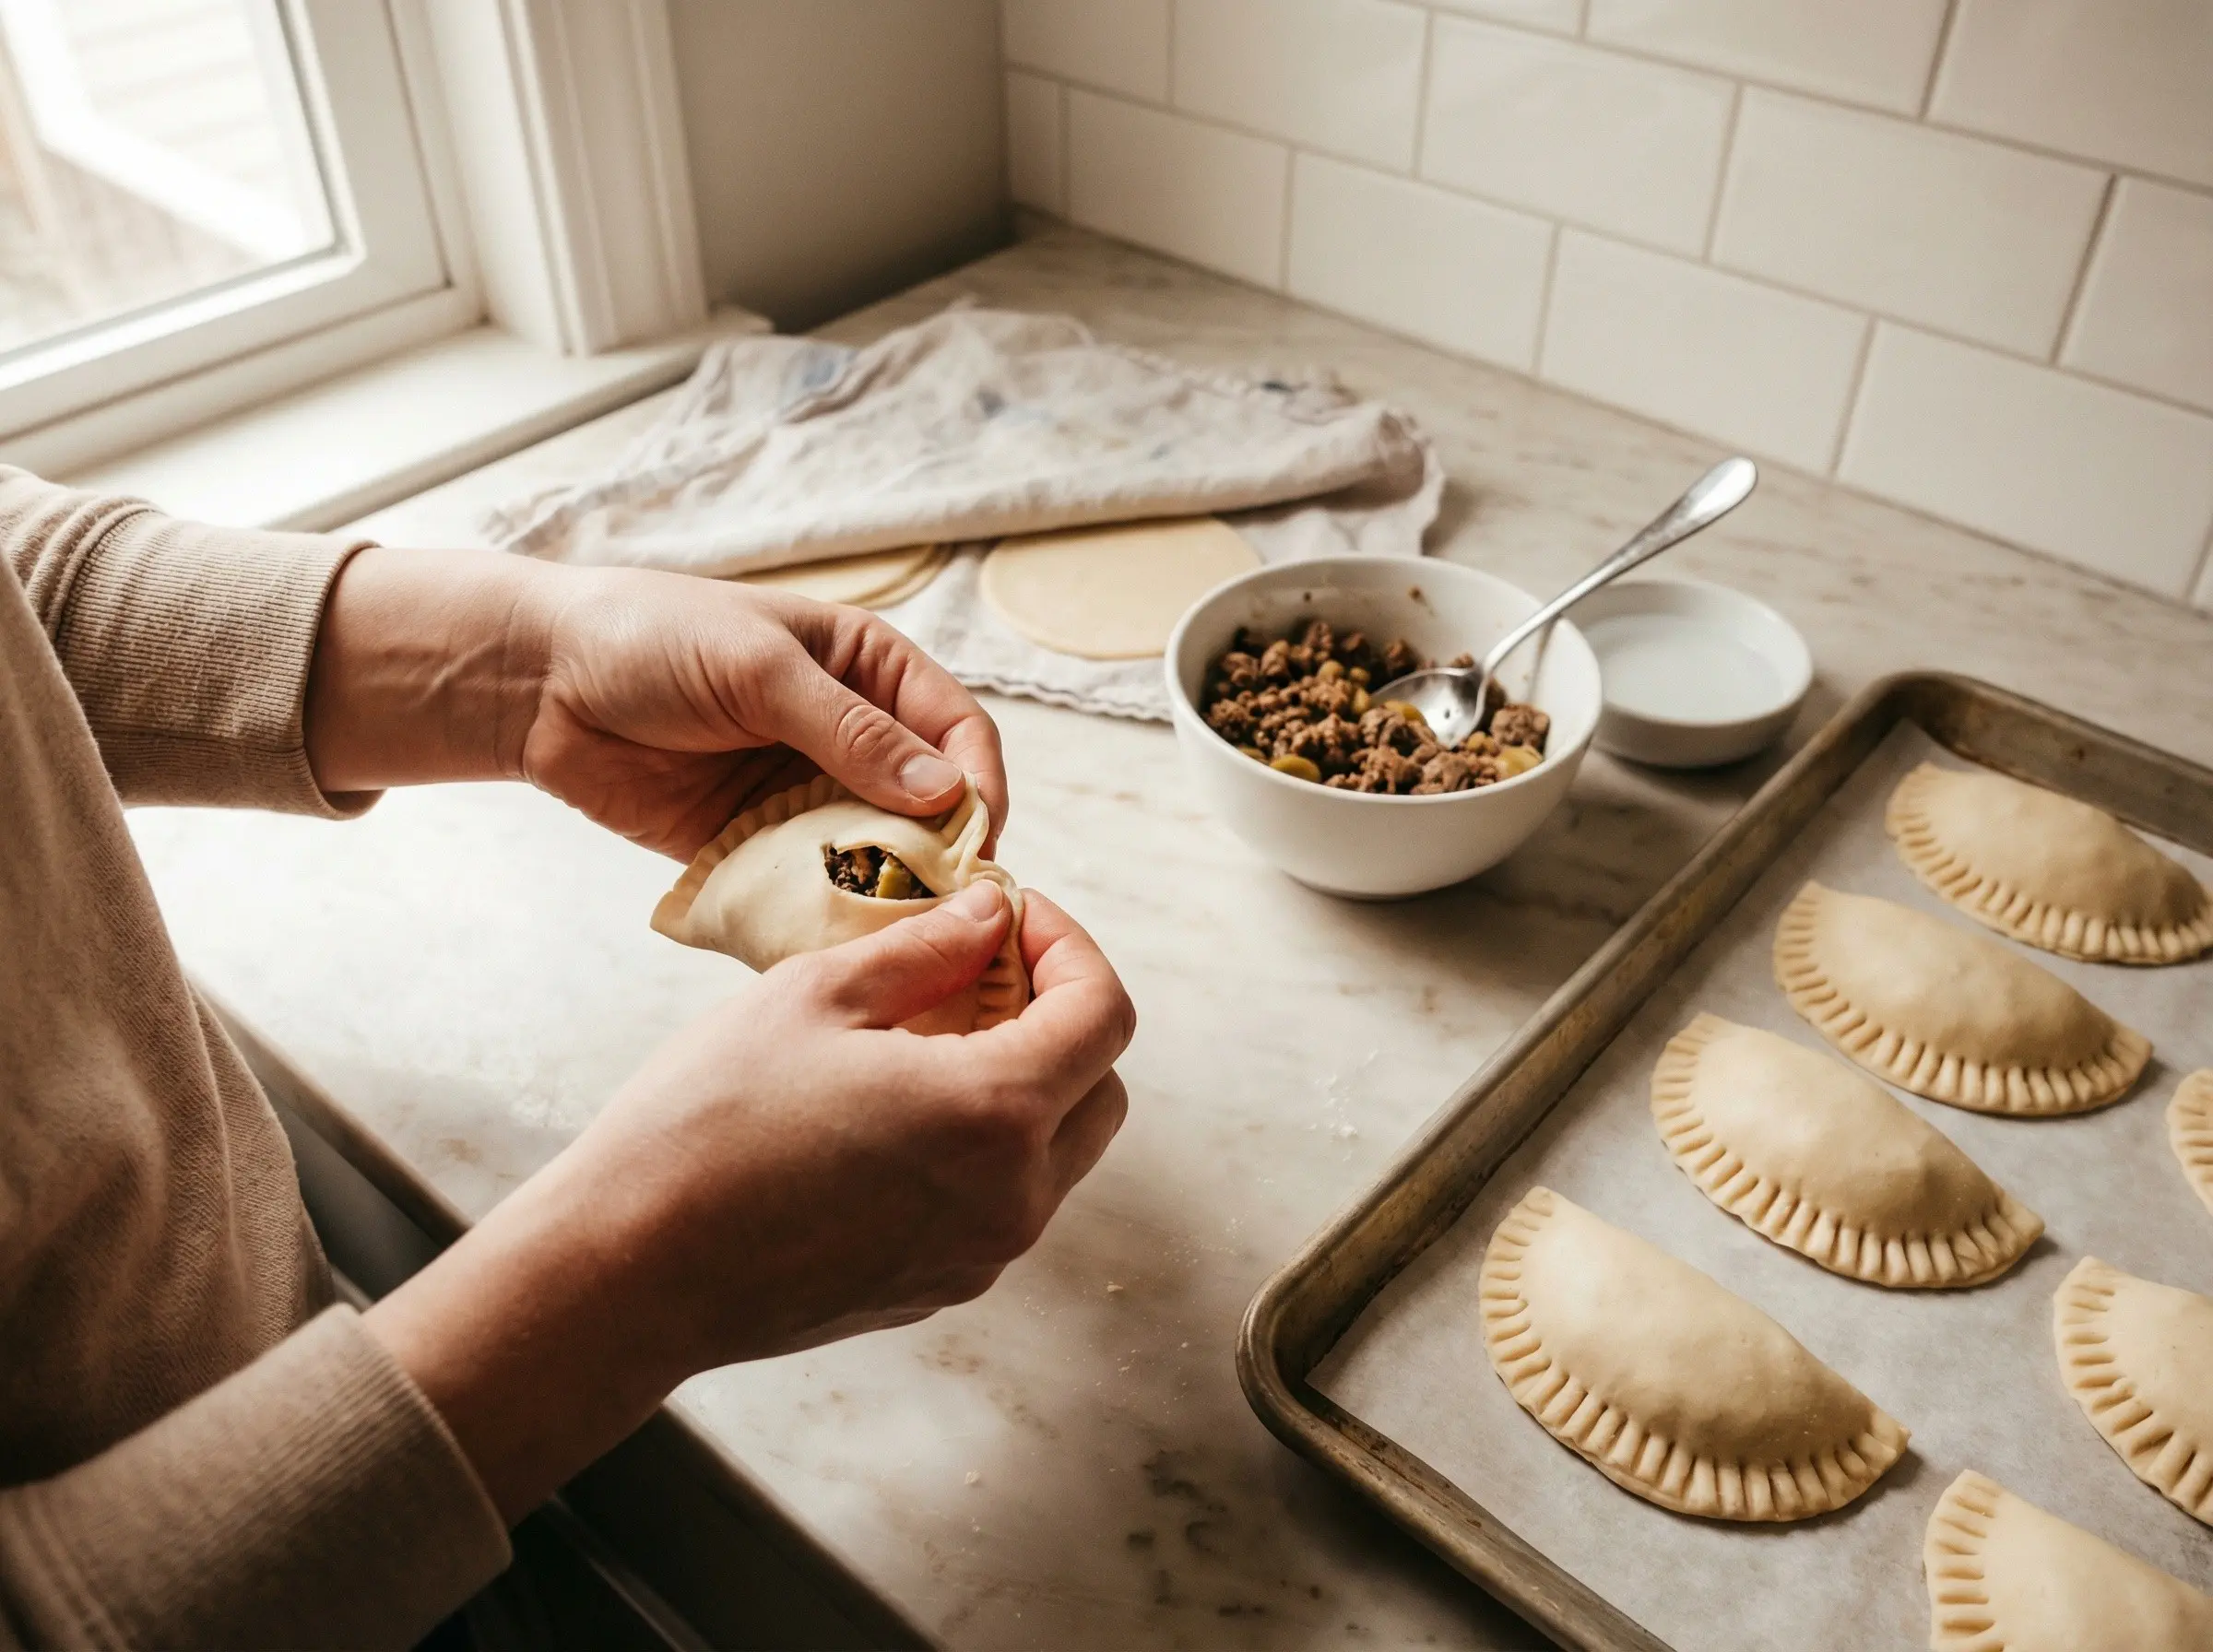
To assemble each empanada, place about 2 tablespoons of the cold filling in the center of a dough circle, leaving a 1/2 inch border around the edge. Be careful not to overfill or the empanadas will burst during baking. Dip your finger in water and moisten the edge of the dough circle - this helps create a seal. Fold the dough in half over the filling to create a half-moon shape. Press the edges firmly together to seal, pushing out any air pockets. Now create the traditional crimped edge, called repulgue: fold small sections of the edge over onto itself, pressing firmly with each fold, working your way around the curved edge. Alternatively, you can press the edges with the tines of a fork for a simpler seal. Place the assembled empanadas on a parchment-lined baking sheet. Repeat with remaining dough and filling. Refrigerate the assembled empanadas for 15-20 minutes while you preheat the oven.
Step 6
Preheat your oven to 400 degrees F. Remove the empanadas from the refrigerator. Beat the remaining egg with a tablespoon of water to create an egg wash. Brush the top of each empanada with the egg wash - this creates a beautiful golden, shiny crust when baked. Using a sharp knife or fork, poke a small vent hole in the top of each empanada to allow steam to escape during baking. Bake for 20-25 minutes until the empanadas are golden brown and the bottoms are lightly browned. Rotate the baking sheet halfway through for even browning. The empanadas should be puffed slightly and deep golden in color. Remove from the oven and let cool for 5 minutes before serving - the filling will be very hot. Serve warm with chimichurri sauce, salsa, or your favorite dipping sauce. Empanadas are best eaten the day they are made but can be stored in an airtight container in the refrigerator for up to 3 days and reheated in a 350 degree oven for 10 minutes. Unbaked empanadas can be frozen for up to 3 months - freeze on a baking sheet, then transfer to freezer bags. Bake from frozen, adding 5-10 minutes to the baking time.
You Might Also Like