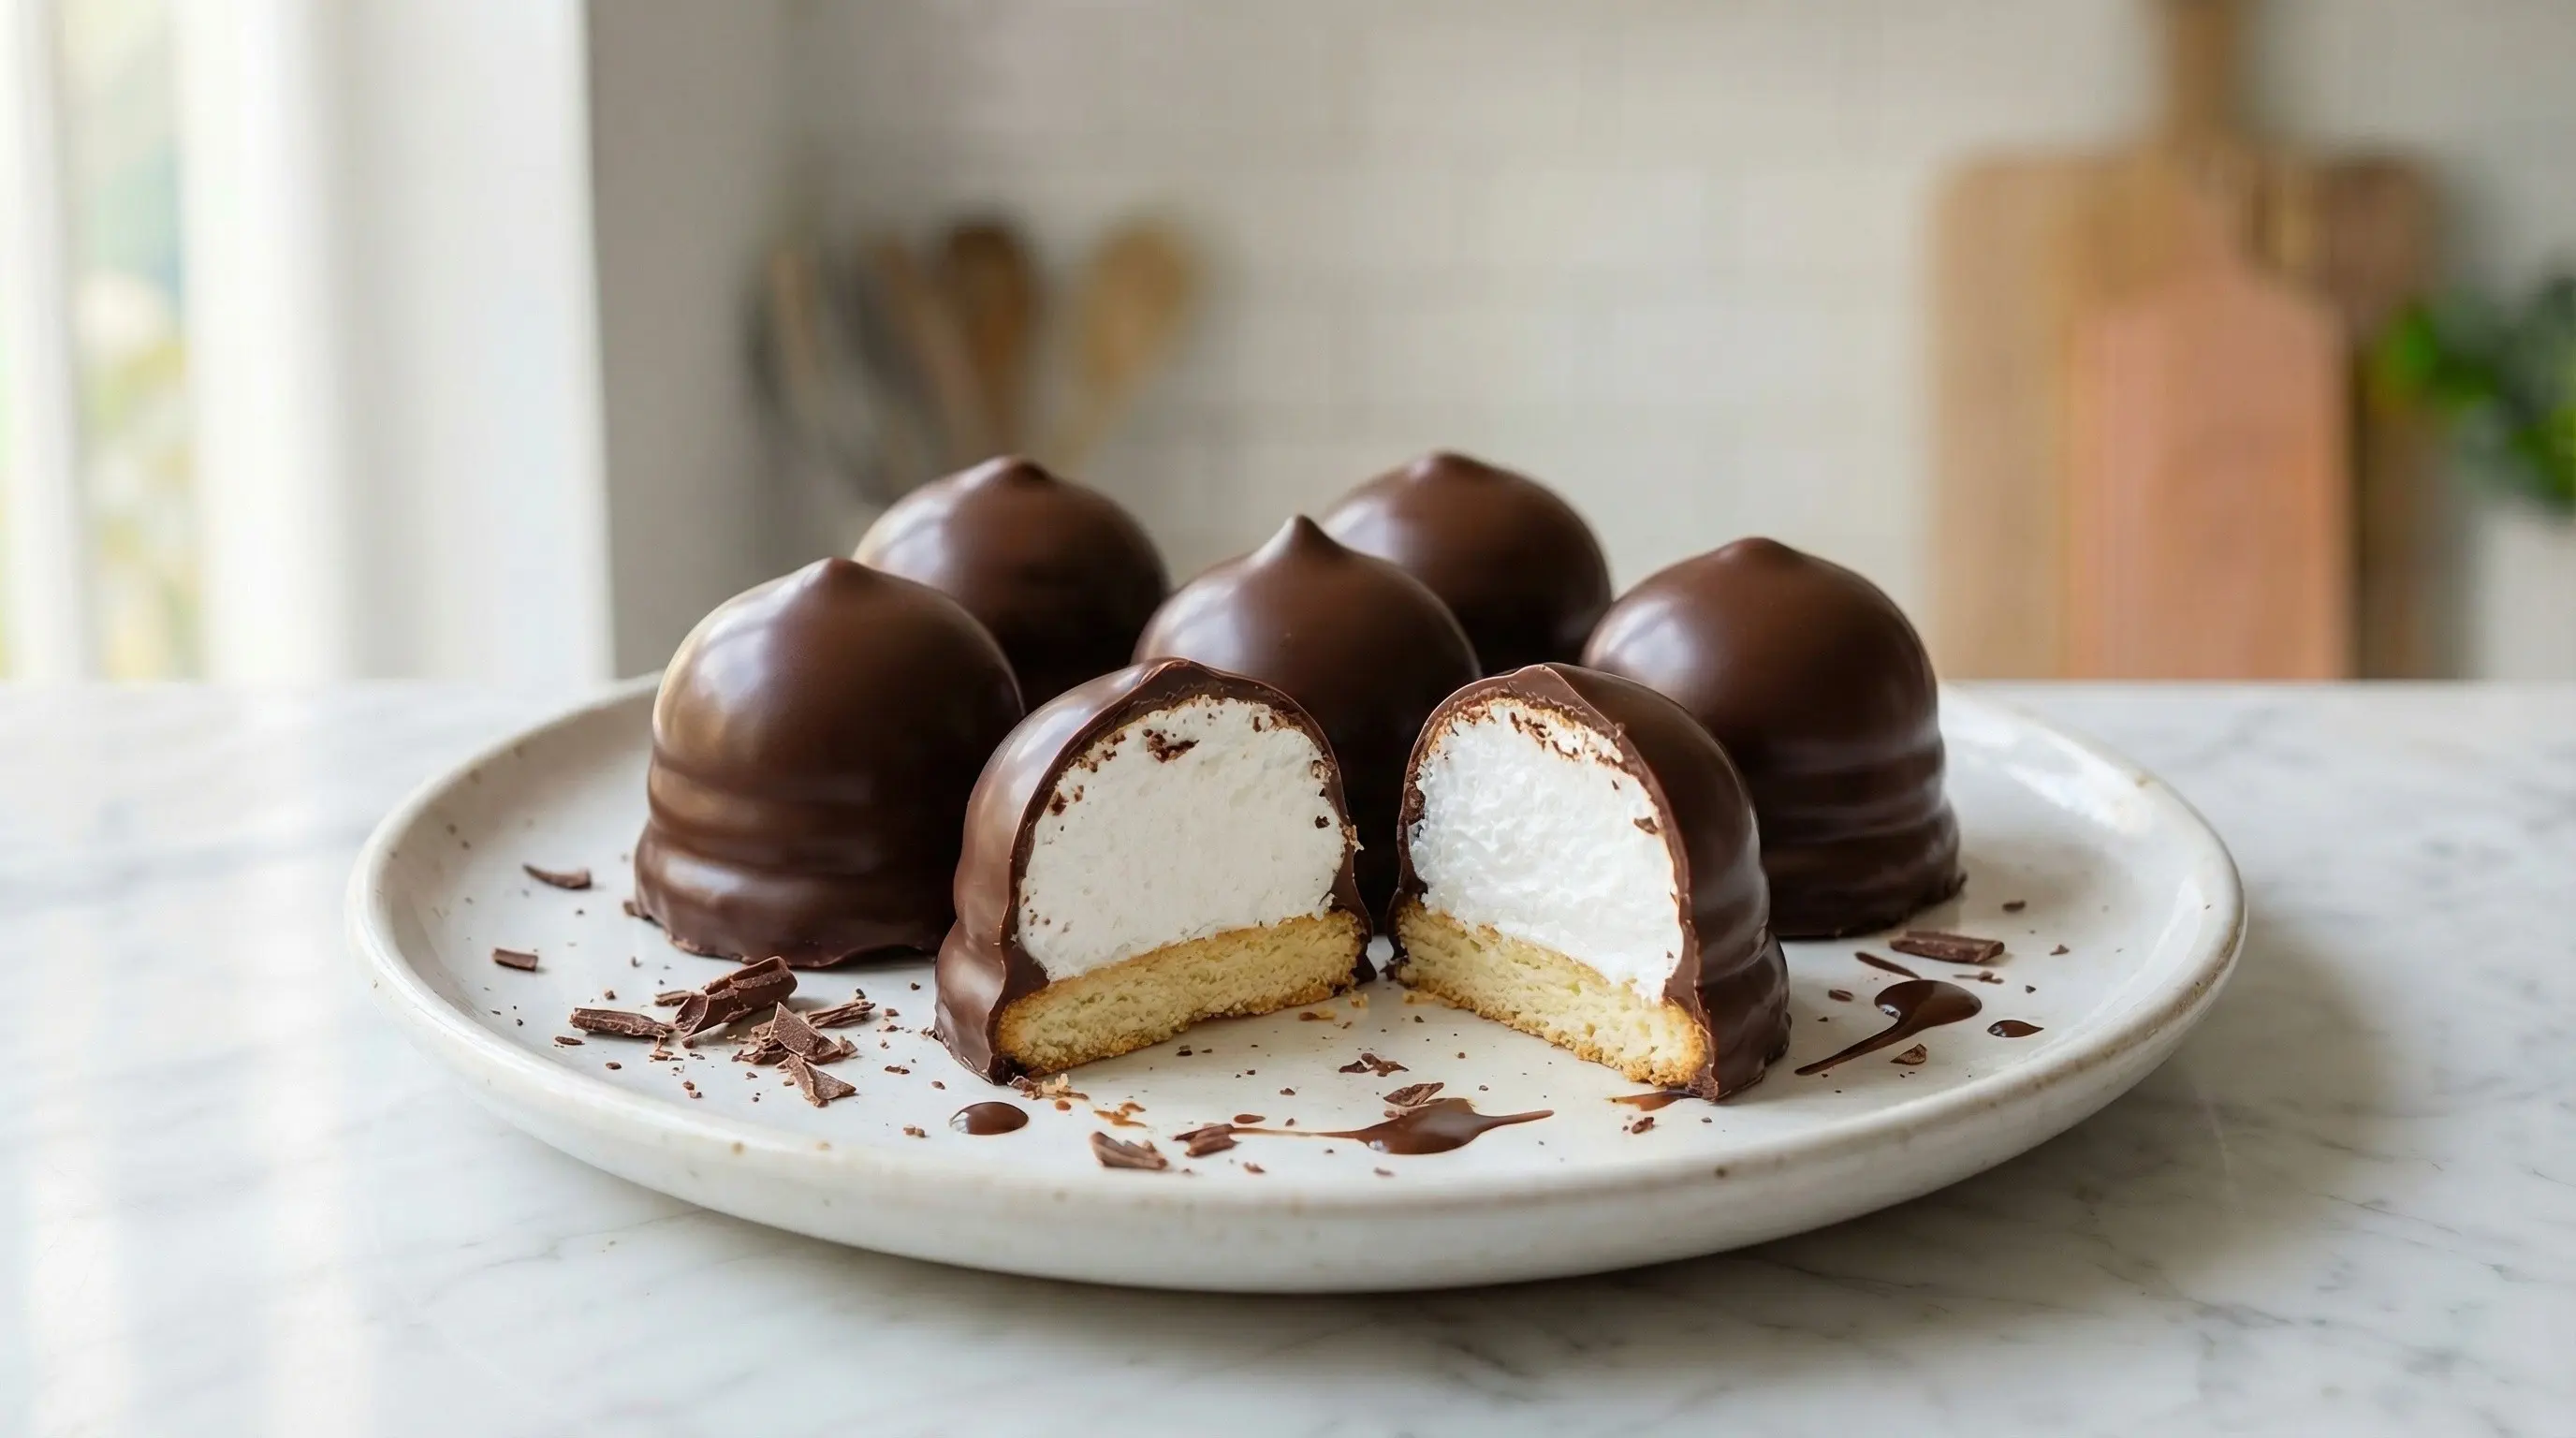
Peruvian Besos de Moza
Learn how to make besos de moza, Peru's beloved chocolate-covered marshmallow cookies. These sweet "maiden's kisses" feature fluffy meringue on a cookie base dipped in chocolate!
Ingredients
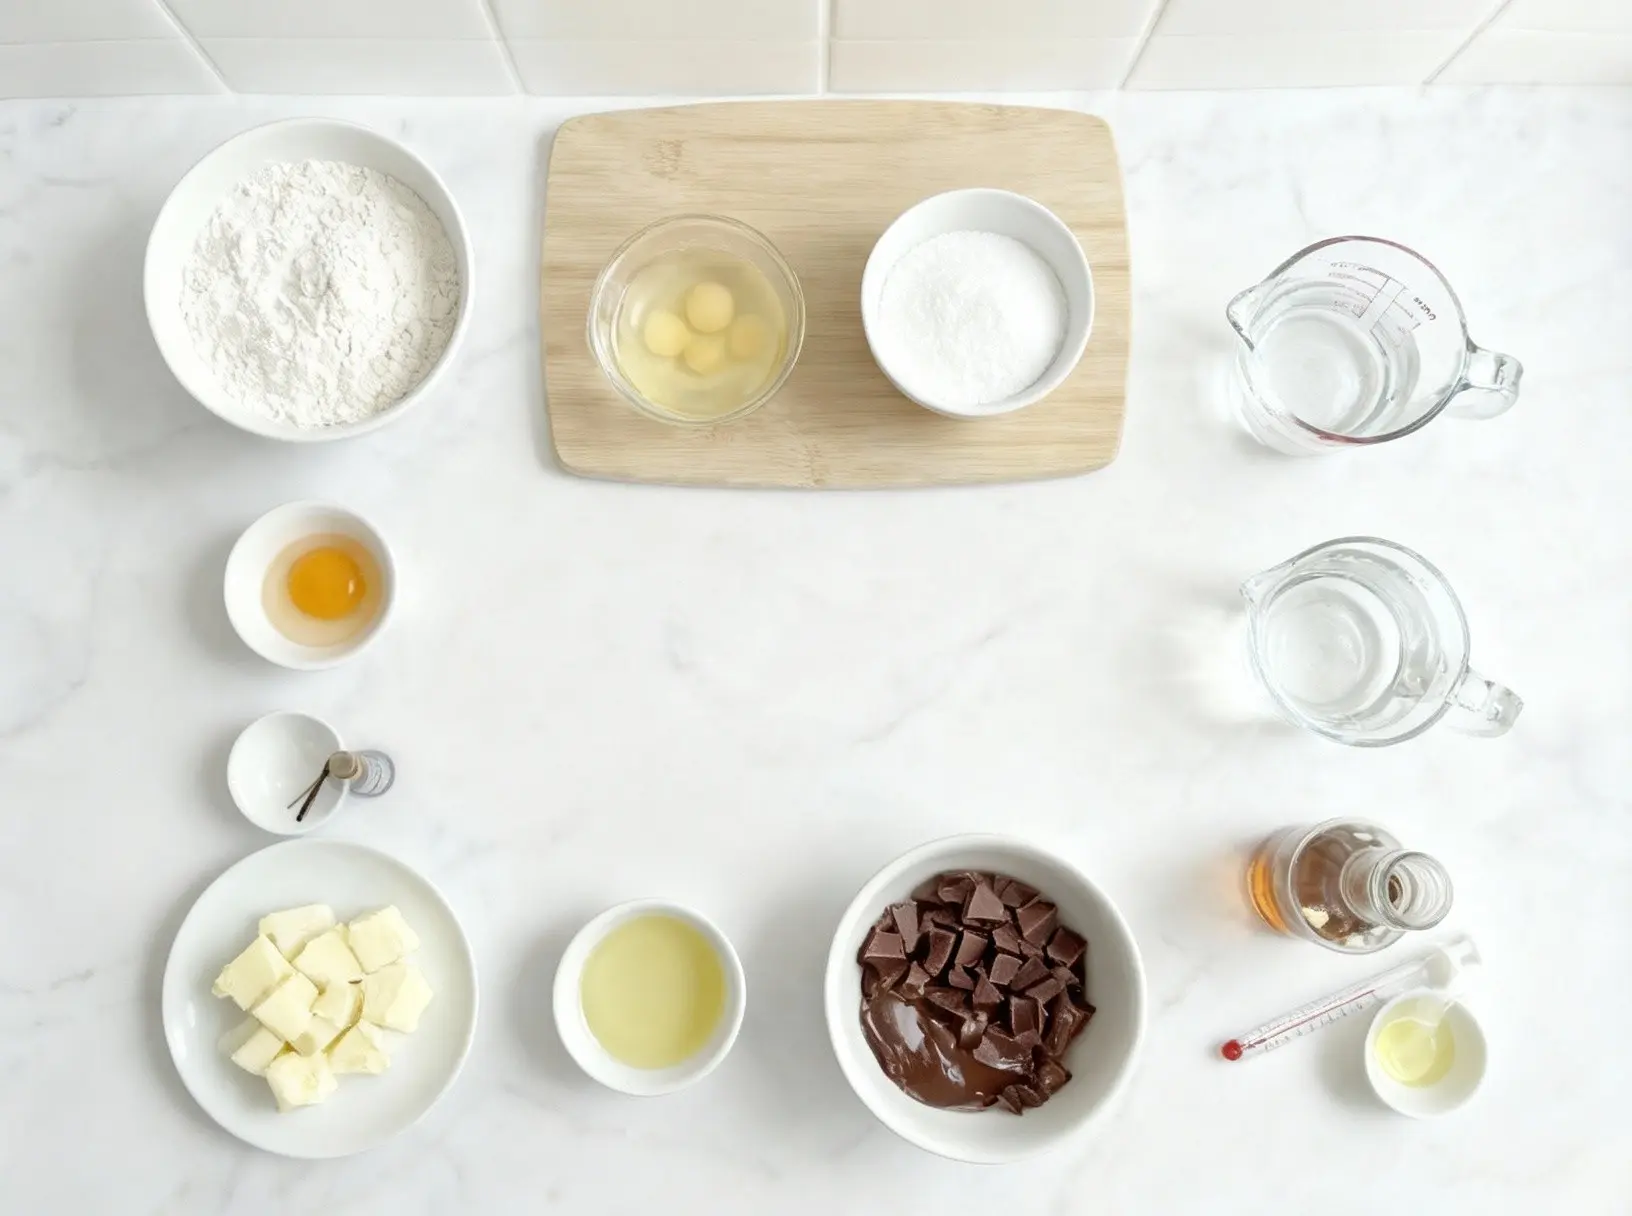
The Story
Besos de Moza, which translates to "maiden's kisses" or "young woman's kisses," are one of Peru's most cherished confections, evoking nostalgia and sweet memories for generations of Peruvians. These beloved treats consist of a delicate cookie base topped with a pillow of soft, fluffy marshmallow meringue, all enrobed in a shell of rich chocolate. While the exact origins are difficult to pinpoint, besos de moza likely emerged in Lima's confectionery tradition during the early to mid-20th century, influenced by European chocolate-making techniques that arrived with immigrant communities from Germany, Italy, and France. The commercialization of besos de moza transformed them from artisanal confections into a national icon. The most famous brand, produced by Nestlé Peru (originally by D'Onofrio, a company founded by Italian immigrants in the 1890s), has been selling packaged besos de moza since the mid-20th century, making them accessible across the country. The distinctive red and pink packaging is instantly recognizable to any Peruvian, and the treats are associated with childhood memories, romantic gifts, and special occasions. Despite the commercial version's popularity, many Peruvian home cooks and small confectioners continue to make artisanal besos de moza, often considered superior to the factory-made version for their fresh, fluffy marshmallow and higher quality chocolate. What makes besos de moza so irresistible is the perfect combination of textures and flavors in each bite. The cookie base provides a subtle crunch and buttery foundation, the marshmallow meringue is impossibly light and sweet with a melt-in-your-mouth quality, and the chocolate coating adds rich, bittersweet depth that balances the sweetness. The name itself suggests romance and tenderness - these are the treats Peruvian suitors bring to their sweethearts, children beg their parents for, and families share during celebrations. Making besos de moza at home is a labor of love that yields results far superior to store-bought versions, with fresher marshmallow and better chocolate. They represent the sweeter side of Peruvian cuisine, a country more often celebrated for its ceviche and savory dishes but with a rich tradition of dulces and postres.
Instructions
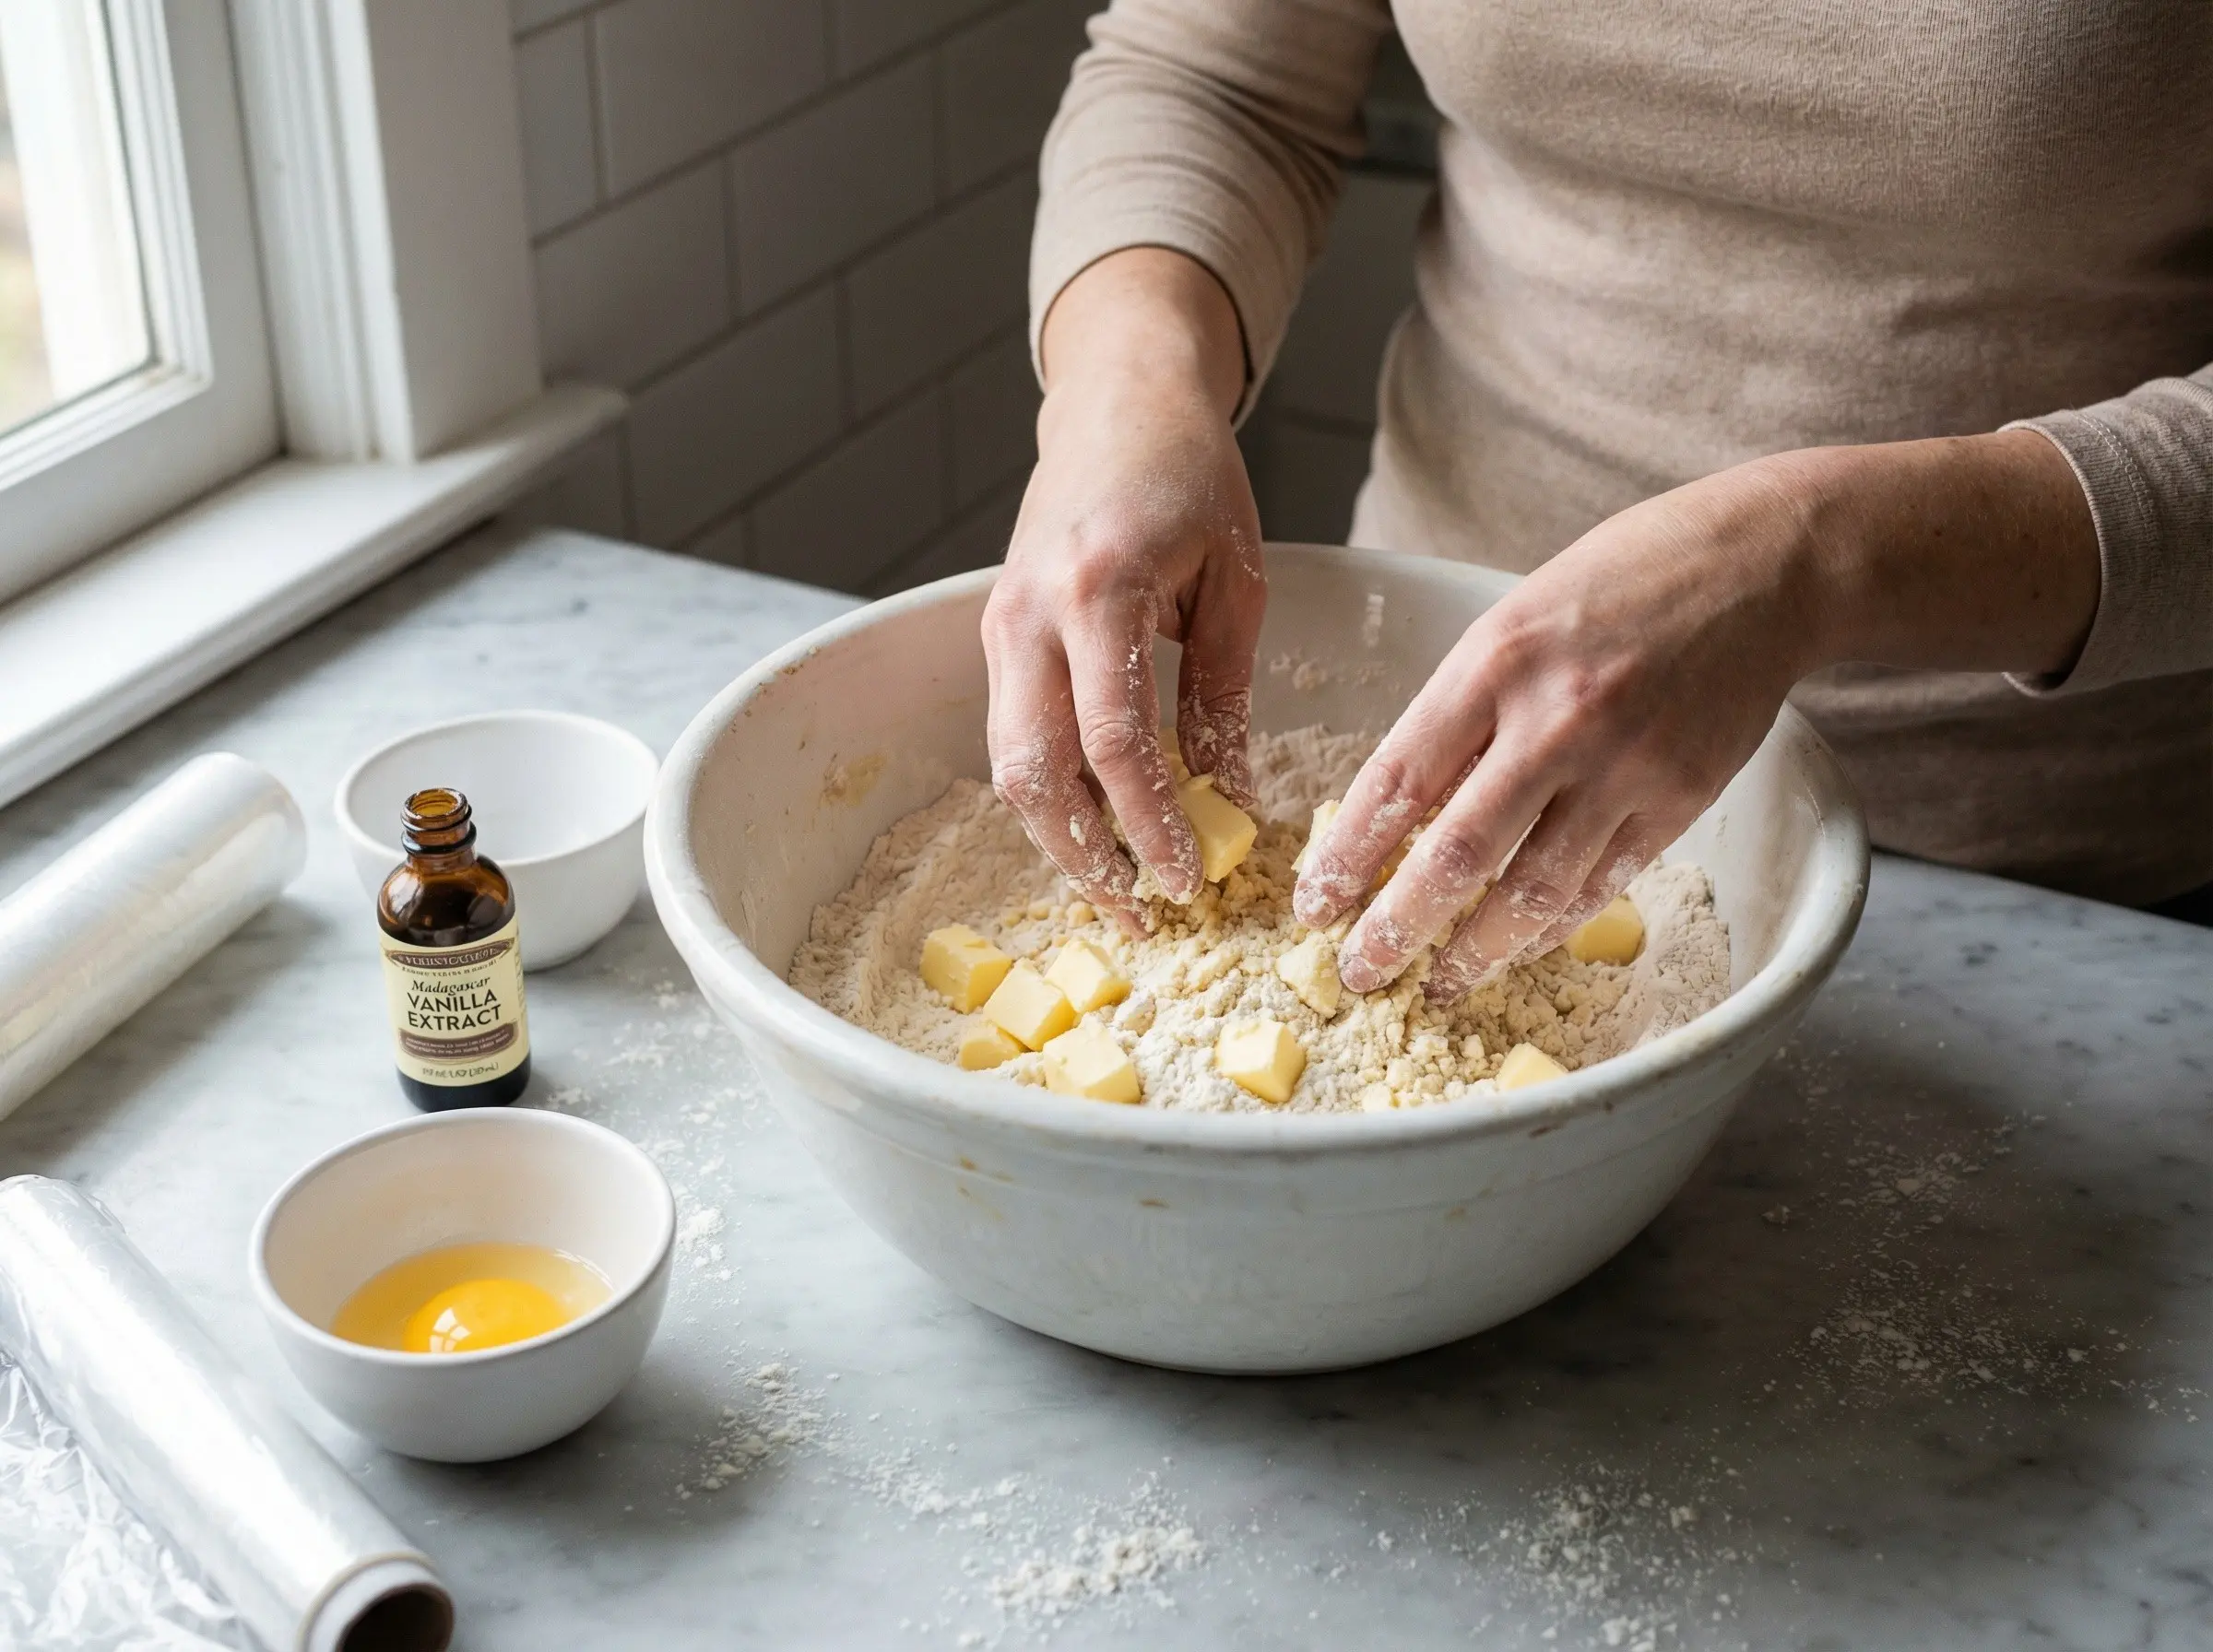
Step 1
Start by making the cookie base. In a large bowl, whisk together the flour and powdered sugar. Add the cold, cubed butter and use your fingertips or a pastry cutter to work the butter into the flour mixture until it resembles coarse crumbs with some pea-sized pieces remaining. This technique is similar to making pie crust - keep the butter cold for the best texture. Add the egg yolk and vanilla extract, mixing with a fork until the dough just comes together. Do not overwork the dough or the cookies will be tough. If the dough seems too dry, add a teaspoon of cold water. Gather the dough into a ball, flatten into a disc, wrap in plastic wrap, and refrigerate for at least 30 minutes. This resting time allows the gluten to relax and makes the dough easier to roll.
Step 2
Preheat your oven to 350 degrees F and line two baking sheets with parchment paper. Remove the chilled dough from the refrigerator and let it sit for 5 minutes to soften slightly. On a lightly floured surface, roll out the dough to about 1/4 inch thickness. Using a 1.5 to 2-inch round cookie cutter, cut out circles of dough. These will be the bases for your besos de moza, so they should be uniform in size. Gather the scraps, re-roll gently, and cut more circles. Place the circles on the prepared baking sheets, spacing them about 1 inch apart. Bake for 10-12 minutes until the edges are just barely golden - the cookies should remain quite pale. They will firm up as they cool. Let the cookies cool on the baking sheet for 5 minutes, then transfer to a wire rack to cool completely. The cookies must be completely cool before adding the marshmallow topping.
Step 3
While the cookies cool, prepare the Italian meringue marshmallow topping. This method produces a stable, fluffy marshmallow that holds its shape beautifully. In a small saucepan, combine the granulated sugar and water. Place over medium-high heat and stir until the sugar dissolves. Once dissolved, stop stirring and let the syrup come to a boil. Insert a candy thermometer and cook until the syrup reaches 240 degrees F (soft ball stage). While the syrup is cooking, place the egg whites and cream of tartar in a large, clean, dry mixing bowl. When the syrup reaches about 230 degrees F, begin beating the egg whites with an electric mixer on medium speed until they form soft peaks. This timing ensures the whites are ready when the syrup reaches temperature.
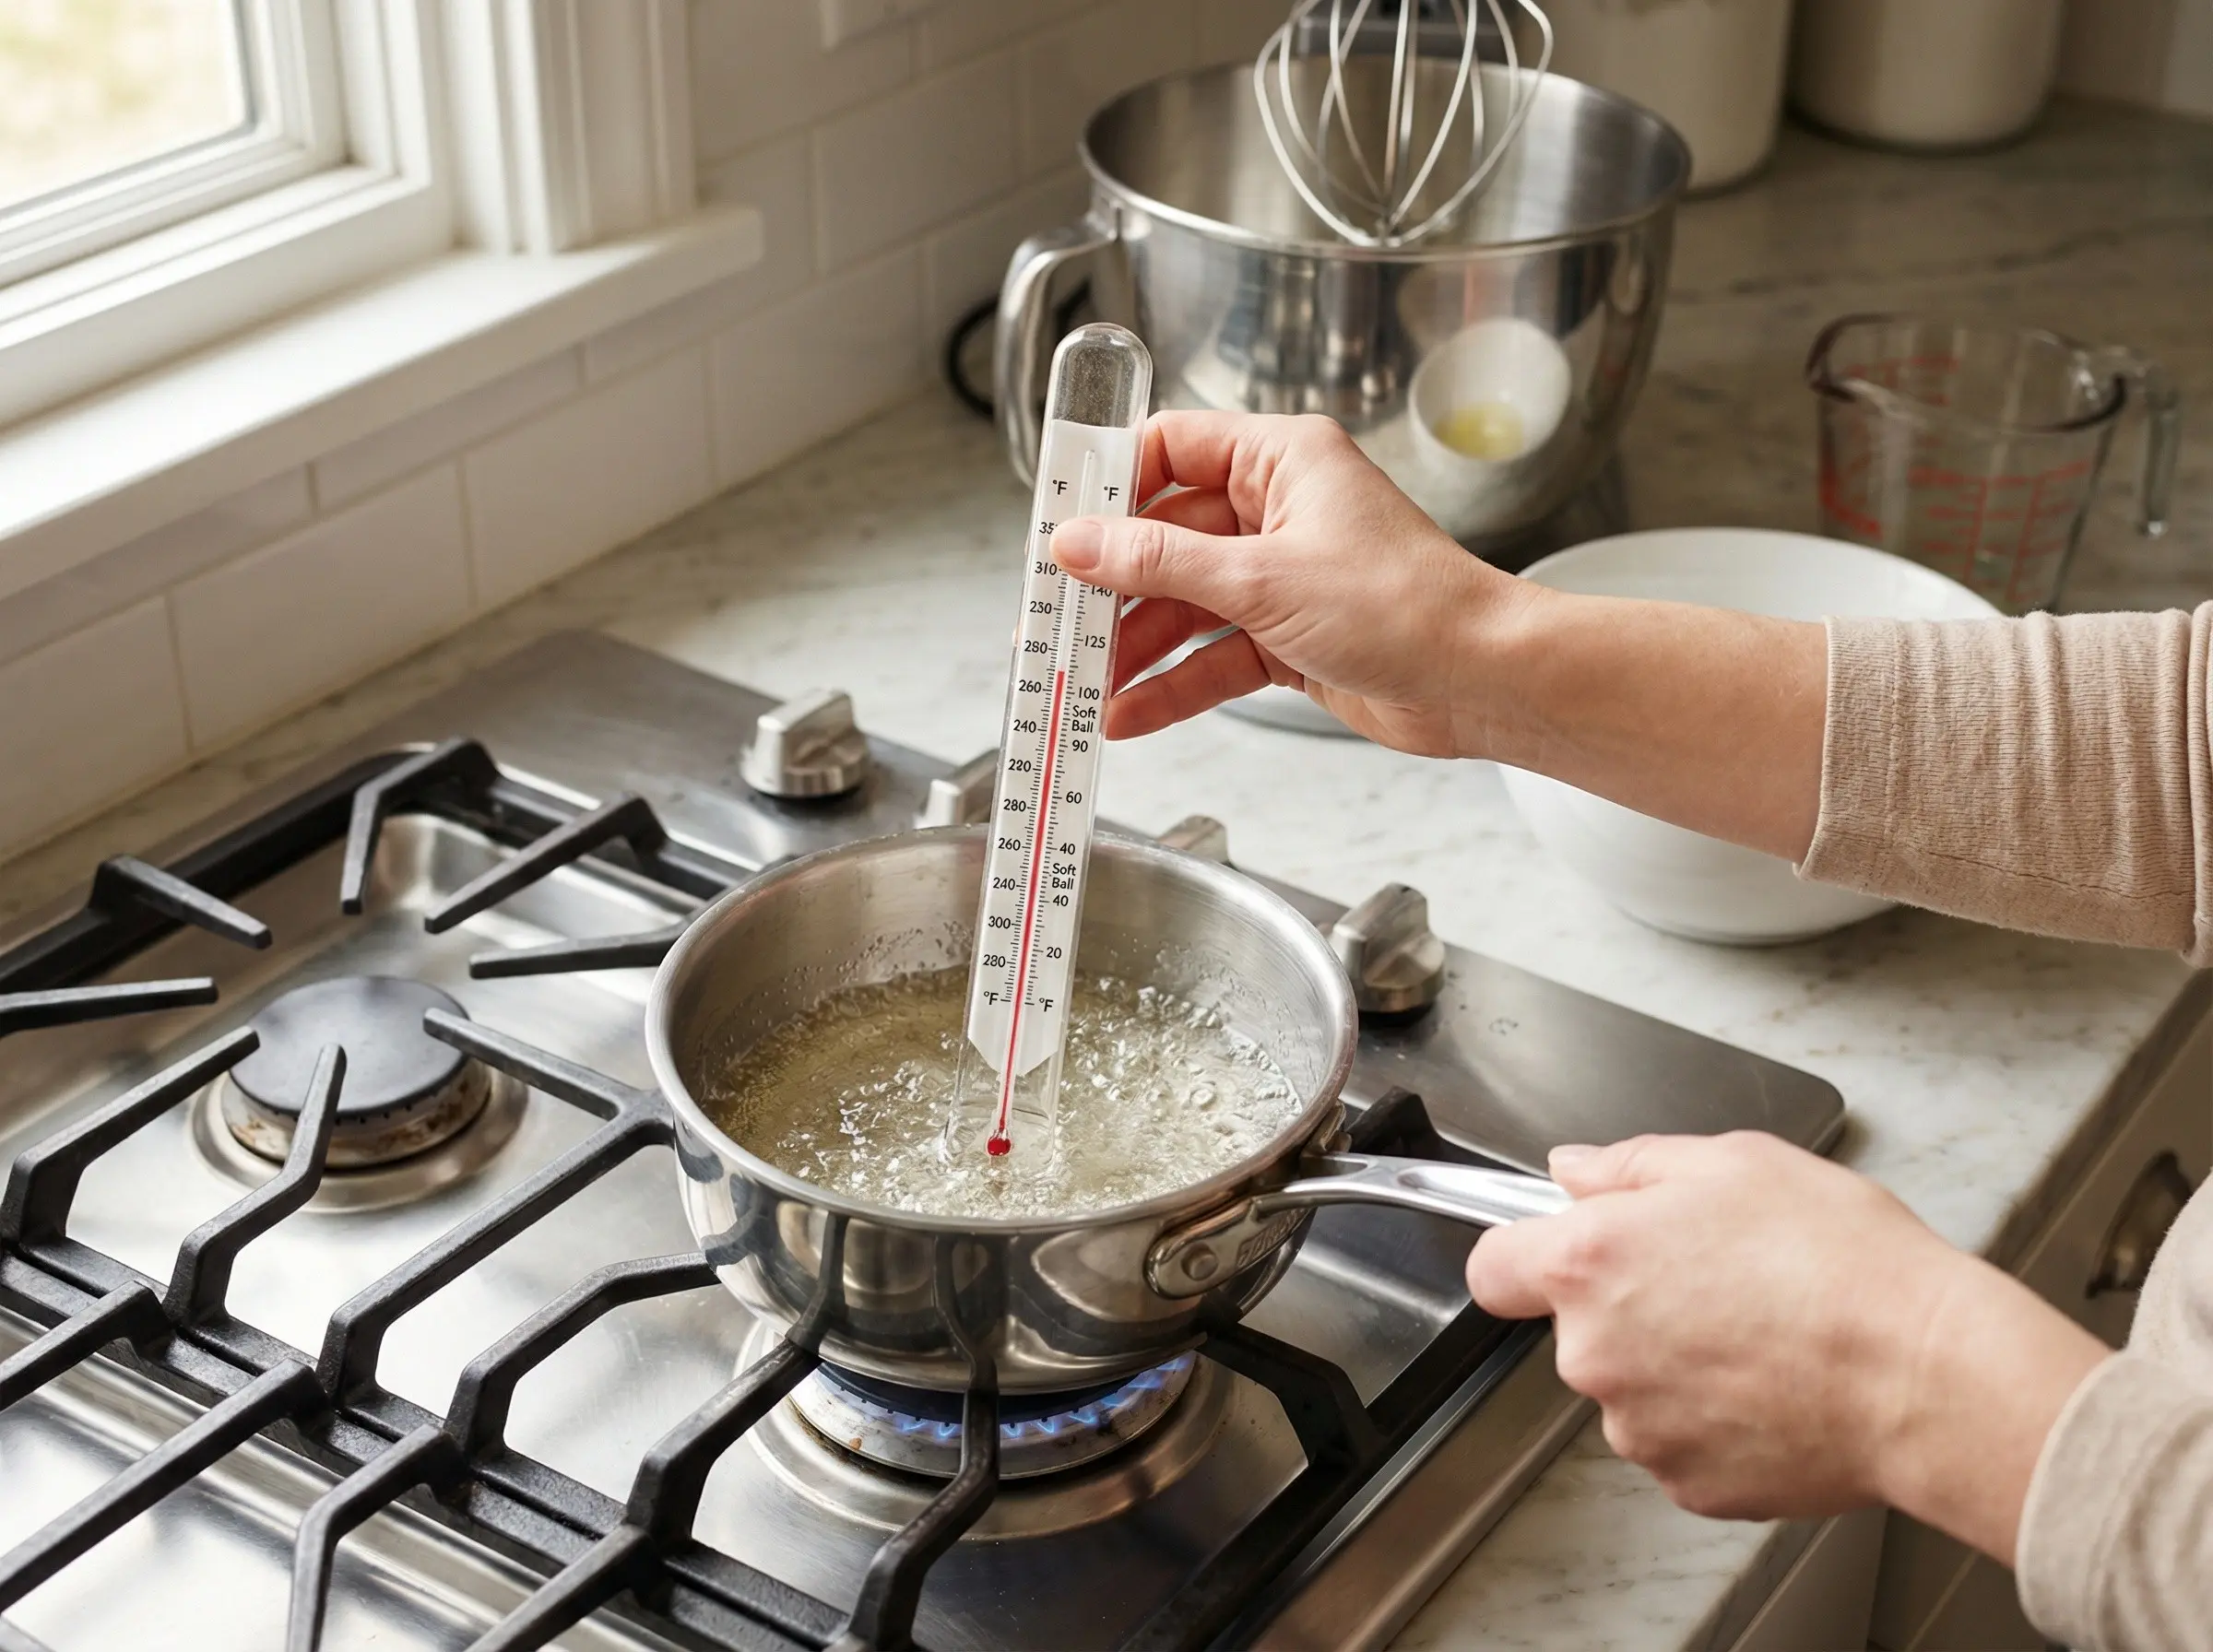
Step 4
When the sugar syrup reaches exactly 240 degrees F, remove it from heat immediately. With the mixer running on medium speed, carefully and slowly pour the hot syrup in a thin, steady stream into the beaten egg whites. Aim for the space between the beaters and the bowl to prevent the syrup from splattering or hitting the beaters and spinning onto the sides of the bowl. Once all the syrup is added, increase the mixer speed to high and continue beating for 8-10 minutes until the meringue is thick, glossy, and has cooled to room temperature. The meringue should hold stiff peaks and be smooth and marshmallow-like. Add the vanilla extract and beat for another 30 seconds to incorporate. The meringue should be very thick and fluffy - this is what gives besos de moza their signature cloud-like topping.
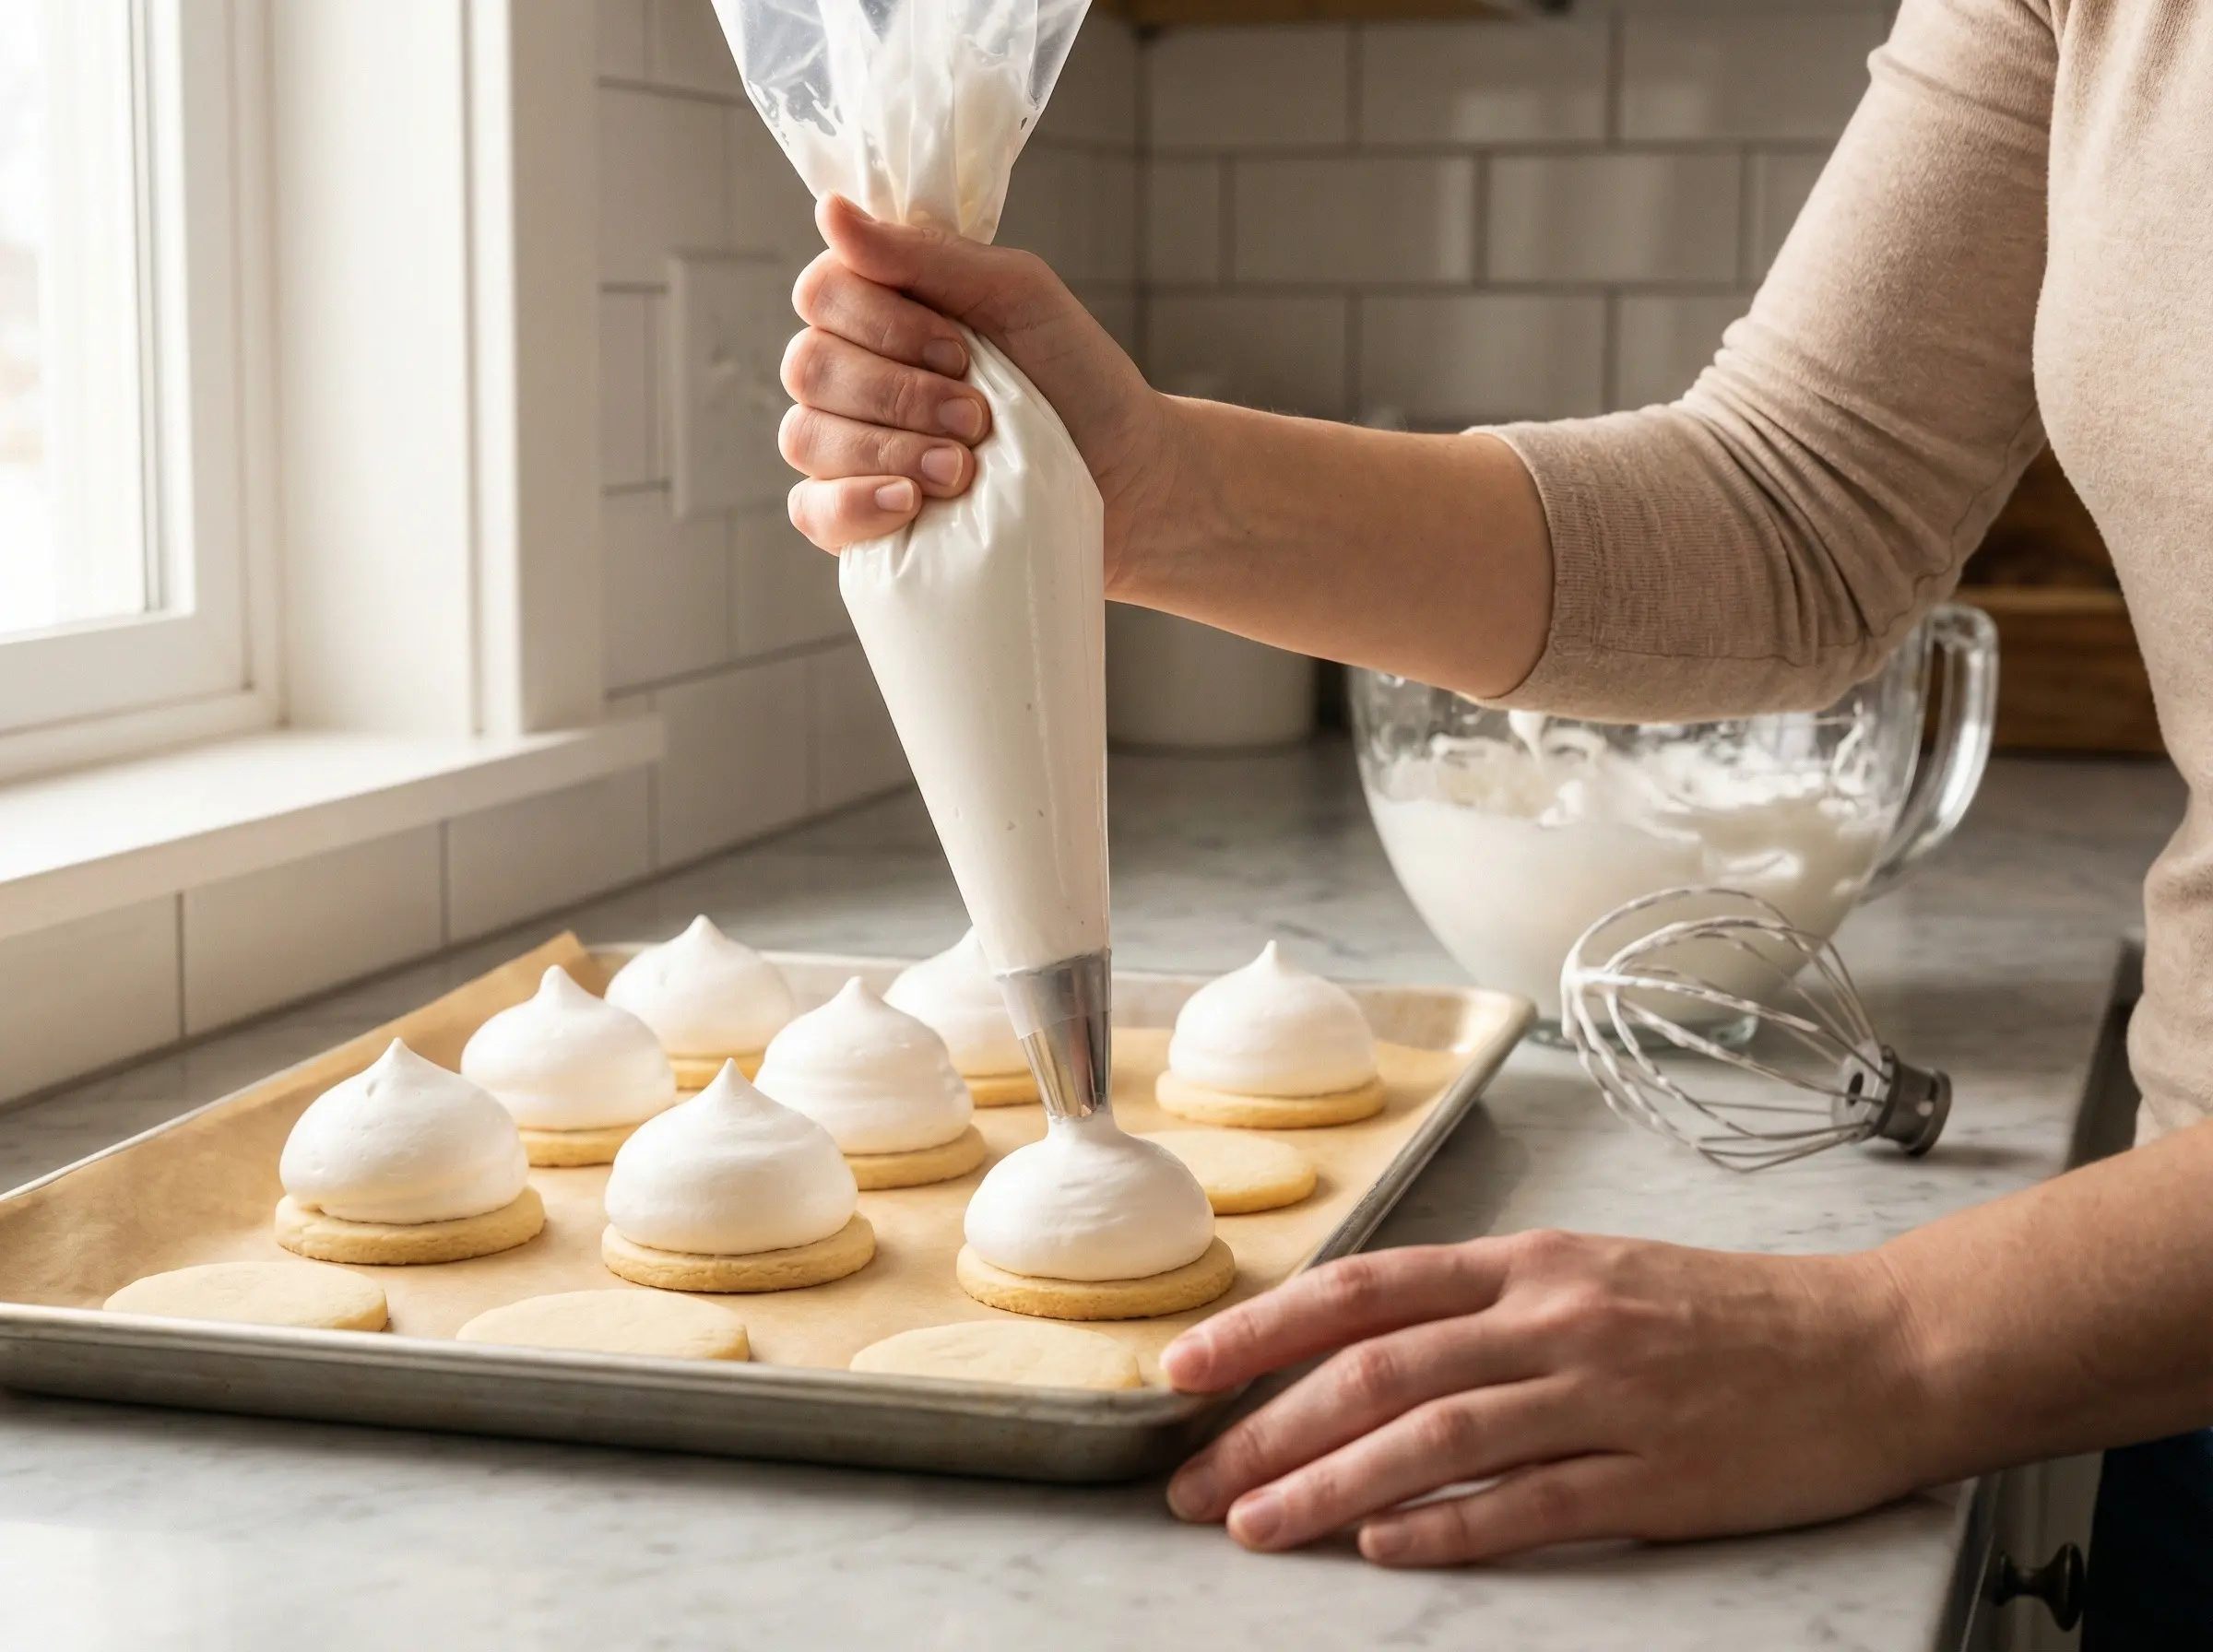
Step 5
Transfer the meringue to a piping bag fitted with a large round tip, or you can use a zip-top bag with a corner cut off. Pipe a generous mound of meringue onto each cooled cookie base, creating a tall, domed shape - about 1 to 1.5 inches high. The meringue should cover the cookie completely with a rounded top. You can also use two spoons to dollop and shape the meringue if you do not have a piping bag. The shape should resemble a kiss or a small dome. Let the assembled cookies sit at room temperature for about 30 minutes to allow the meringue to set slightly and form a thin skin on the outside. This makes them easier to dip in chocolate without the meringue sliding off. Place the cookies in the refrigerator for 15-20 minutes if your kitchen is warm.
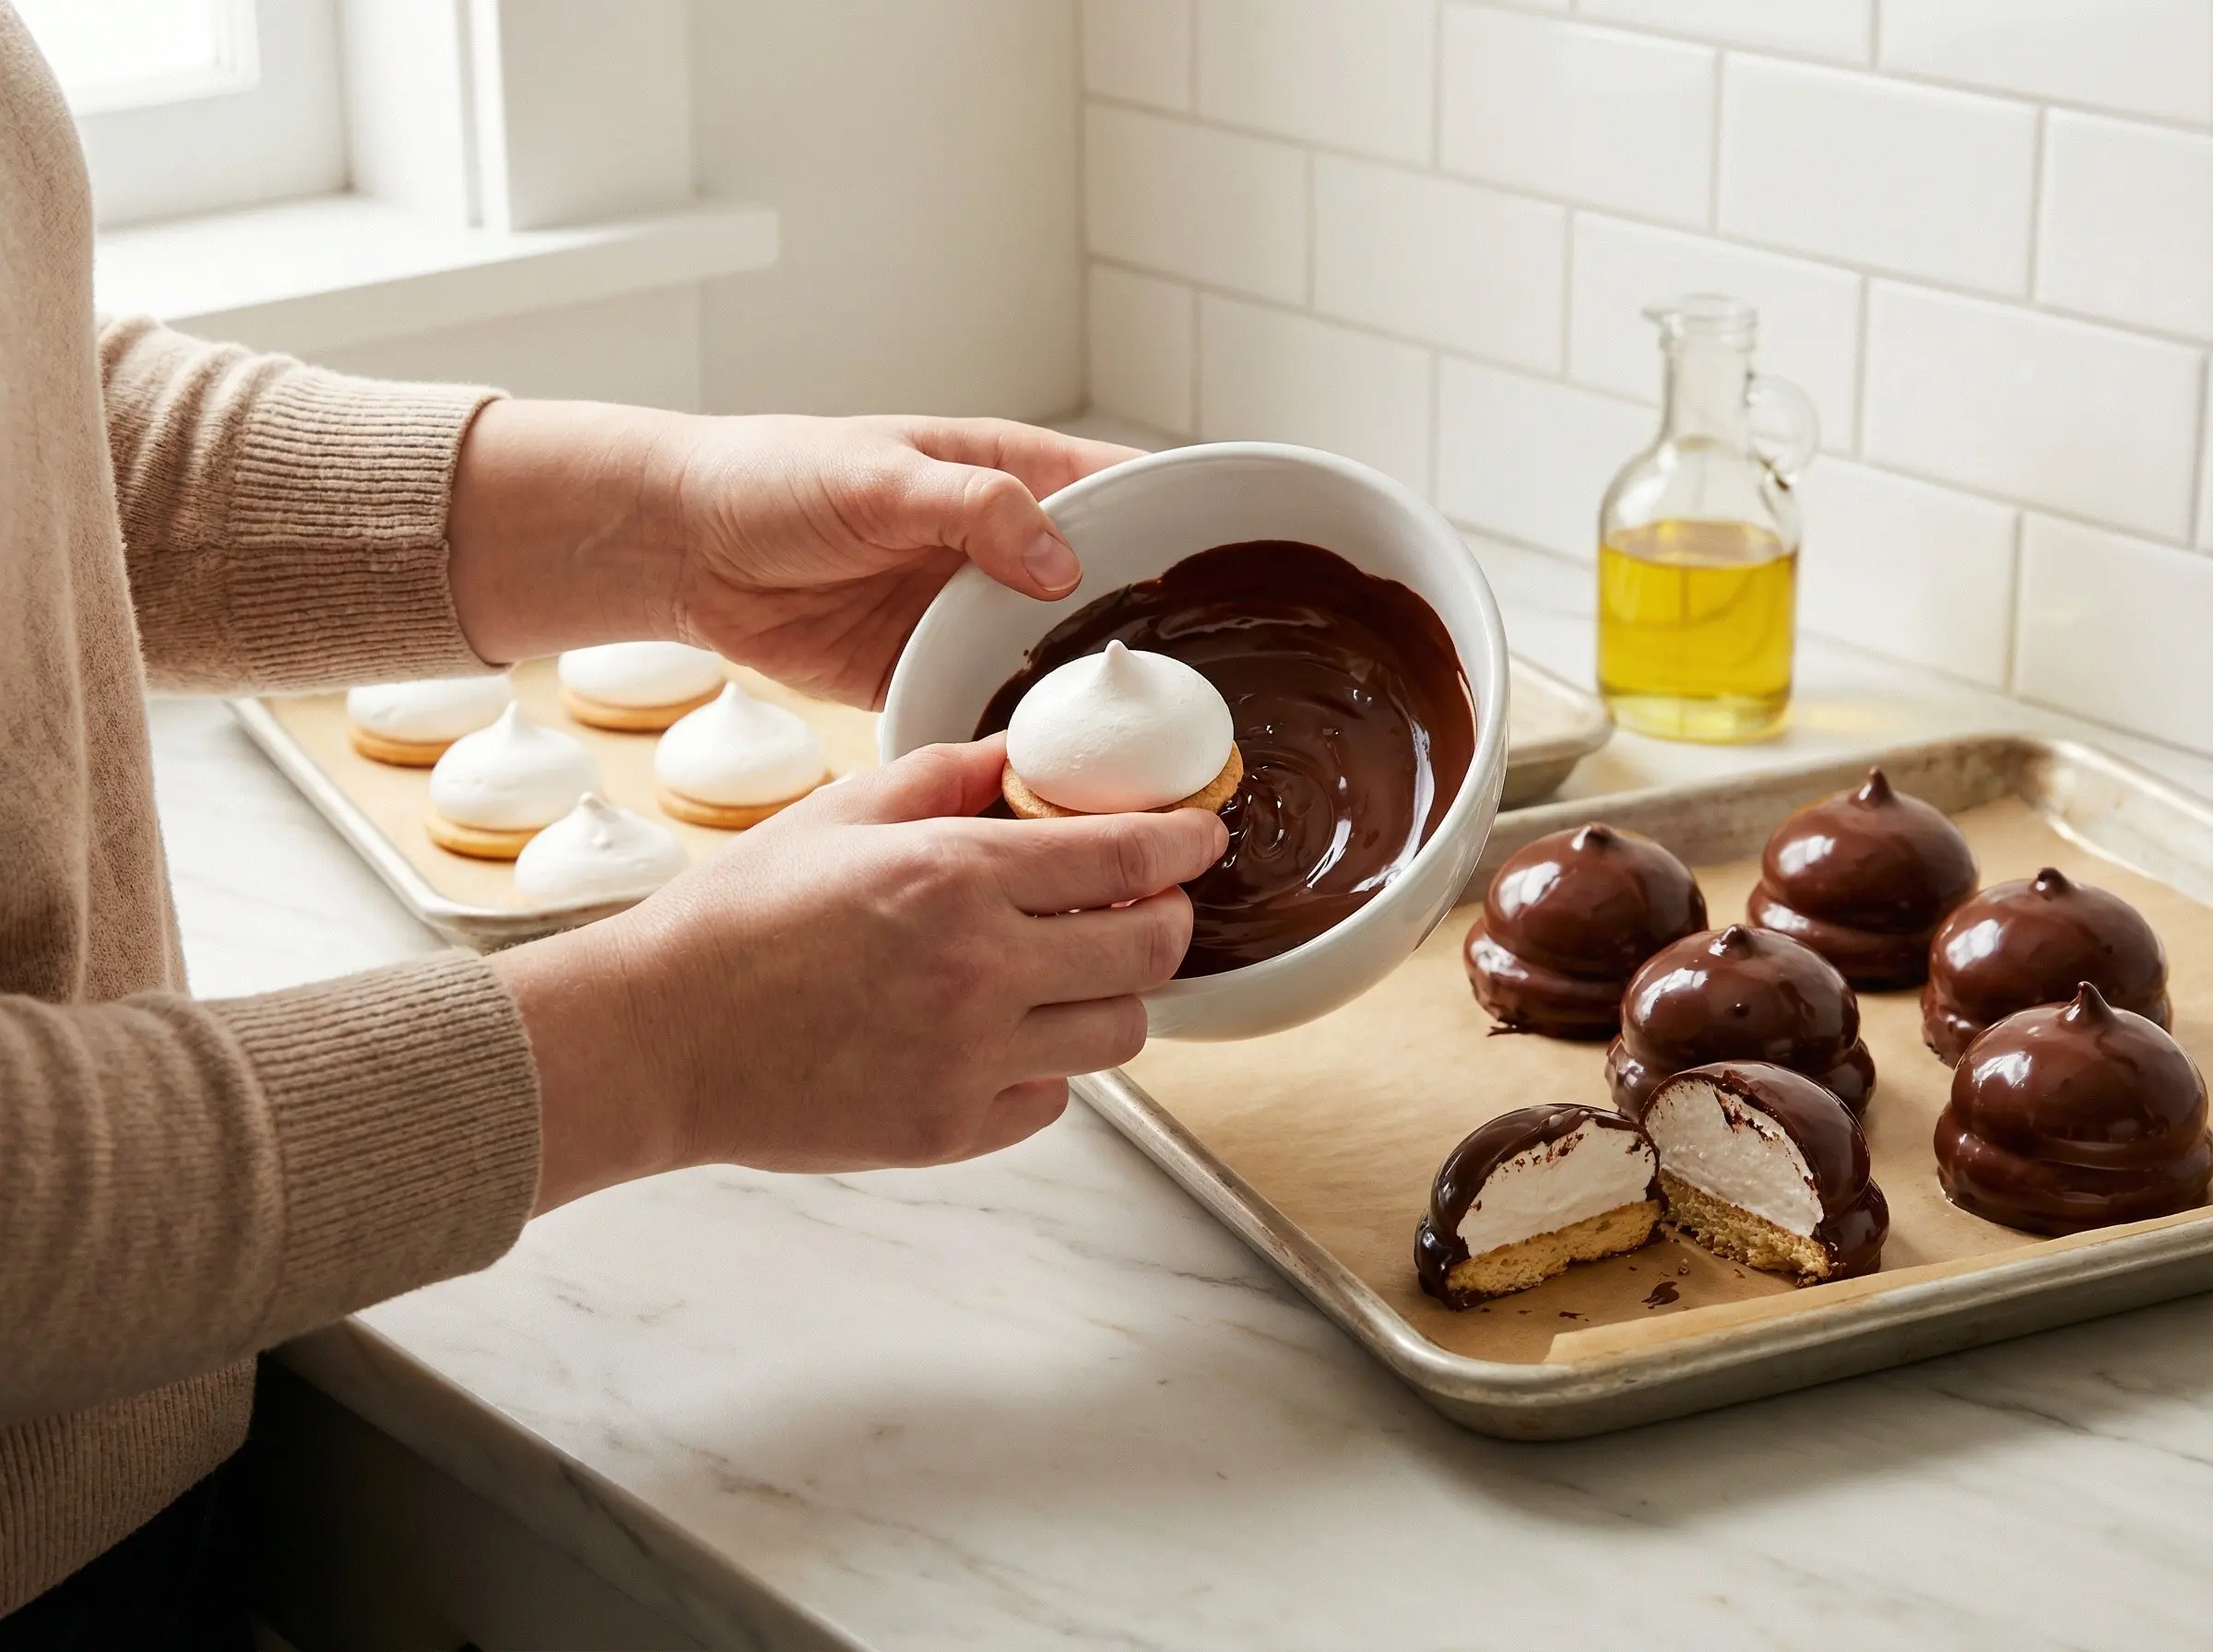
Step 6
Prepare the chocolate coating. Place the chopped chocolate and oil in a microwave-safe bowl. Microwave in 30-second intervals, stirring between each, until the chocolate is completely melted and smooth. The oil helps thin the chocolate for a smooth coating and gives it a nice sheen. Alternatively, melt the chocolate and oil together in a double boiler over simmering water. The chocolate should be warm but not hot. One at a time, hold each beso de moza by the cookie base and dip it into the melted chocolate, tilting the bowl to help coat the meringue completely. Let excess chocolate drip off, then place the dipped beso on a parchment-lined baking sheet. Work relatively quickly as the meringue is delicate. If the chocolate becomes too thick as it cools, rewarm it briefly. Once all the besos are dipped, refrigerate for 15-20 minutes until the chocolate is set and firm. Store the finished besos de moza in an airtight container in the refrigerator for up to 5 days, though they are best enjoyed within 2-3 days when the marshmallow is at its freshest. Let them sit at room temperature for 5 minutes before serving for the best texture.
You Might Also Like