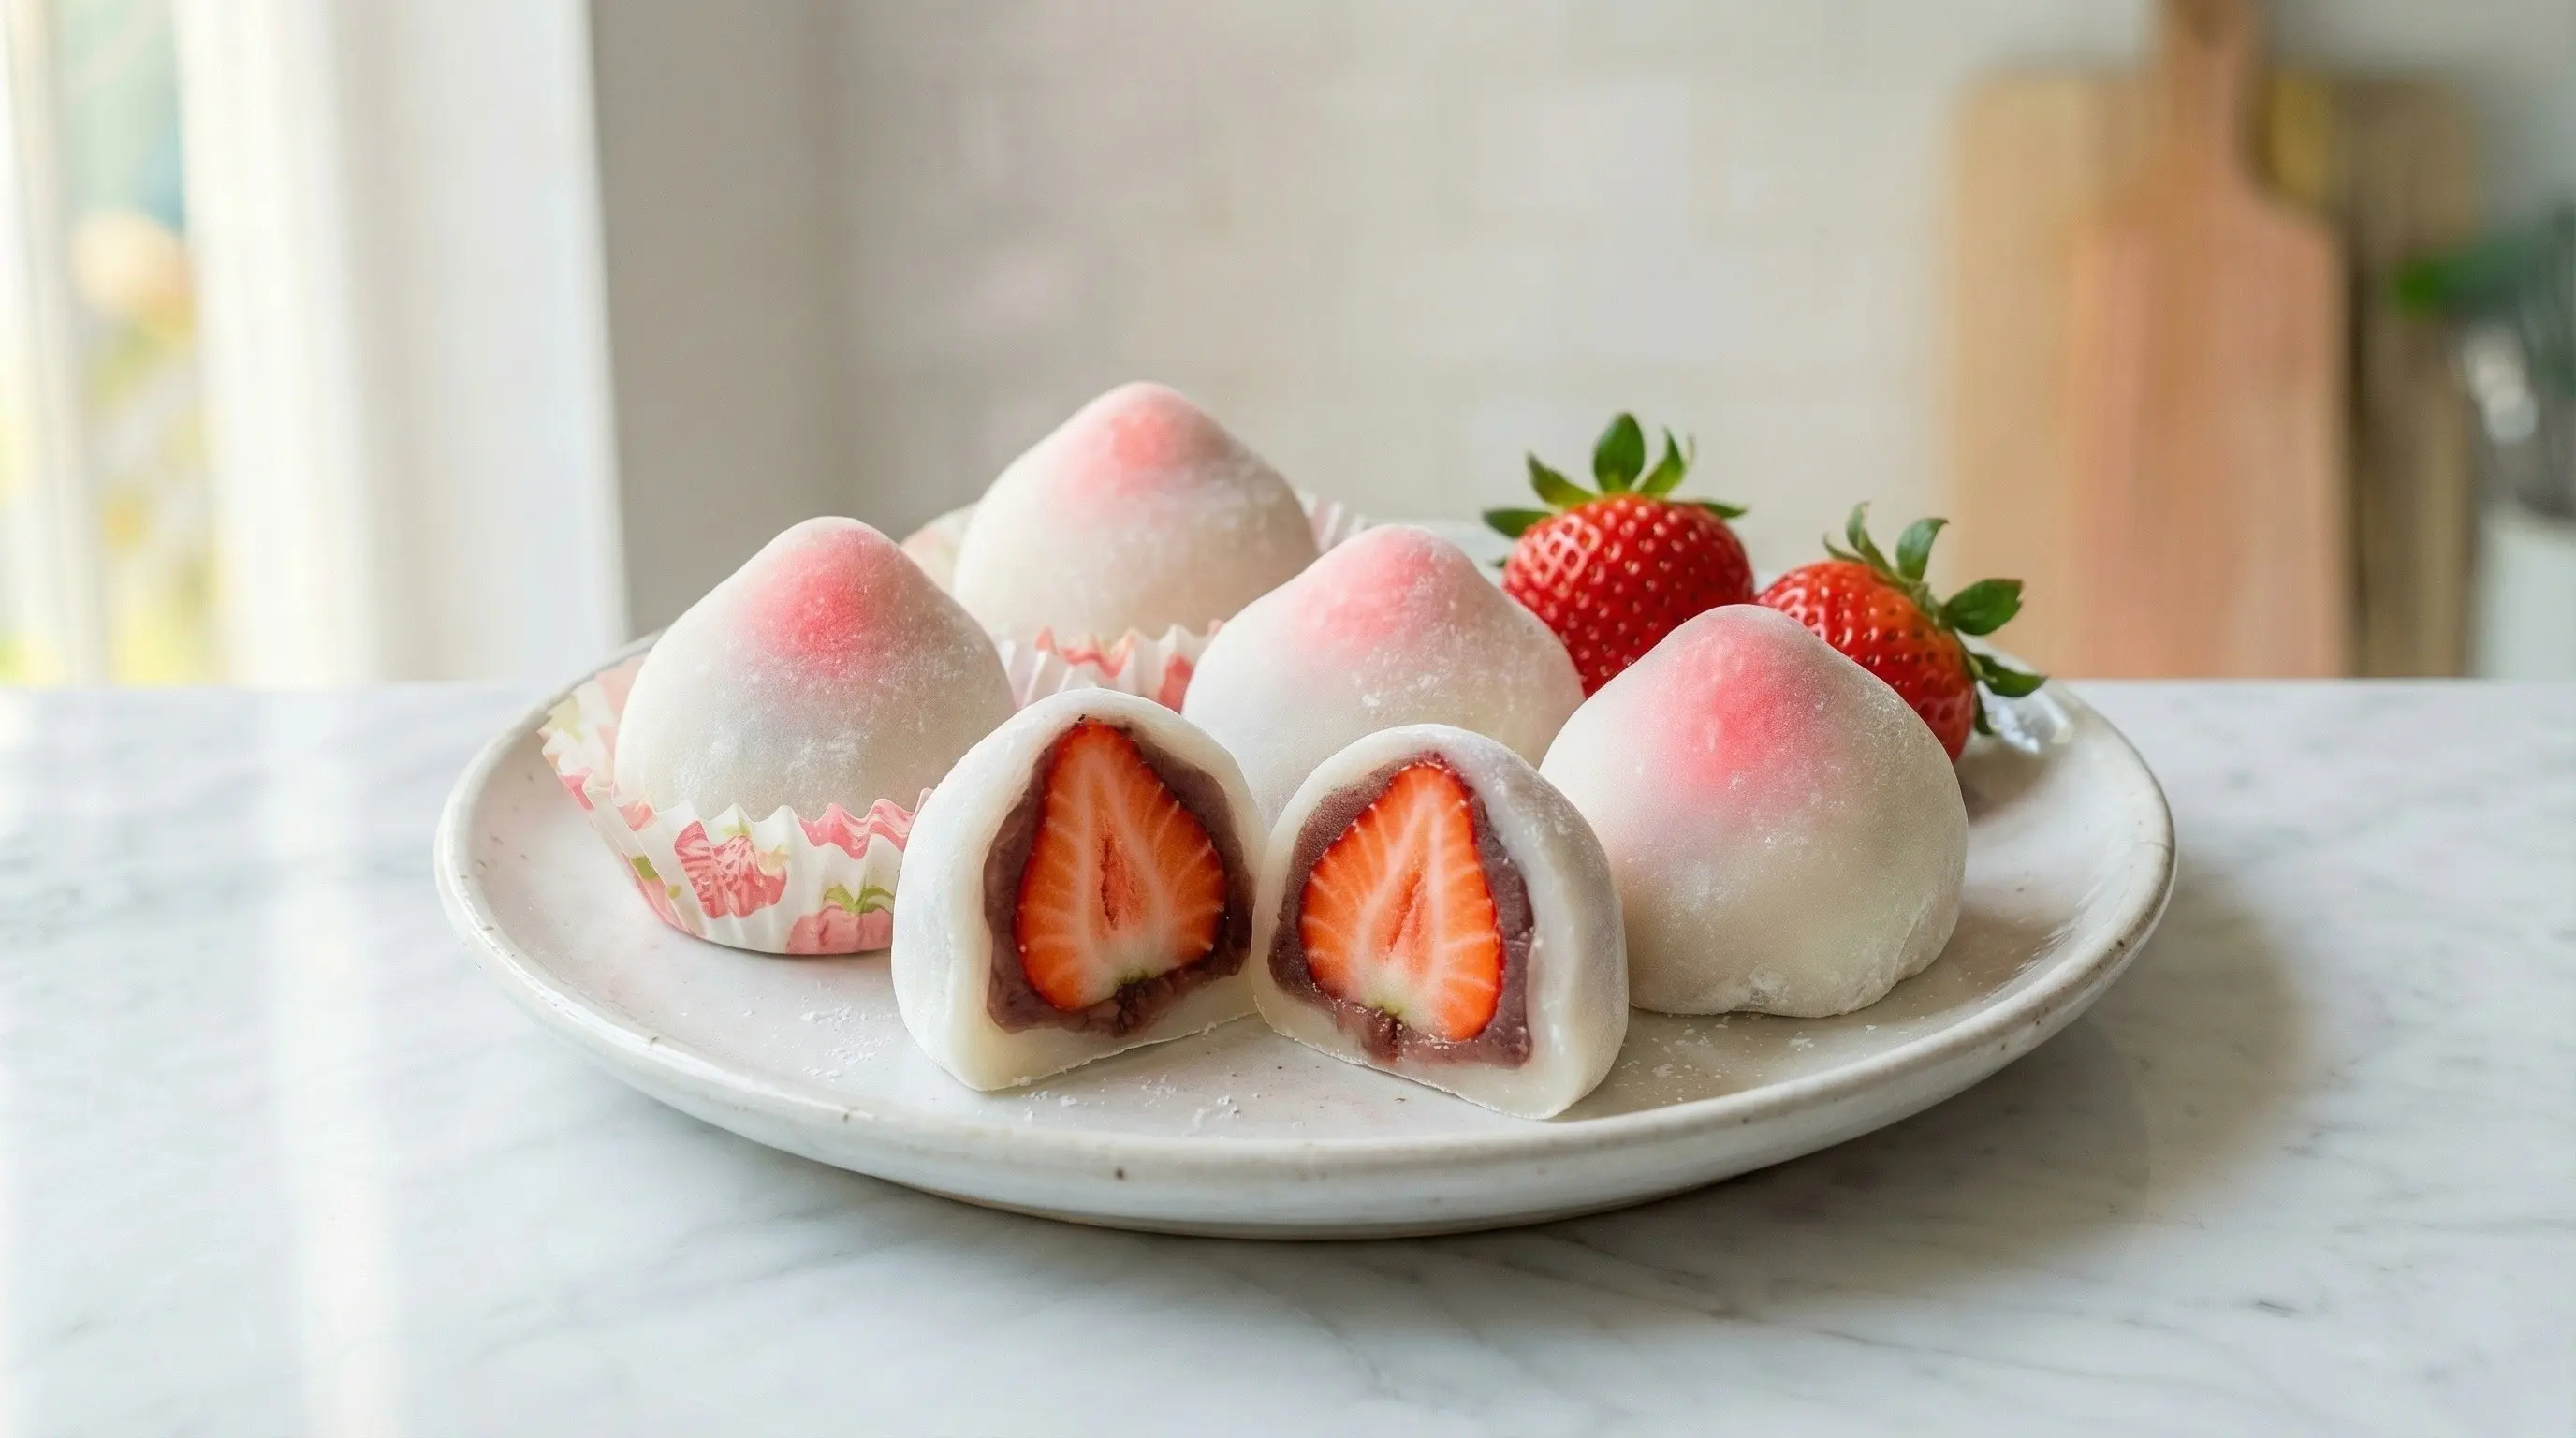
Ichigo Daifuku
Learn how to make ichigo daifuku, beautiful Japanese mochi stuffed with fresh strawberry and sweet red bean paste. This beloved wagashi is the perfect spring treat!
Ingredients
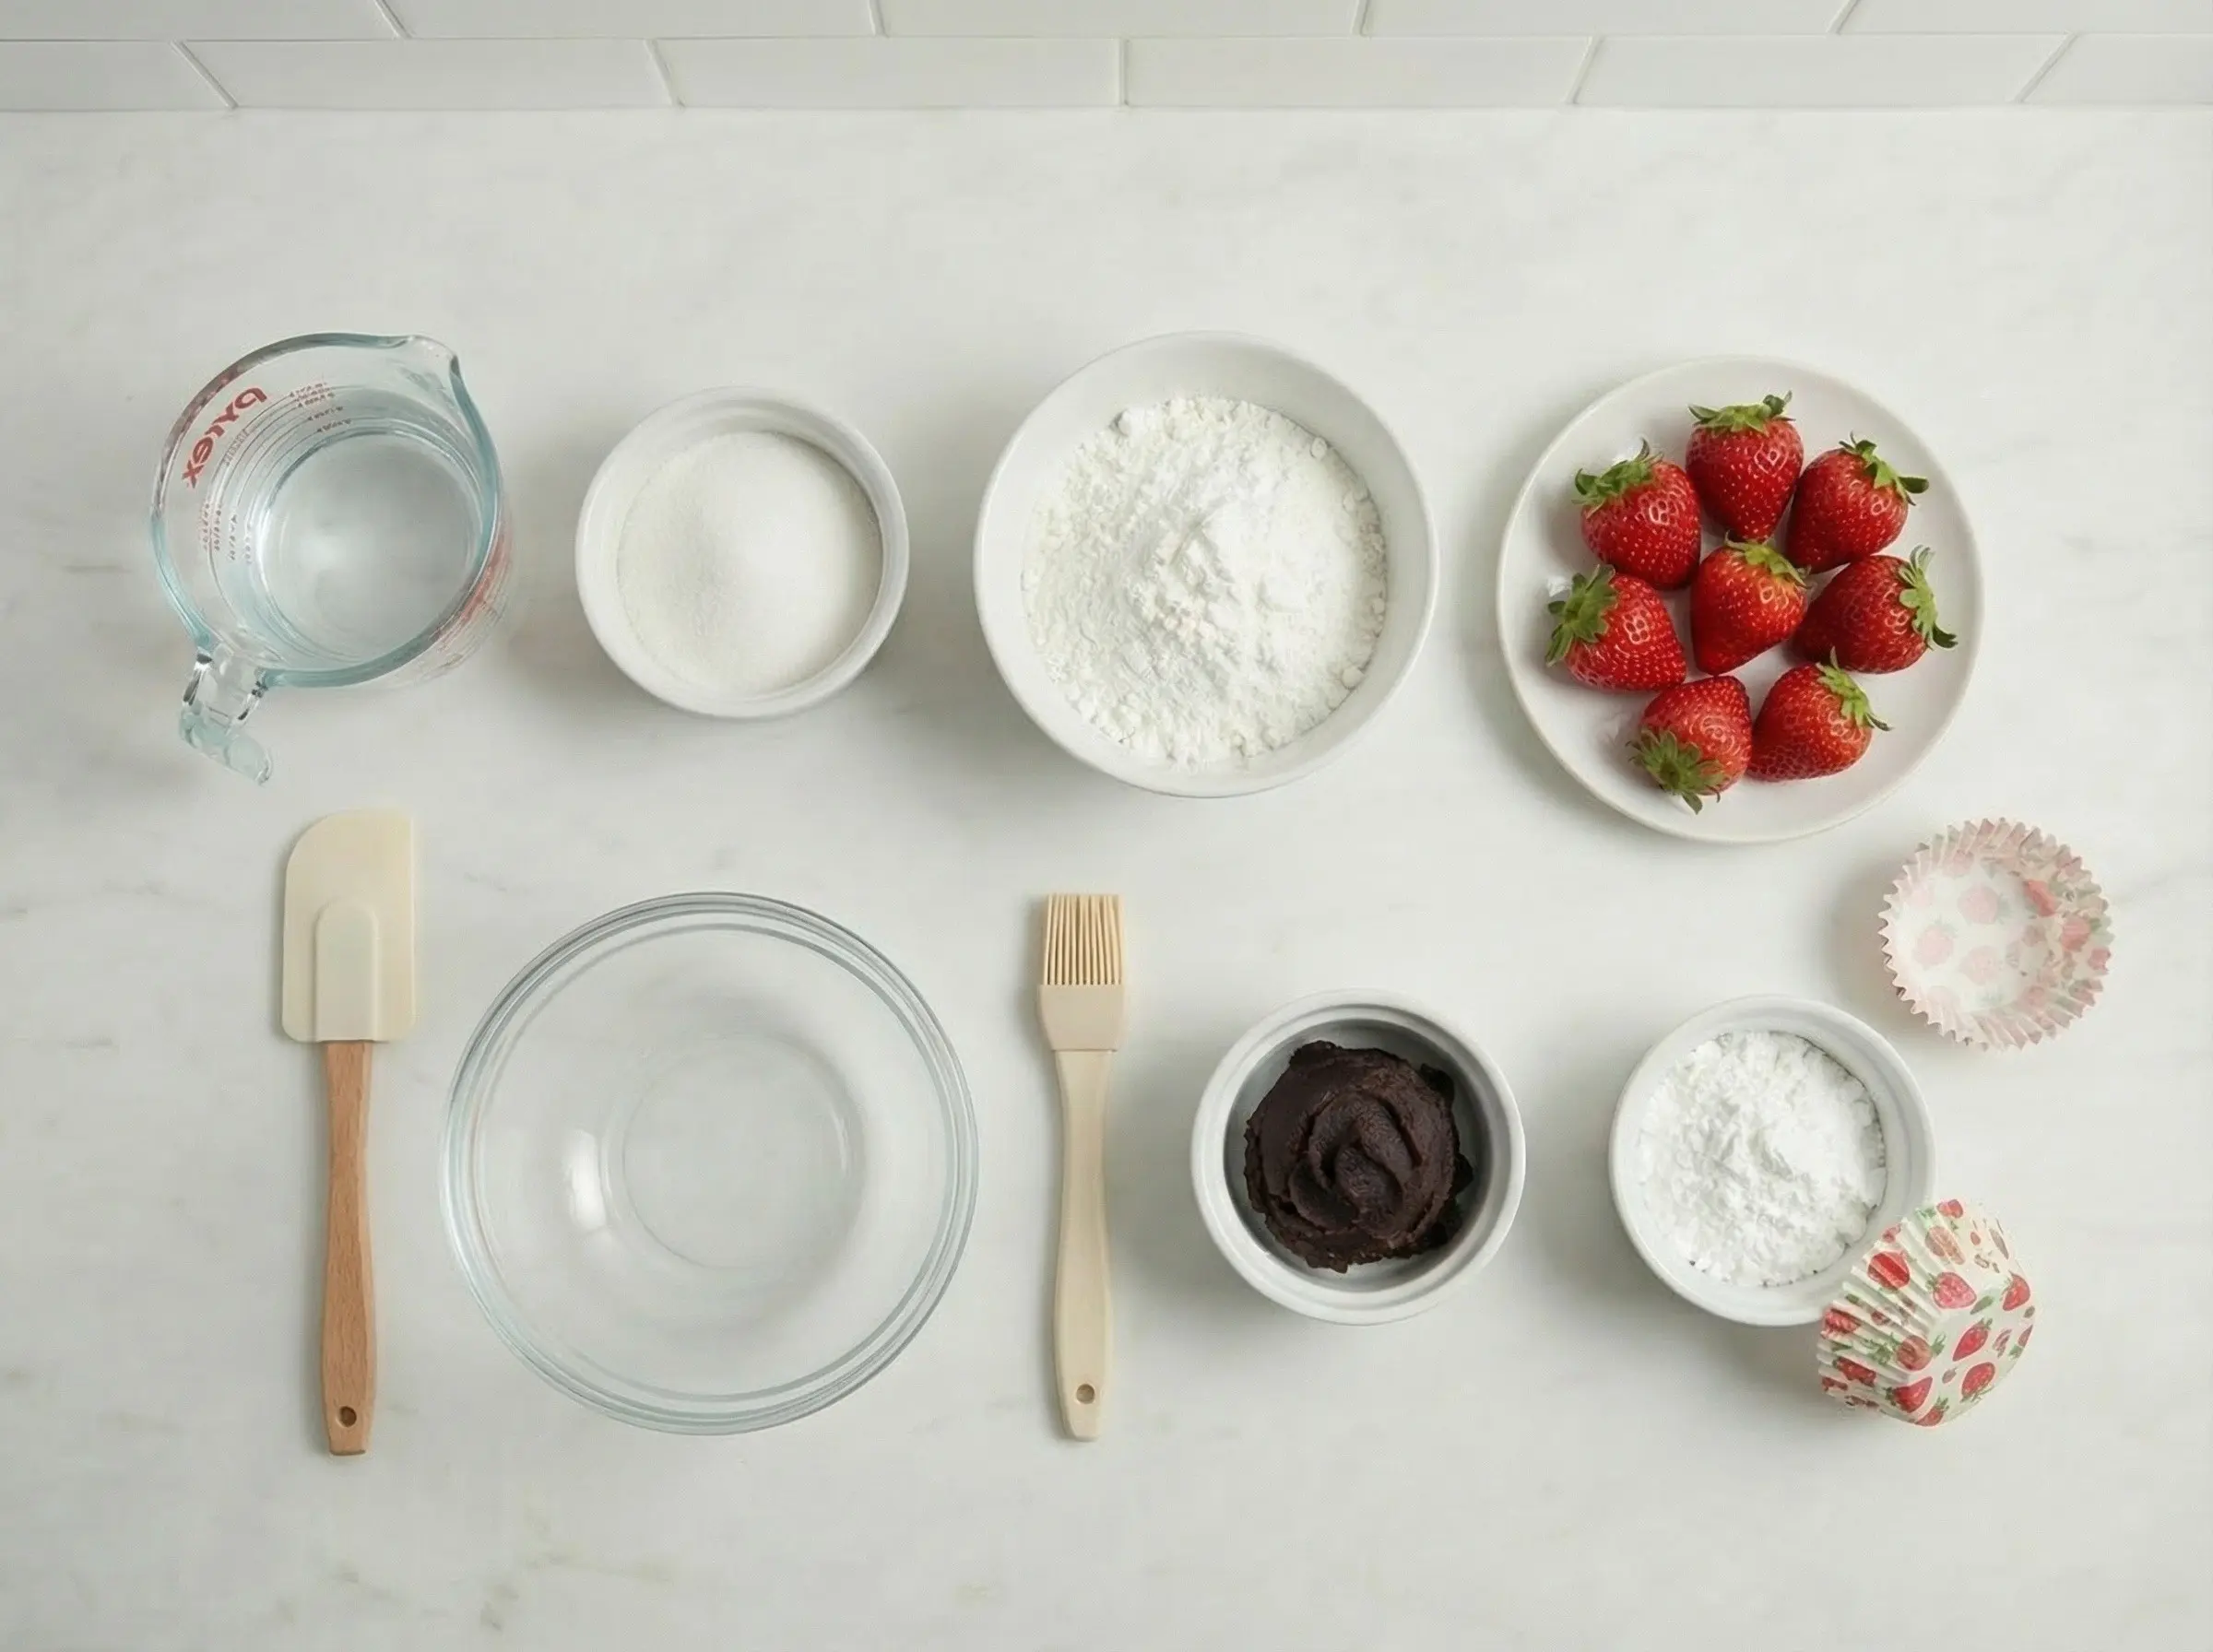
The Story
Ichigo daifuku is one of Japan's most beloved wagashi (traditional confections), a perfect marriage of chewy mochi, sweet red bean paste, and a fresh, juicy strawberry. While daifuku - mochi stuffed with sweet fillings - has been enjoyed in Japan since the late 18th century, the addition of fresh strawberry is a surprisingly modern innovation. Ichigo daifuku was invented in 1985 at a wagashi shop called Taimeiken in Tokyo's Ginza district, though several other shops also claim the honor. The creator's genius was recognizing that the tartness and juiciness of fresh strawberry would perfectly complement the sweetness of anko (red bean paste) and the neutral chewiness of mochi, creating a new classic that now defines spring in Japan. The timing of ichigo daifuku's creation coincided with Japan's development of exceptional strawberry varieties and year-round greenhouse cultivation, making premium strawberries available even in winter. Japanese strawberries are bred for sweetness, fragrance, and beautiful appearance - varieties like Amaou, Tochiotome, and Benihoppe are treated almost like precious gems. When strawberry season arrives in late winter and early spring, wagashi shops across Japan display their ichigo daifuku prominently, and long lines form at famous establishments. The confection has become so iconic that it now appears in countless variations: white bean paste instead of red, chocolate-flavored mochi, whole mochi coatings that leave the strawberry tip exposed like a little hat, and even luxury versions using the most expensive strawberries costing thousands of yen each. What makes ichigo daifuku so irresistible is the harmony of textures and temperatures. The mochi wrapper should be soft, stretchy, and slightly sticky - yielding to the teeth with a satisfying chew. The anko provides sweetness and earthy depth, while the strawberry bursts with bright, tart juice that cuts through the richness. When eaten fresh, the contrast between the room-temperature mochi and anko with the cold strawberry creates a multi-sensory experience. Visually, ichigo daifuku is enchanting - the pink or red of the strawberry glowing through the translucent white mochi like a lantern. It embodies the Japanese aesthetic of celebrating seasonal ingredients and finding beauty in simple things. Making ichigo daifuku at home is a rewarding project that connects you to this delicious tradition.
Instructions
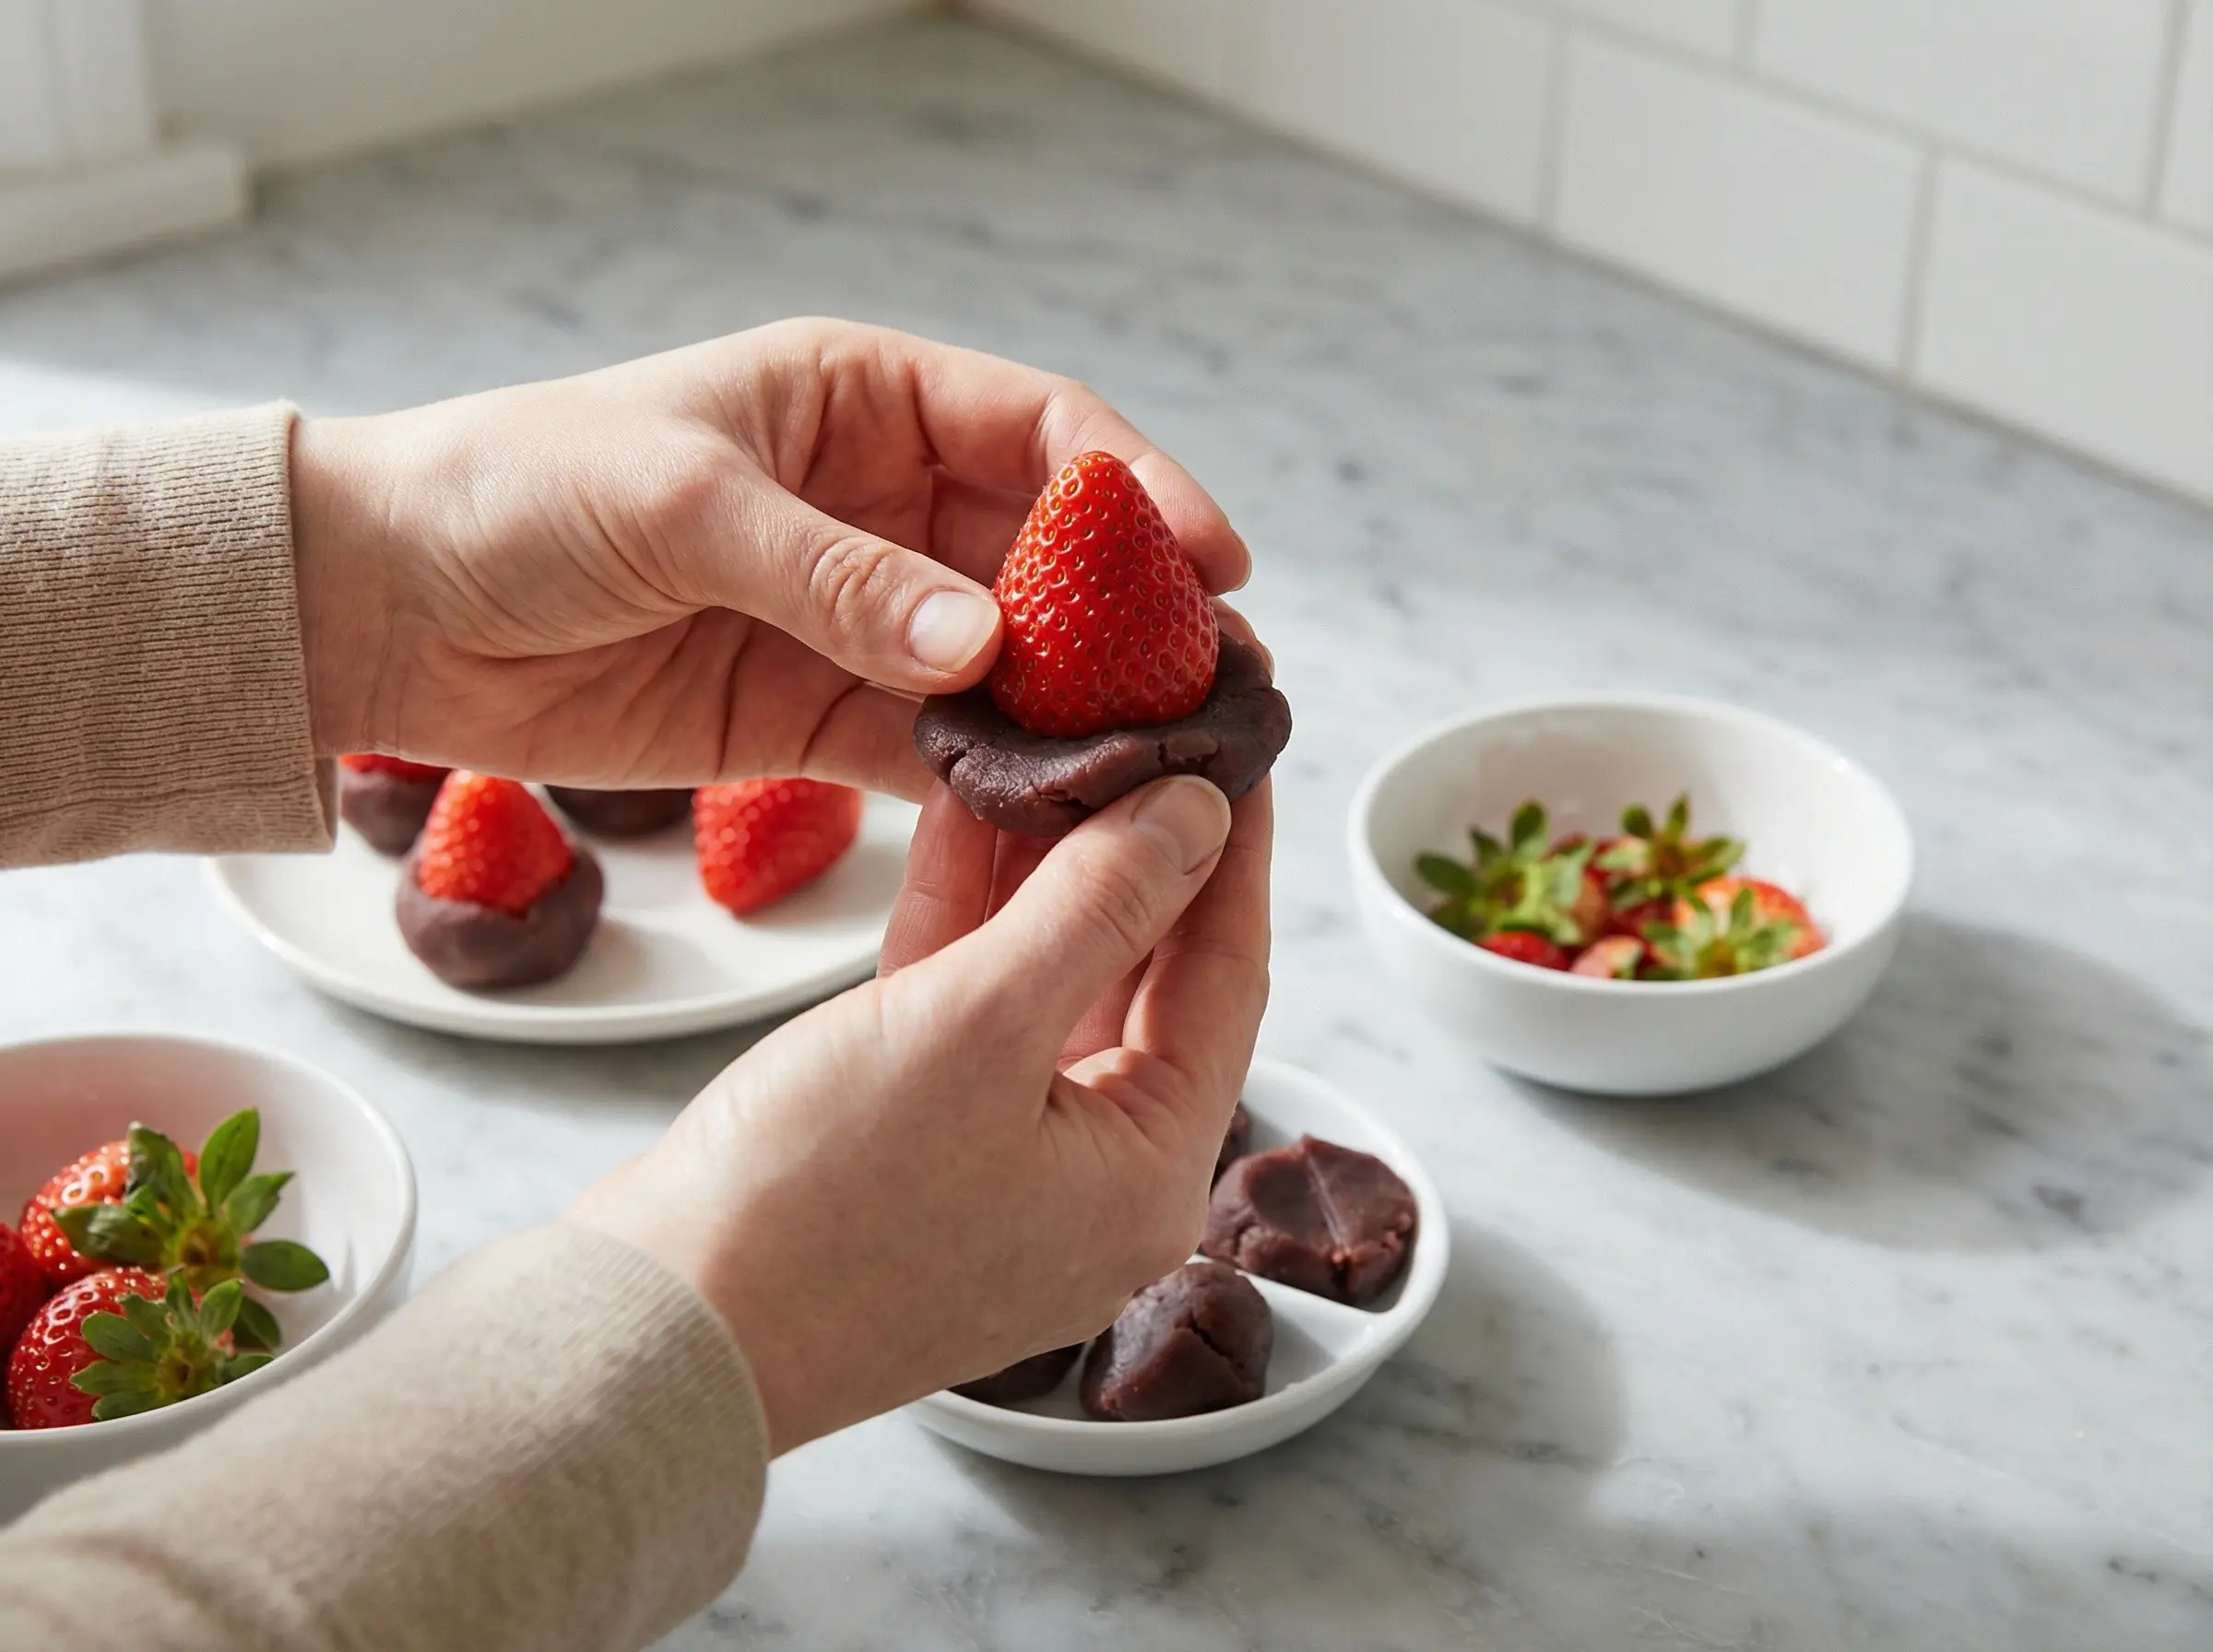
Step 1
Prepare the strawberries and anko first. Wash the strawberries gently and pat them completely dry - any moisture will make the mochi soggy and prevent the anko from sticking properly. Hull the strawberries by removing the green tops and cutting out the white core. Choose strawberries that are similar in size, ripe but still firm, and as conical as possible for the most attractive final shape. Divide the red bean paste into 8 equal portions, about 1 tablespoon each. Flatten each portion into a thin disc in your palm, place a strawberry pointed-end up in the center, and wrap the anko around the strawberry, covering the bottom two-thirds while leaving the pointed tip exposed. The anko layer should be thin and even. Set the wrapped strawberries aside.
Step 2
Prepare a clean work surface by generously dusting a large plate or baking sheet with potato starch or cornstarch - this prevents the mochi from sticking. Have additional starch ready for dusting your hands. Set out all your tools: a rubber spatula, a damp kitchen towel, and a small bowl of water for wetting your fingers. The mochi will be very hot and sticky when cooked, so proper preparation is essential for working with it quickly and safely.
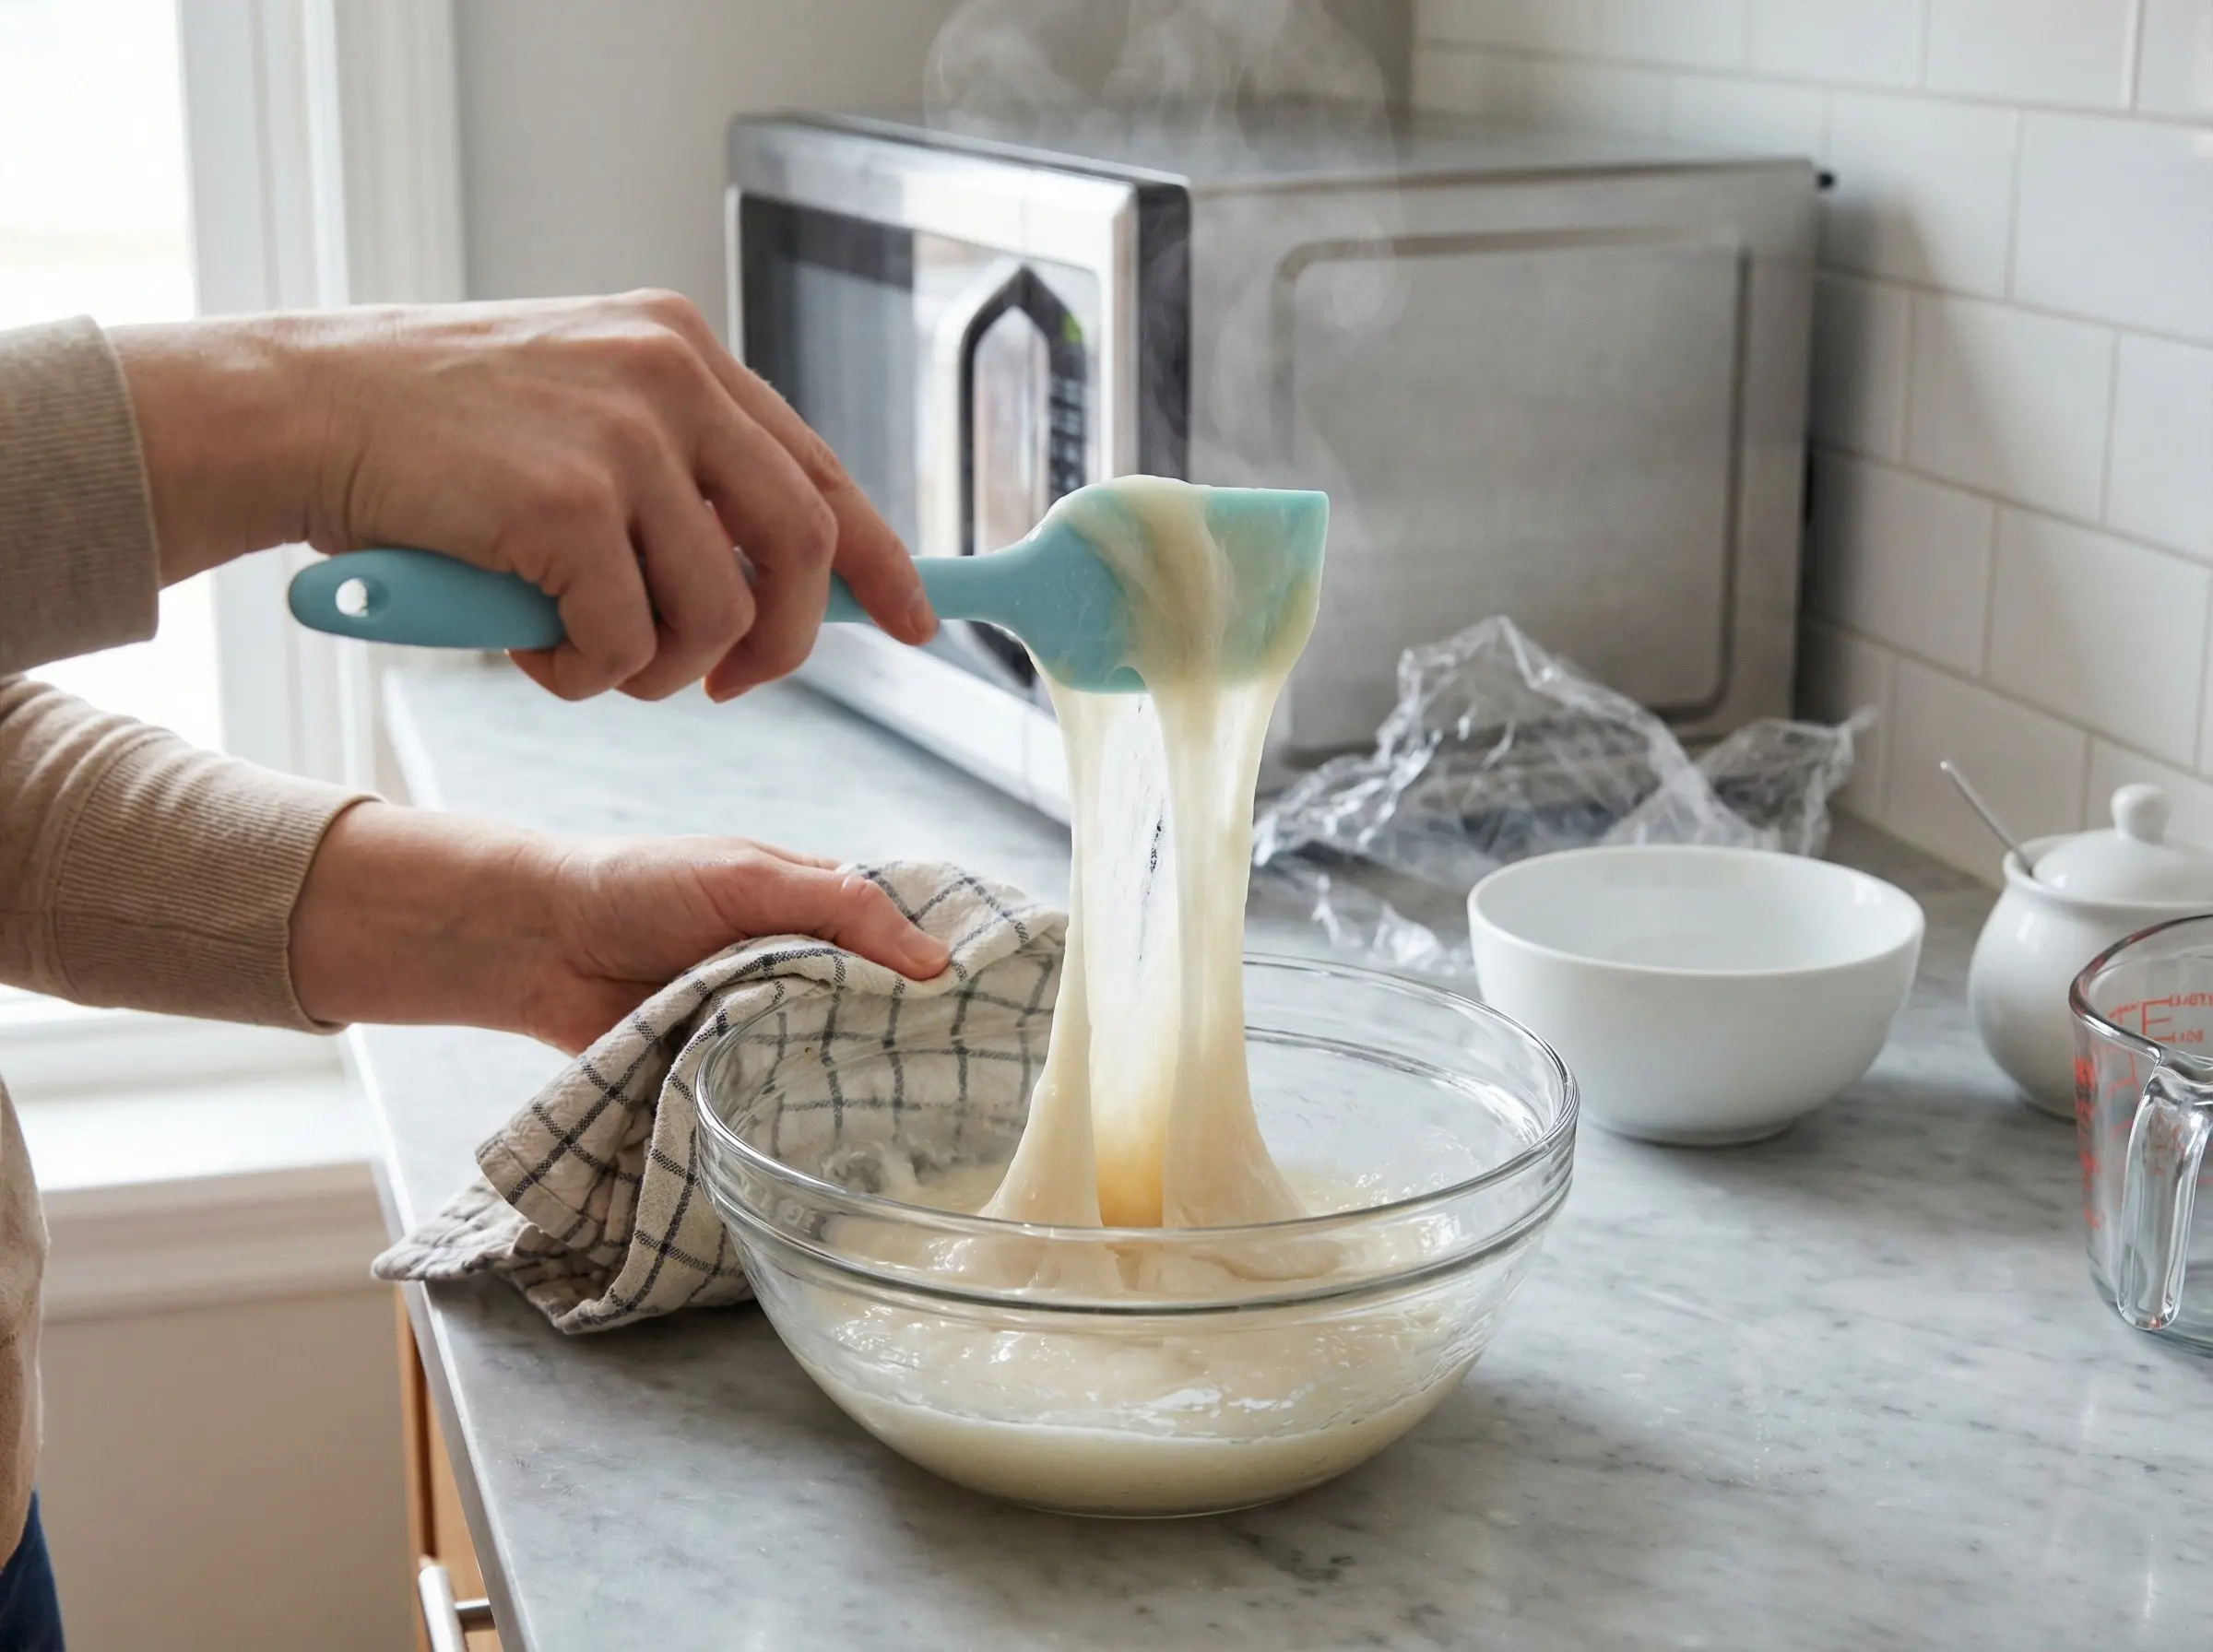
Step 3
Make the mochi dough. In a microwave-safe bowl, whisk together the mochiko (glutinous rice flour), sugar, and water until completely smooth with no lumps. Cover the bowl loosely with plastic wrap, leaving a small vent for steam to escape. Microwave on high for 2 minutes. Remove carefully - the bowl will be hot - and stir vigorously with a wet rubber spatula. The mixture will be partially cooked and lumpy. Cover again and microwave for another 1-2 minutes until the mochi is translucent, glossy, and pulls away from the sides of the bowl when stirred. It should be sticky and stretchy like melted mozzarella.
Step 4
Immediately transfer the hot mochi onto the starch-dusted surface. Dust the top generously with more starch and allow it to cool for 1-2 minutes until you can handle it - it will still be quite warm and very sticky. Dust your hands well with starch. Divide the mochi into 8 equal portions. The easiest way is to flatten the mochi into a rough rectangle and use a starch-dusted bench scraper or knife to cut it. Keep dusting with starch as needed to prevent sticking. Work quickly, as the mochi becomes less pliable as it cools.
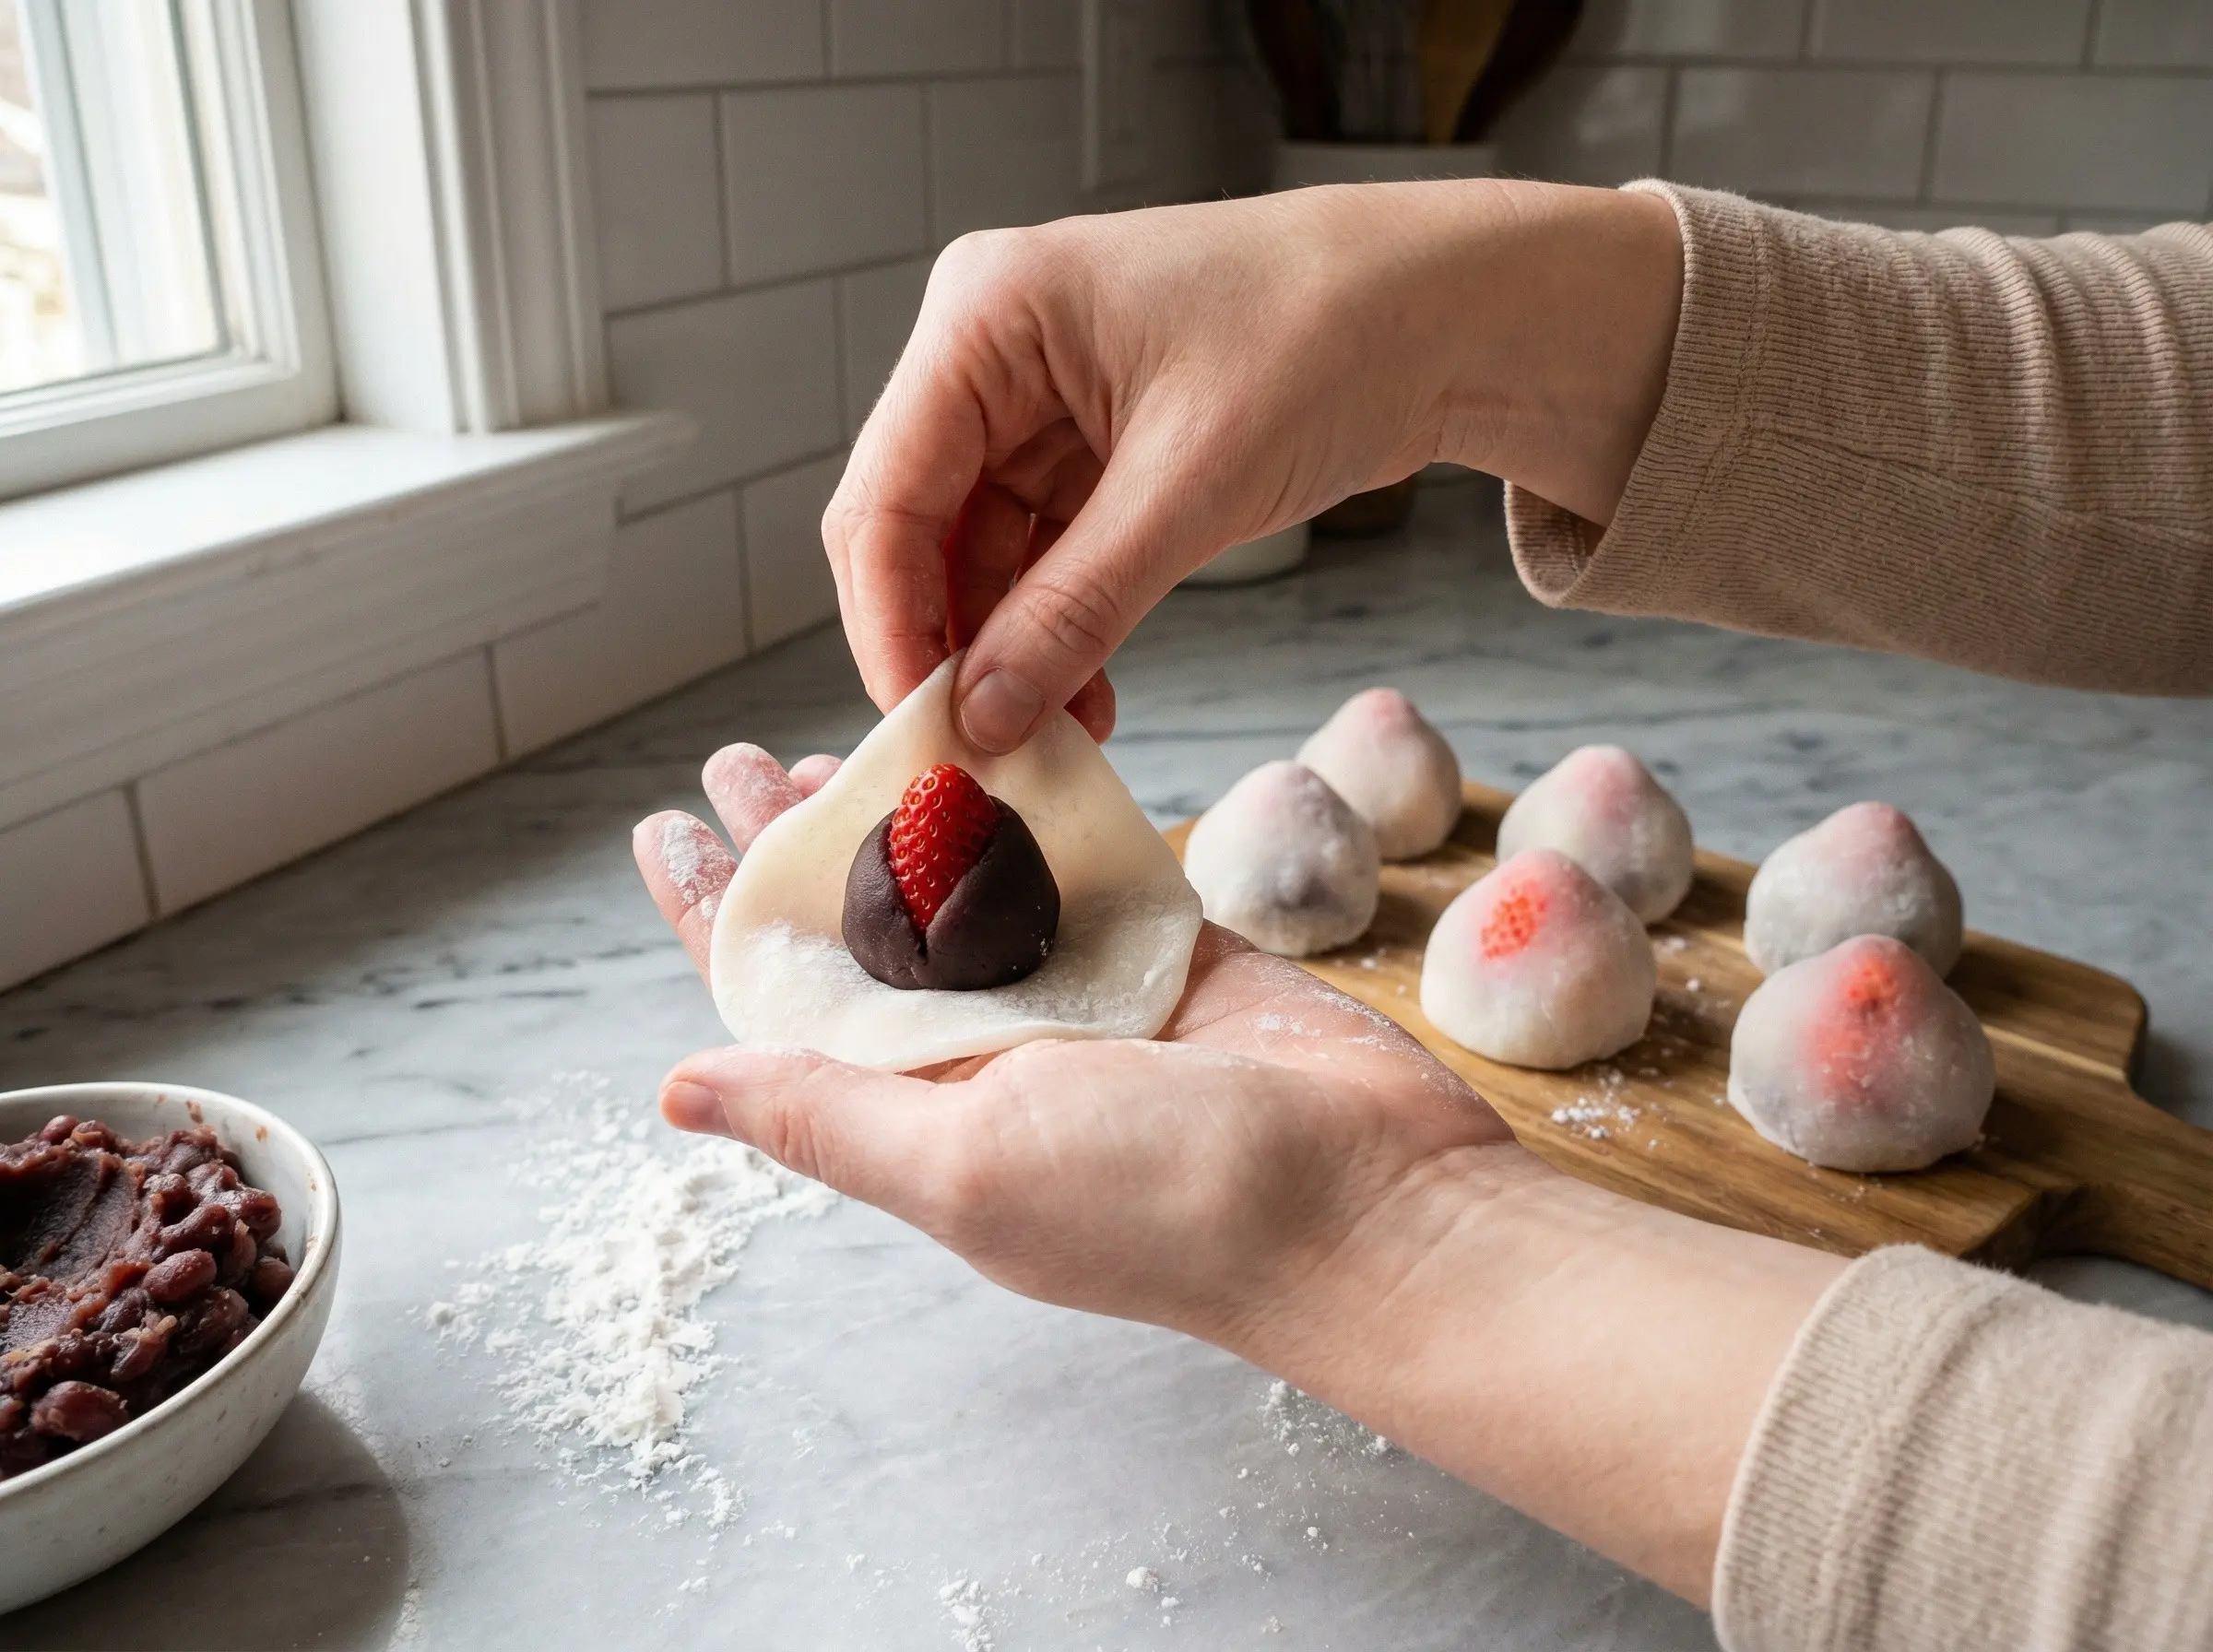
Step 5
Shape the daifuku one at a time while the mochi is still warm and pliable. Take one portion of mochi and flatten it into a thin circle about 3-4 inches in diameter - the center should be thinner than the edges, as the edges will gather at the bottom. Place an anko-wrapped strawberry in the center, pointed-end down. Gently stretch the mochi up and around the strawberry, pleating the edges together at the top to seal. Pinch off any excess mochi at the seam and pinch firmly to close. Turn the daifuku over so the smooth side faces up and the seam is on the bottom. The strawberry tip should be visible through the translucent mochi on top, glowing pink or red like a little jewel.
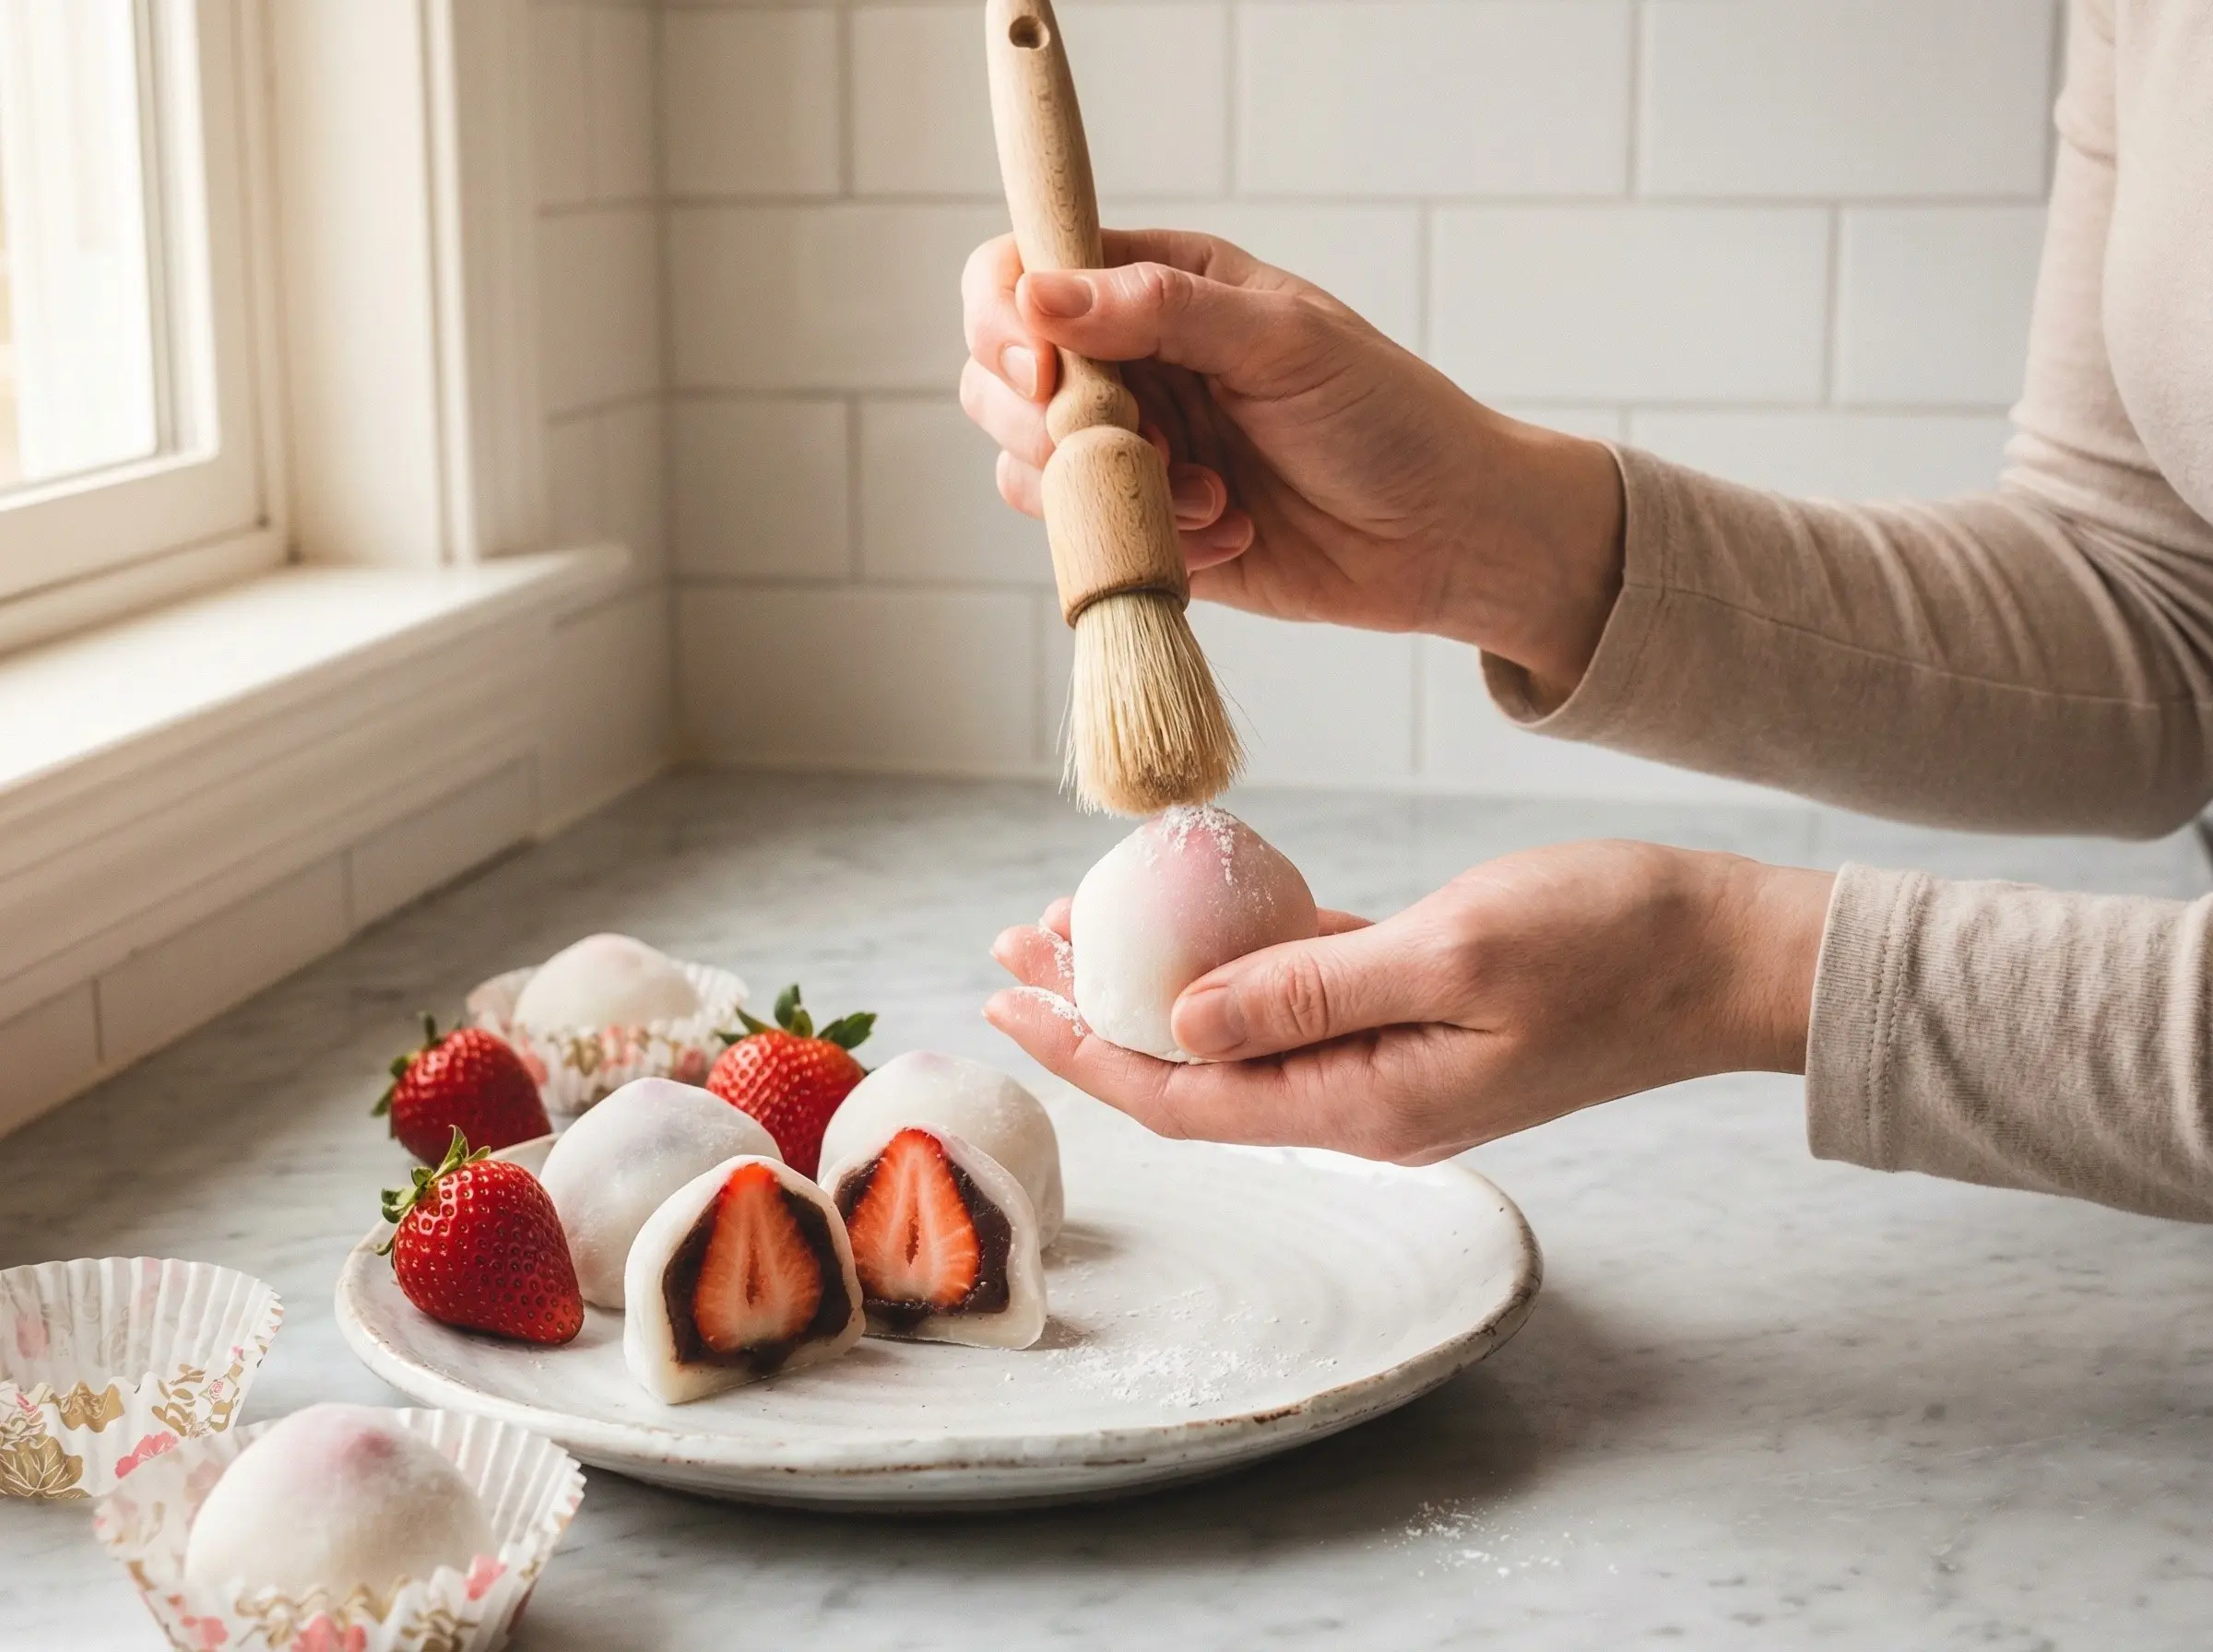
Step 6
Gently brush off any excess starch from the finished daifuku with a soft pastry brush or your fingers - too much starch makes them look dusty and affects the texture. Place each completed daifuku on a serving plate or in individual paper cups. Ichigo daifuku are best eaten the same day they are made, ideally within a few hours. The mochi will harden over time and the strawberry will begin to release juice that makes the daifuku soggy. If you must store them, keep at cool room temperature for up to 6-8 hours - do not refrigerate, as this hardens the mochi. Serve as a beautiful ending to a Japanese meal, with afternoon tea, or as a special seasonal treat. When you bite in, you should experience the soft, chewy mochi, the sweet earthy anko, and finally the burst of fresh, juicy strawberry - a perfect harmony of textures and flavors.
You Might Also Like