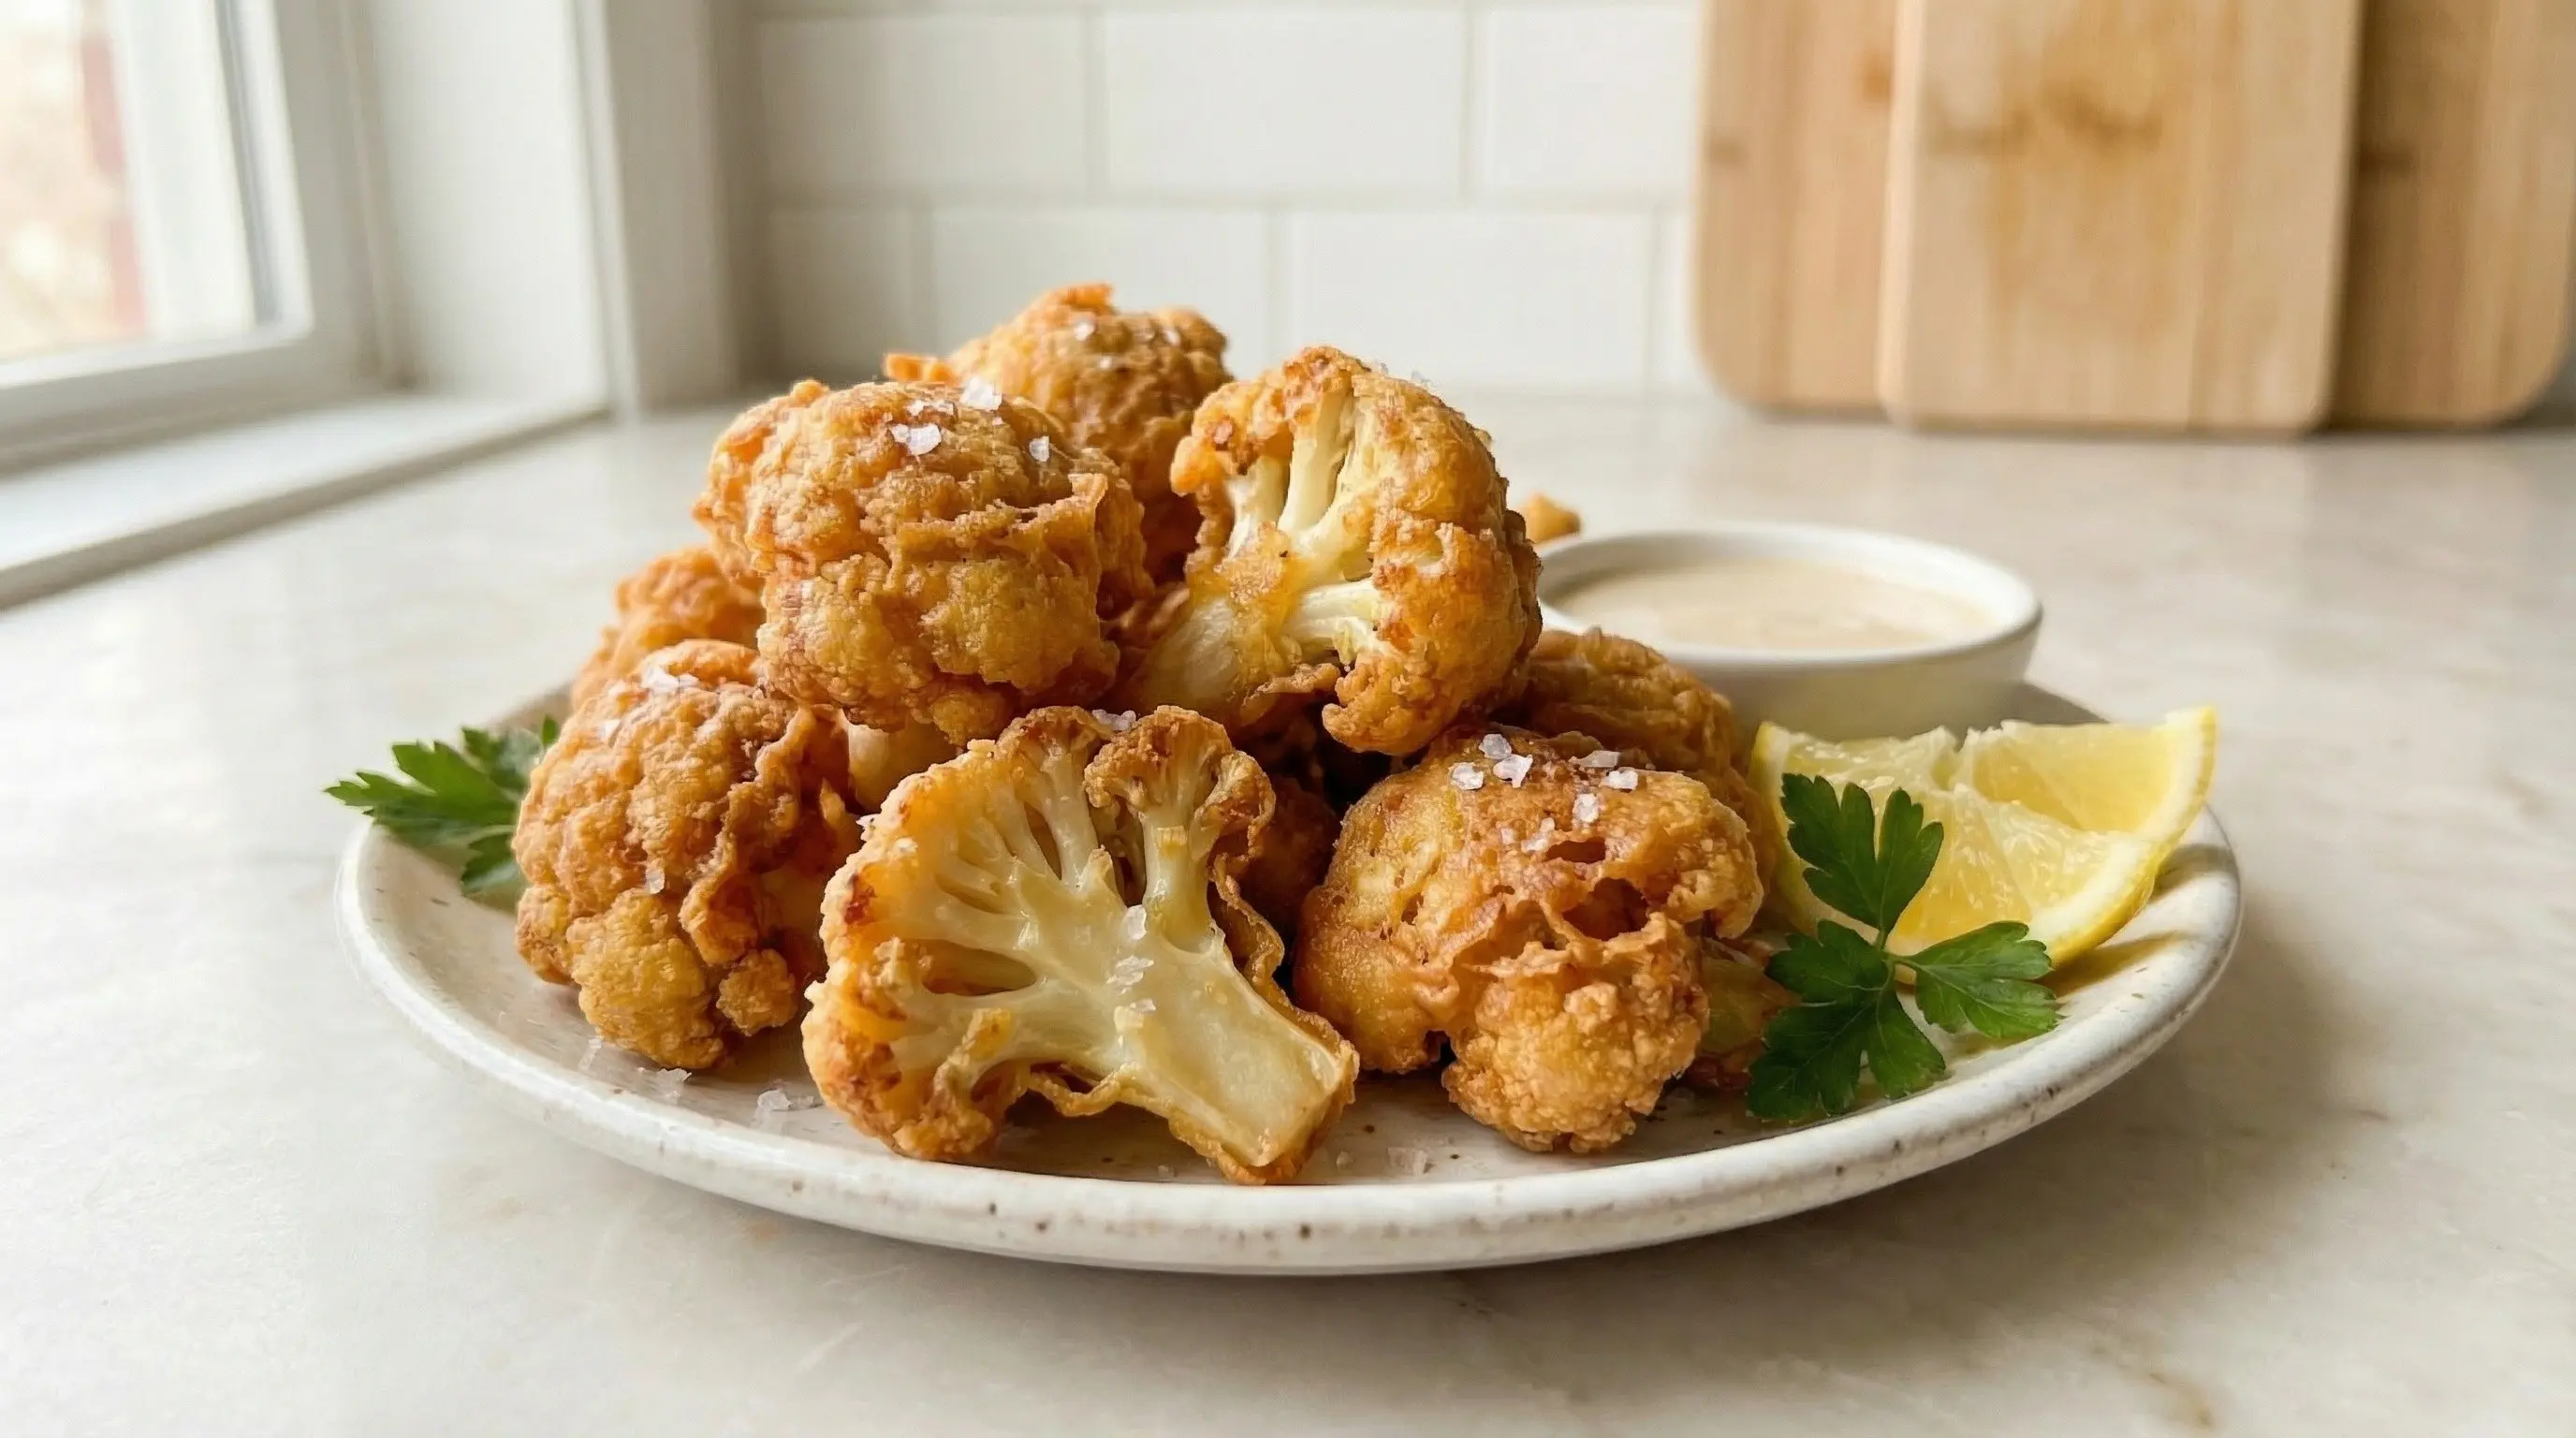
Fried Cauliflower
Learn how to make perfectly crispy fried cauliflower with a light, golden batter and tender interior. This irresistible appetizer or side dish is crunchy, flavorful, and utterly addictive!
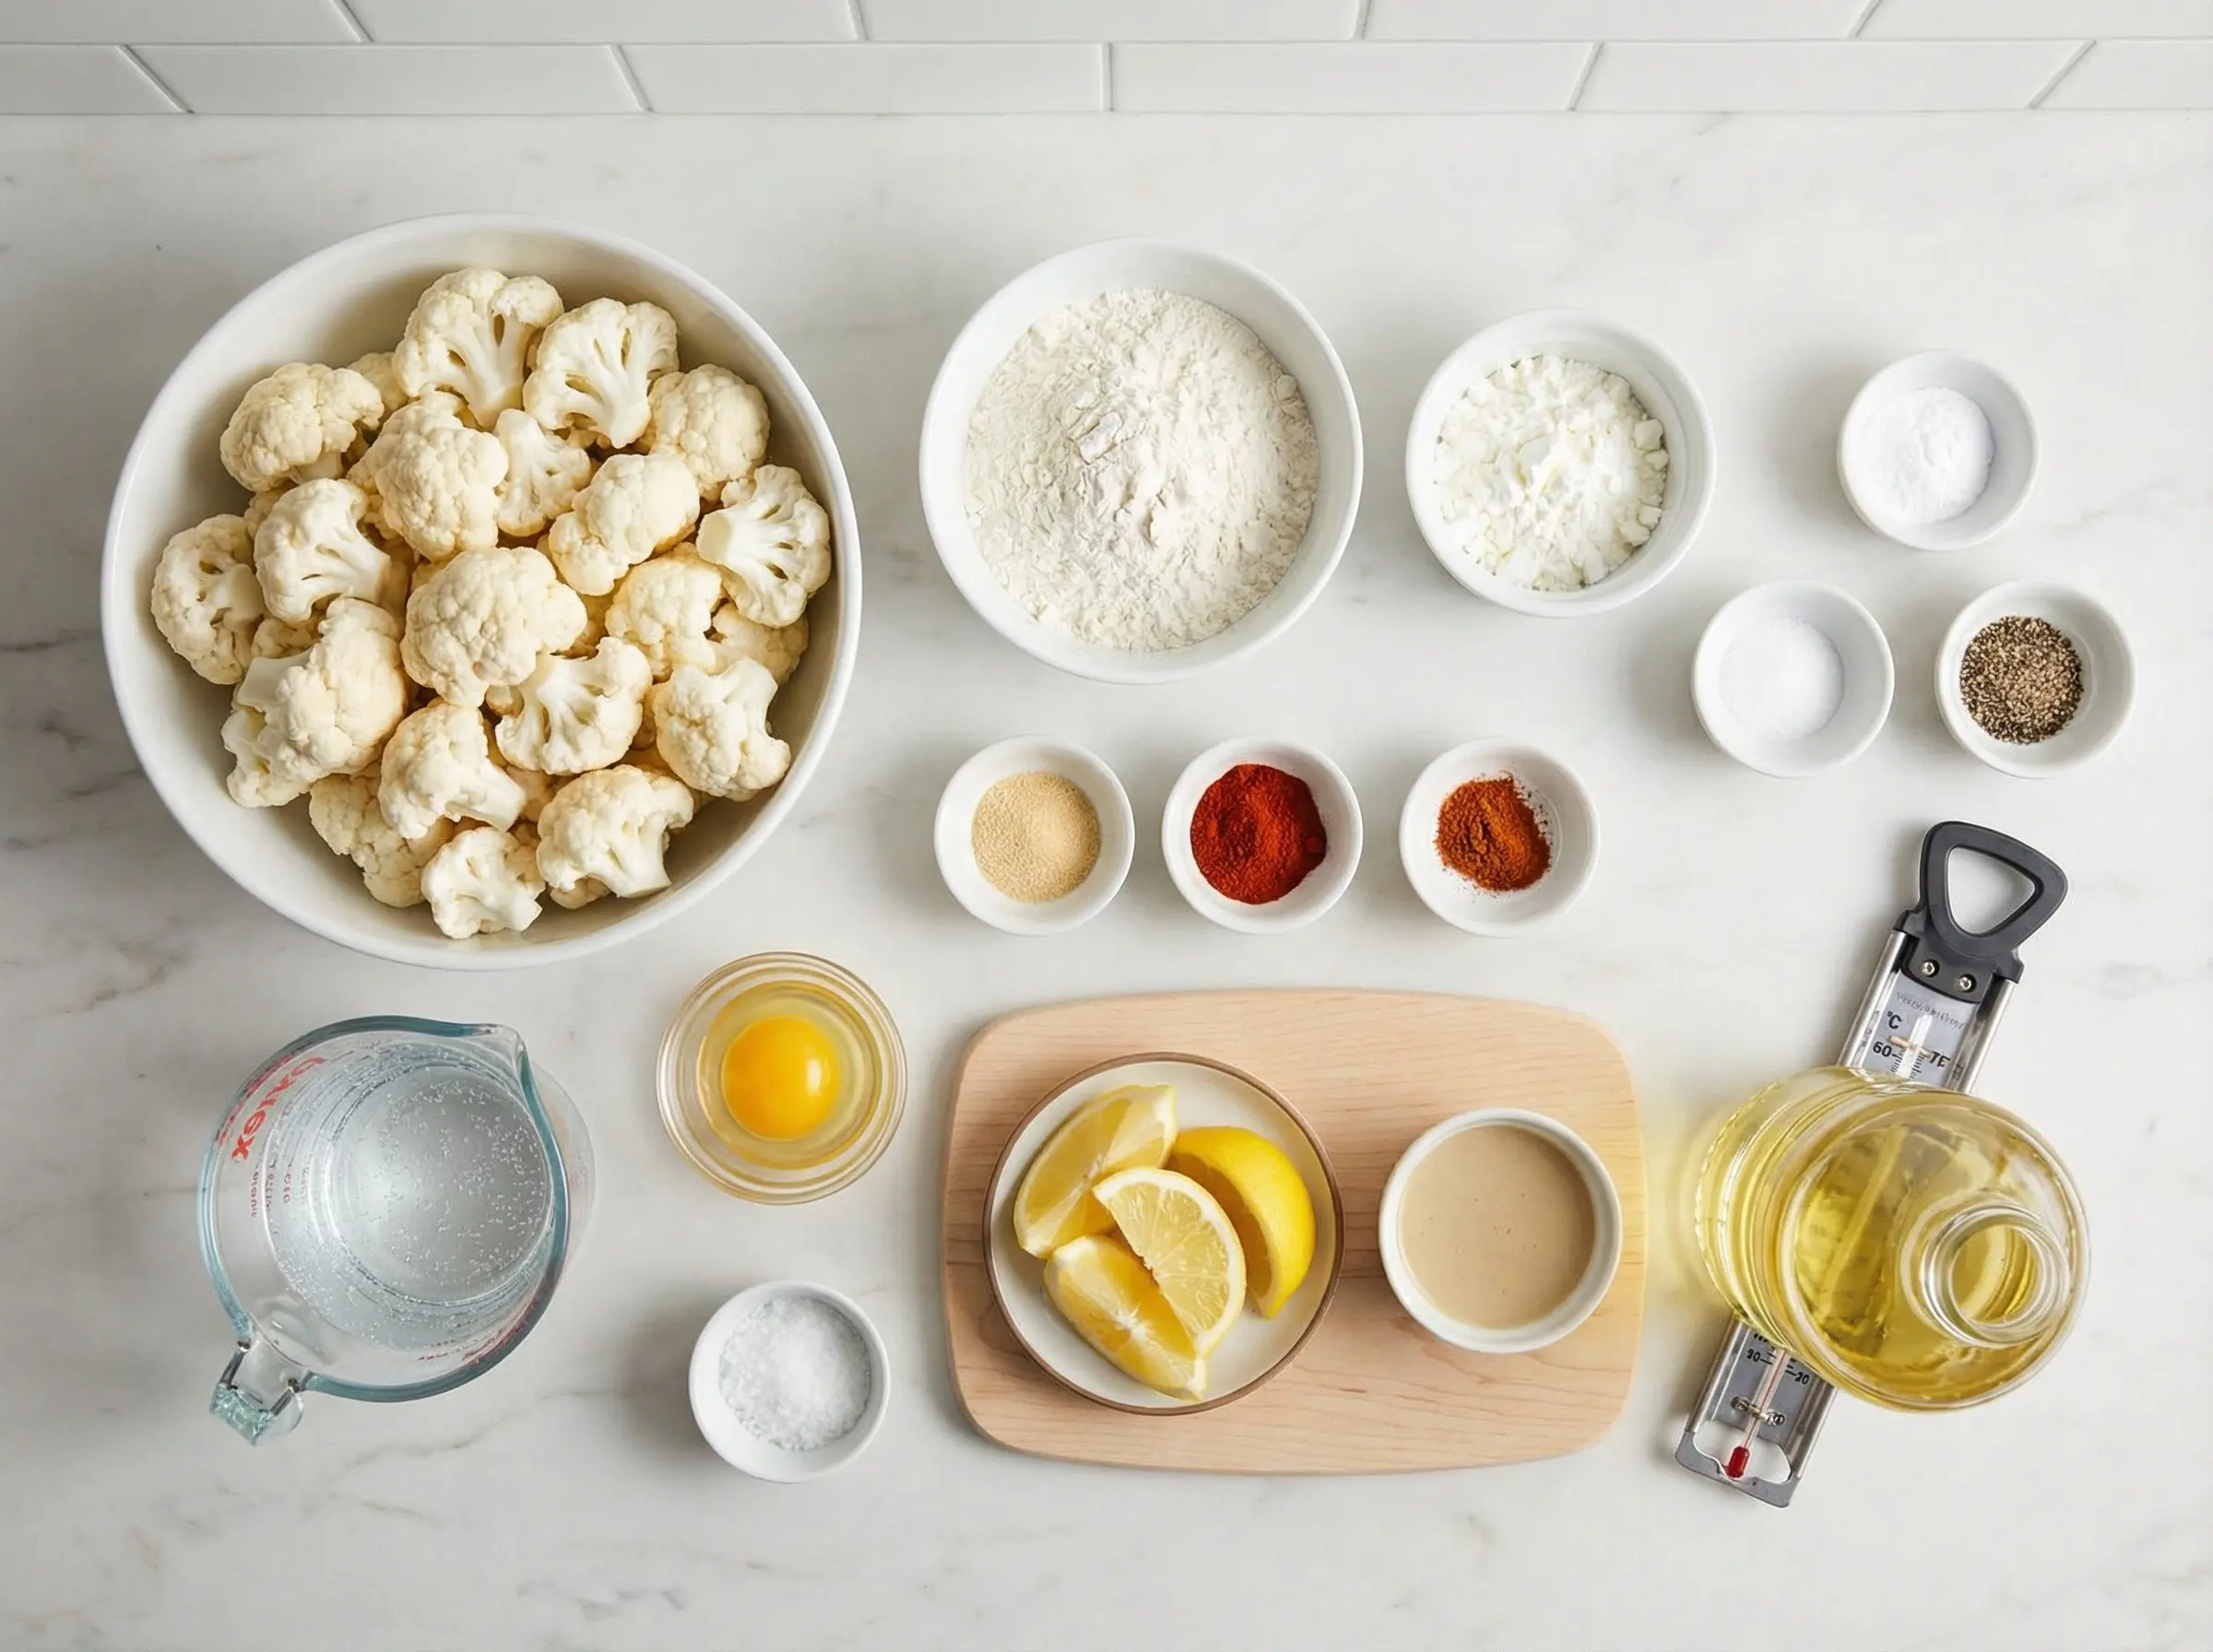
Ingredients
The Story
Fried cauliflower is a dish that transcends borders, appearing in cuisines around the world wherever this versatile vegetable is grown and appreciated. From the crispy gobi pakora of Indian street food to the Italian cavolfiore fritto, from Middle Eastern arnabeet maqli to American bar-food cauliflower bites, every culture has discovered the magic that happens when cauliflower meets hot oil. The vegetable's unique structure - tight florets with countless nooks and crannies - makes it ideal for frying, as the batter clings to every surface and creates an extraordinary crispy coating that gives way to a tender, almost creamy interior. Cauliflower has been cultivated in the Mediterranean region for over two thousand years, with the ancient Romans and Greeks being among the first to appreciate its delicate flavor. The practice of battering and frying vegetables became widespread during the Renaissance, when Italian and Spanish cooks developed sophisticated frying techniques. Fried cauliflower became particularly beloved in Middle Eastern cuisine, where it is often served as part of a mezze spread alongside tahini sauce, or incorporated into dishes like maqluba (an upside-down rice dish). In India, gobi pakora became one of the most popular street foods, with vendors frying cauliflower in spiced chickpea batter during the monsoon season when the craving for crispy, warming snacks peaks. What makes fried cauliflower so universally beloved is the textural transformation that occurs during frying. Raw cauliflower can seem somewhat boring - pale, dense, and mildly bitter. But when coated in a light batter and submerged in hot oil, something magical happens: the exterior becomes shatteringly crisp and golden while the interior steams to a soft, almost nutty sweetness. The contrast between the crunchy coating and tender vegetable is immensely satisfying. The batter itself can be varied endlessly - a light tempura-style coating, a thick beer batter, a spiced chickpea flour pakora batter, or a simple flour and cornstarch mixture - each producing different textures and flavor profiles. Served with a dipping sauce like tahini, ranch, buffalo sauce, or spiced yogurt, fried cauliflower is the ultimate proof that vegetables can be just as indulgent and crave-worthy as any fried food.
Instructions
Step 1
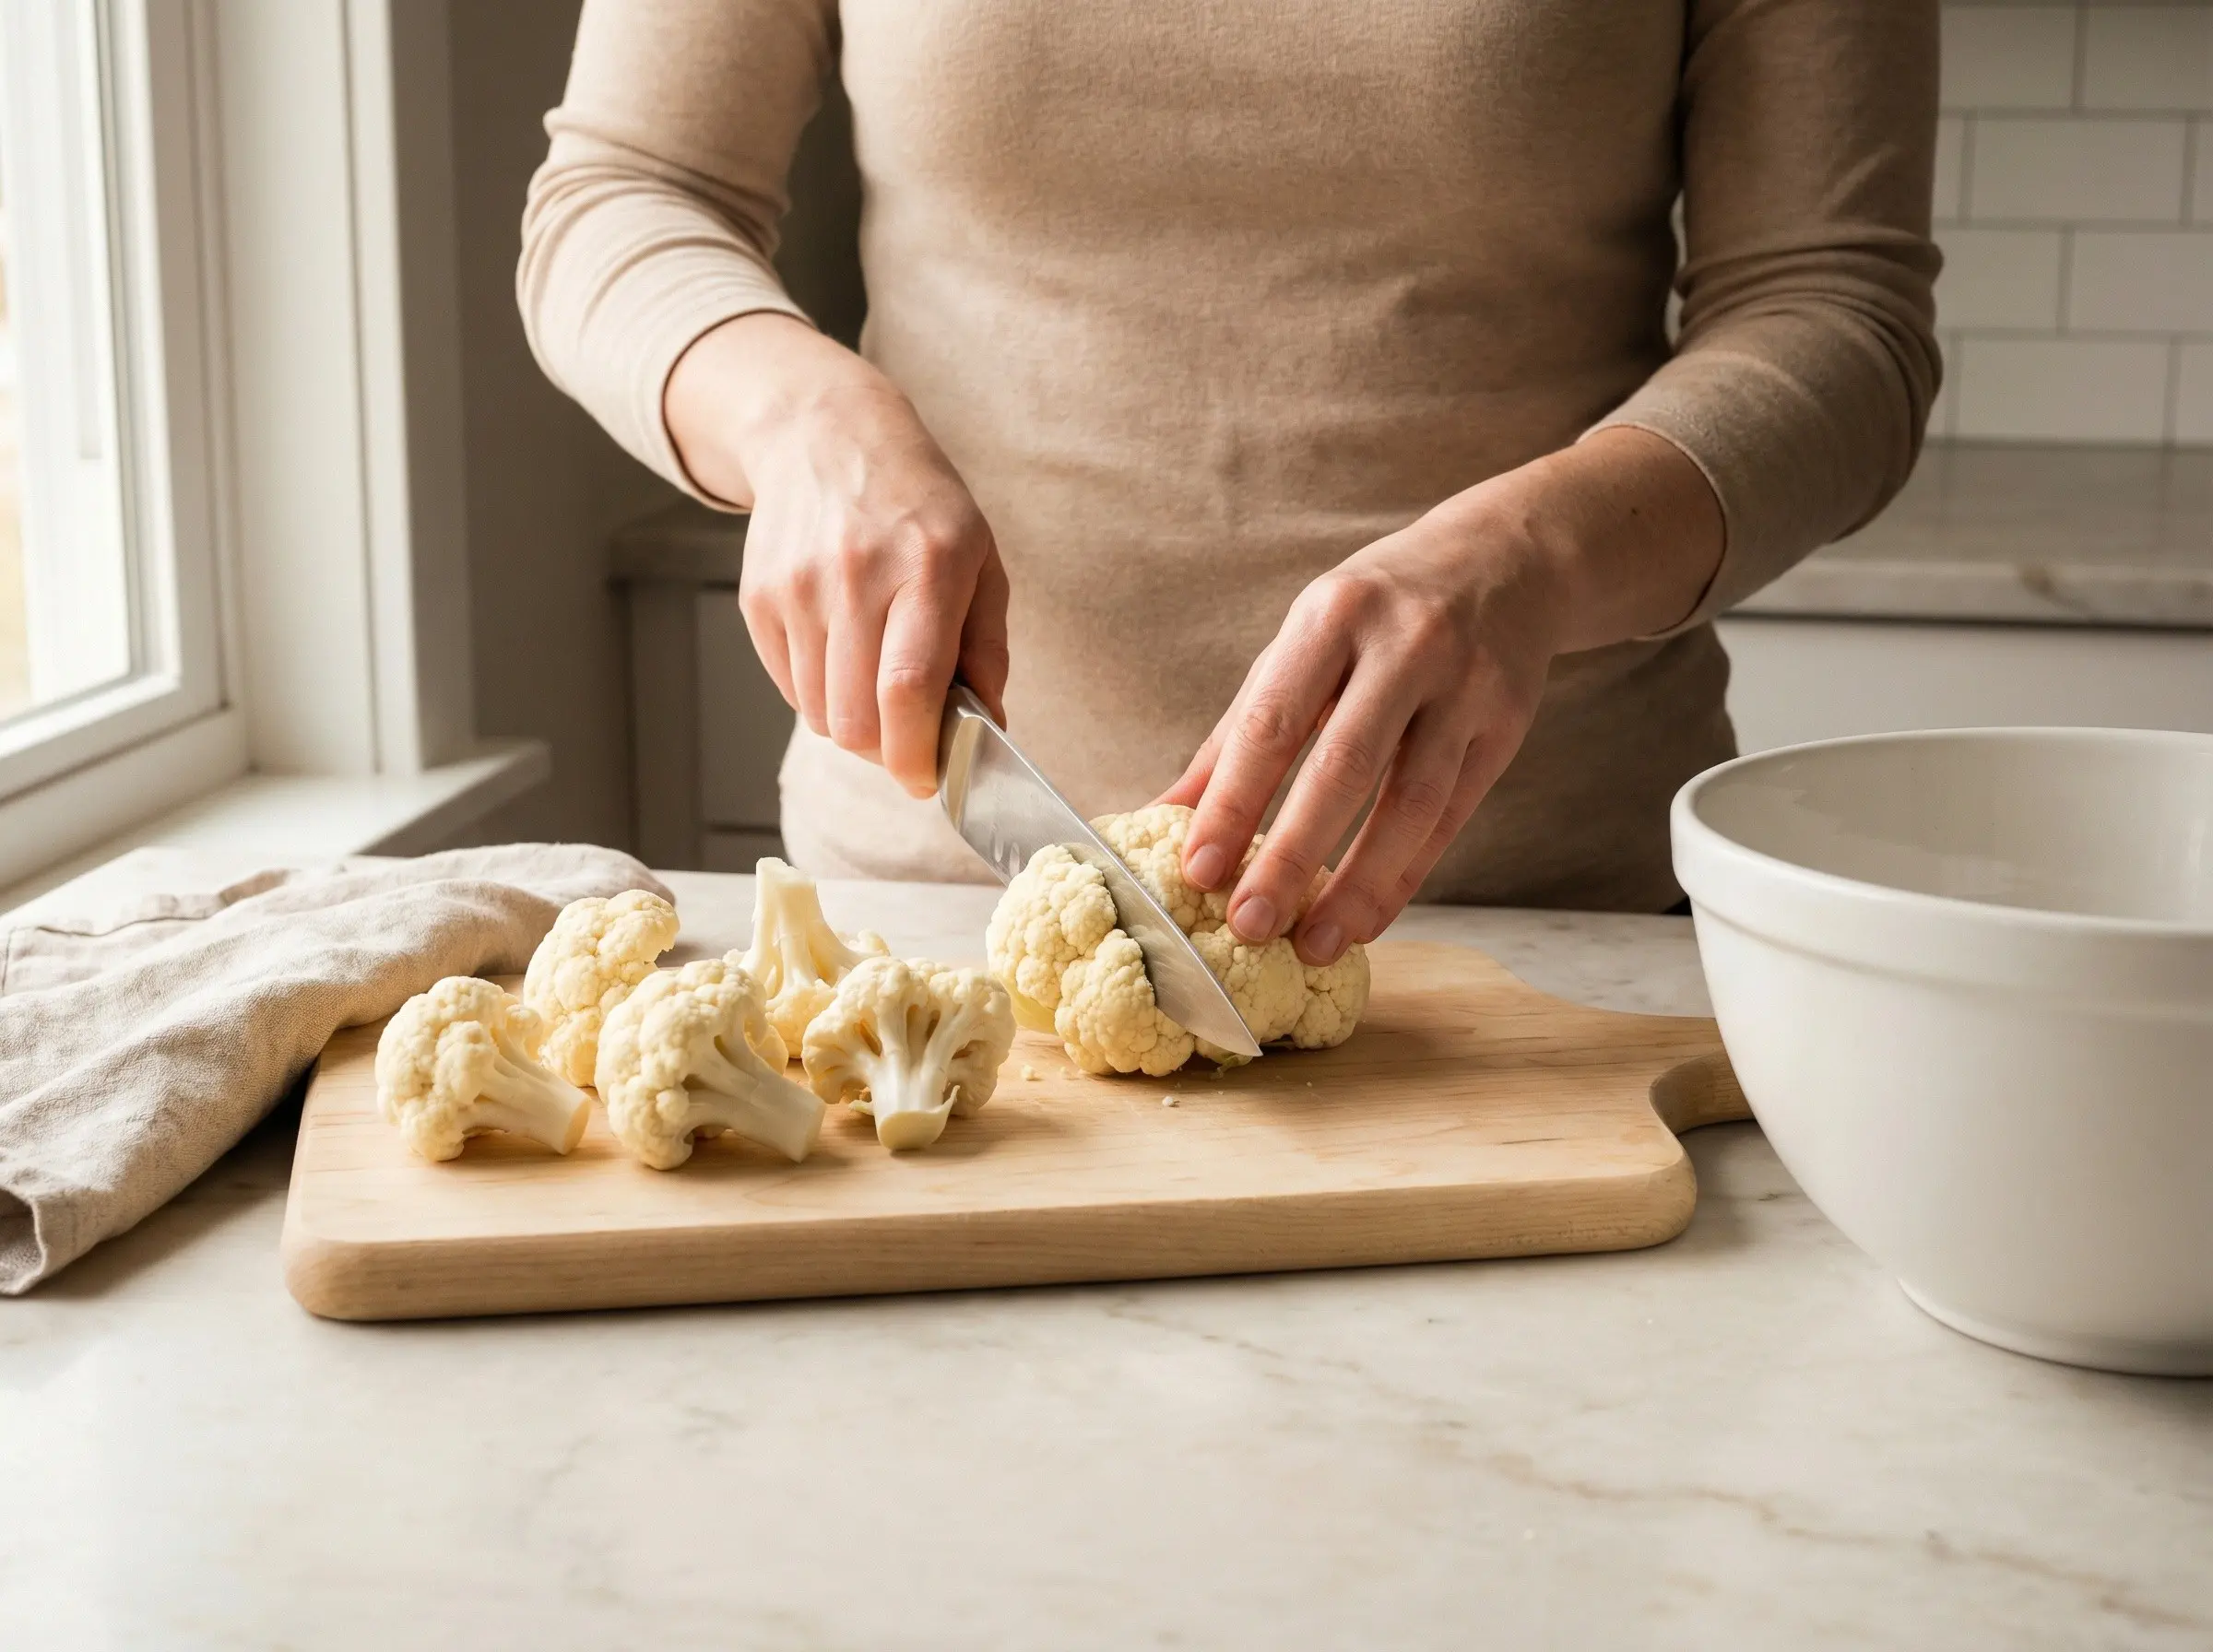
Prepare the cauliflower by cutting it into medium-sized florets, about 1.5 to 2 inches across. Try to keep the florets similar in size so they cook evenly. Leave a bit of stem attached to each floret - it provides a natural handle for dipping and eating. Wash the florets and dry them thoroughly with paper towels or a clean kitchen towel. This step is essential: wet cauliflower will cause the oil to splatter dangerously and will prevent the batter from adhering properly. The florets should be completely dry before battering.
Step 2
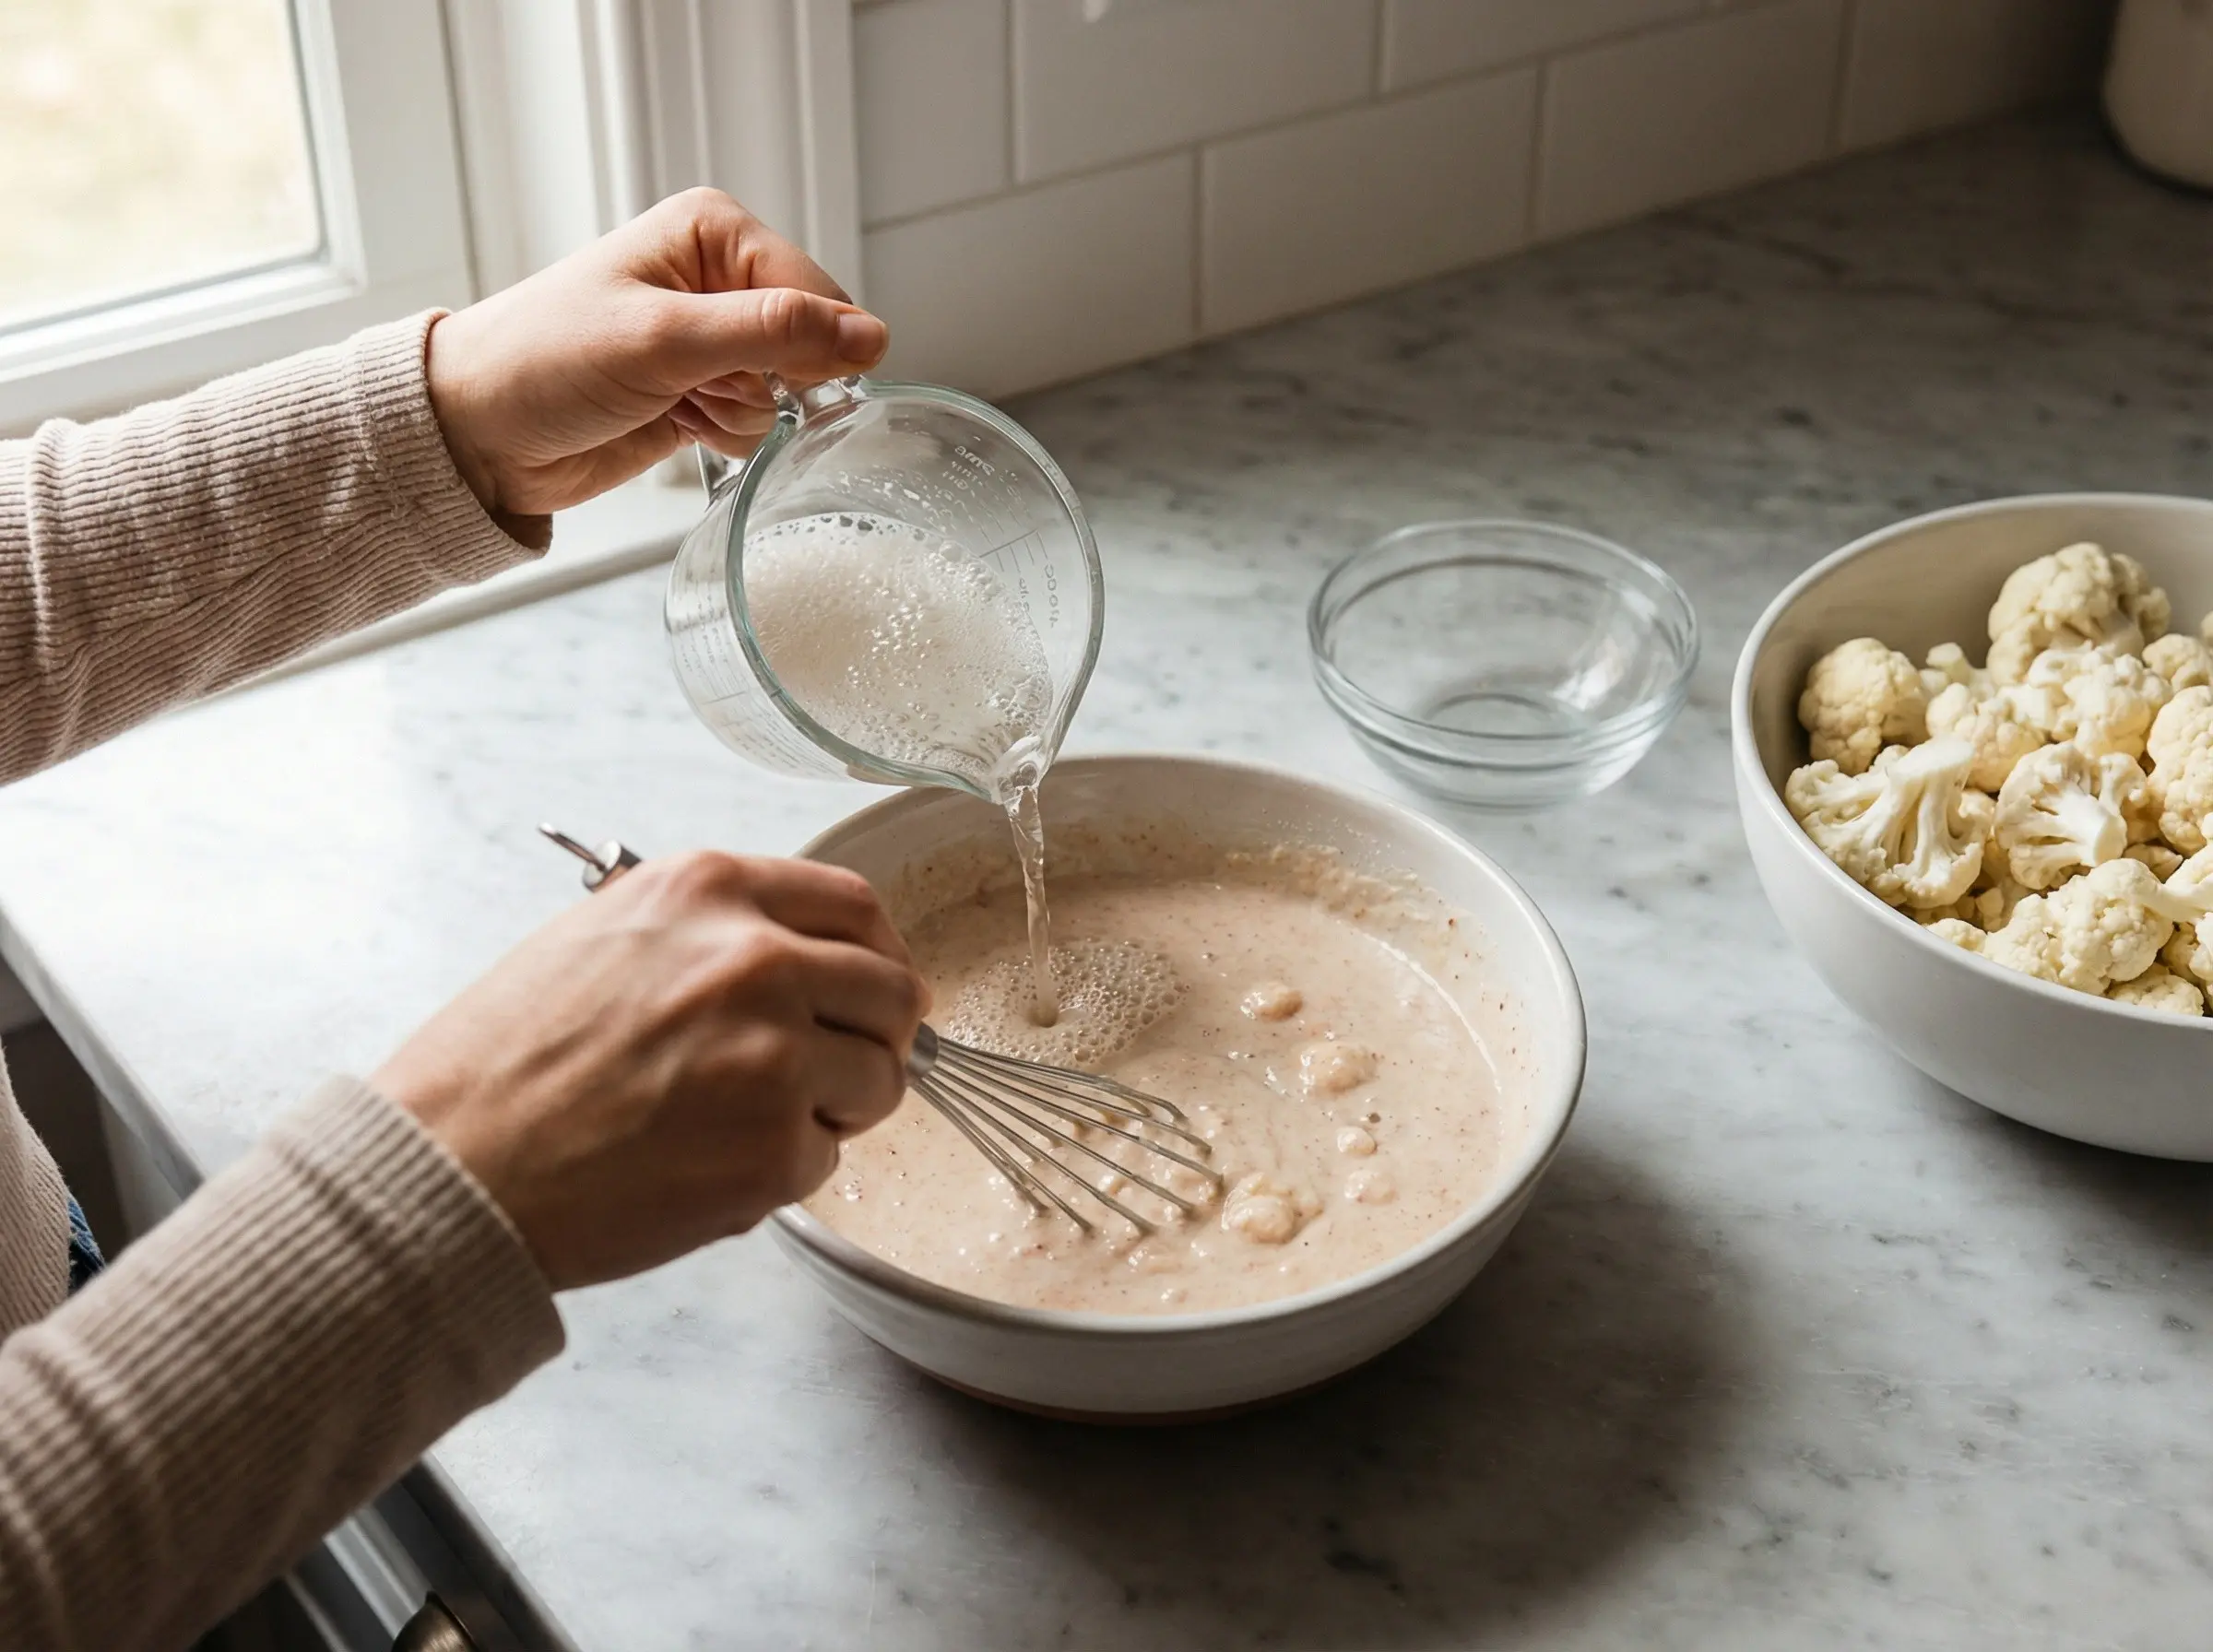
Make the batter. In a large bowl, whisk together the flour, cornstarch, baking powder, salt, black pepper, garlic powder, paprika, and cayenne pepper if using. The cornstarch is key to achieving an extra-crispy coating, and the baking powder creates lightness by releasing tiny bubbles when the batter hits the hot oil. In a separate small bowl, lightly beat the egg, then whisk in the cold sparkling water (or beer). Cold liquid is crucial - it keeps the batter from developing too much gluten, resulting in a lighter, crispier coating.
Step 3
Pour the wet ingredients into the dry ingredients and whisk until just combined. A few small lumps are fine - do not overmix or the batter will become tough and chewy rather than light and crispy. The batter should be the consistency of thin pancake batter, coating a spoon but dripping off easily. If it is too thick, add a splash more sparkling water. If too thin, add a tablespoon of flour. Let the batter rest for 5 minutes while you heat the oil - this allows any remaining lumps to hydrate and the gluten to relax.
Step 4
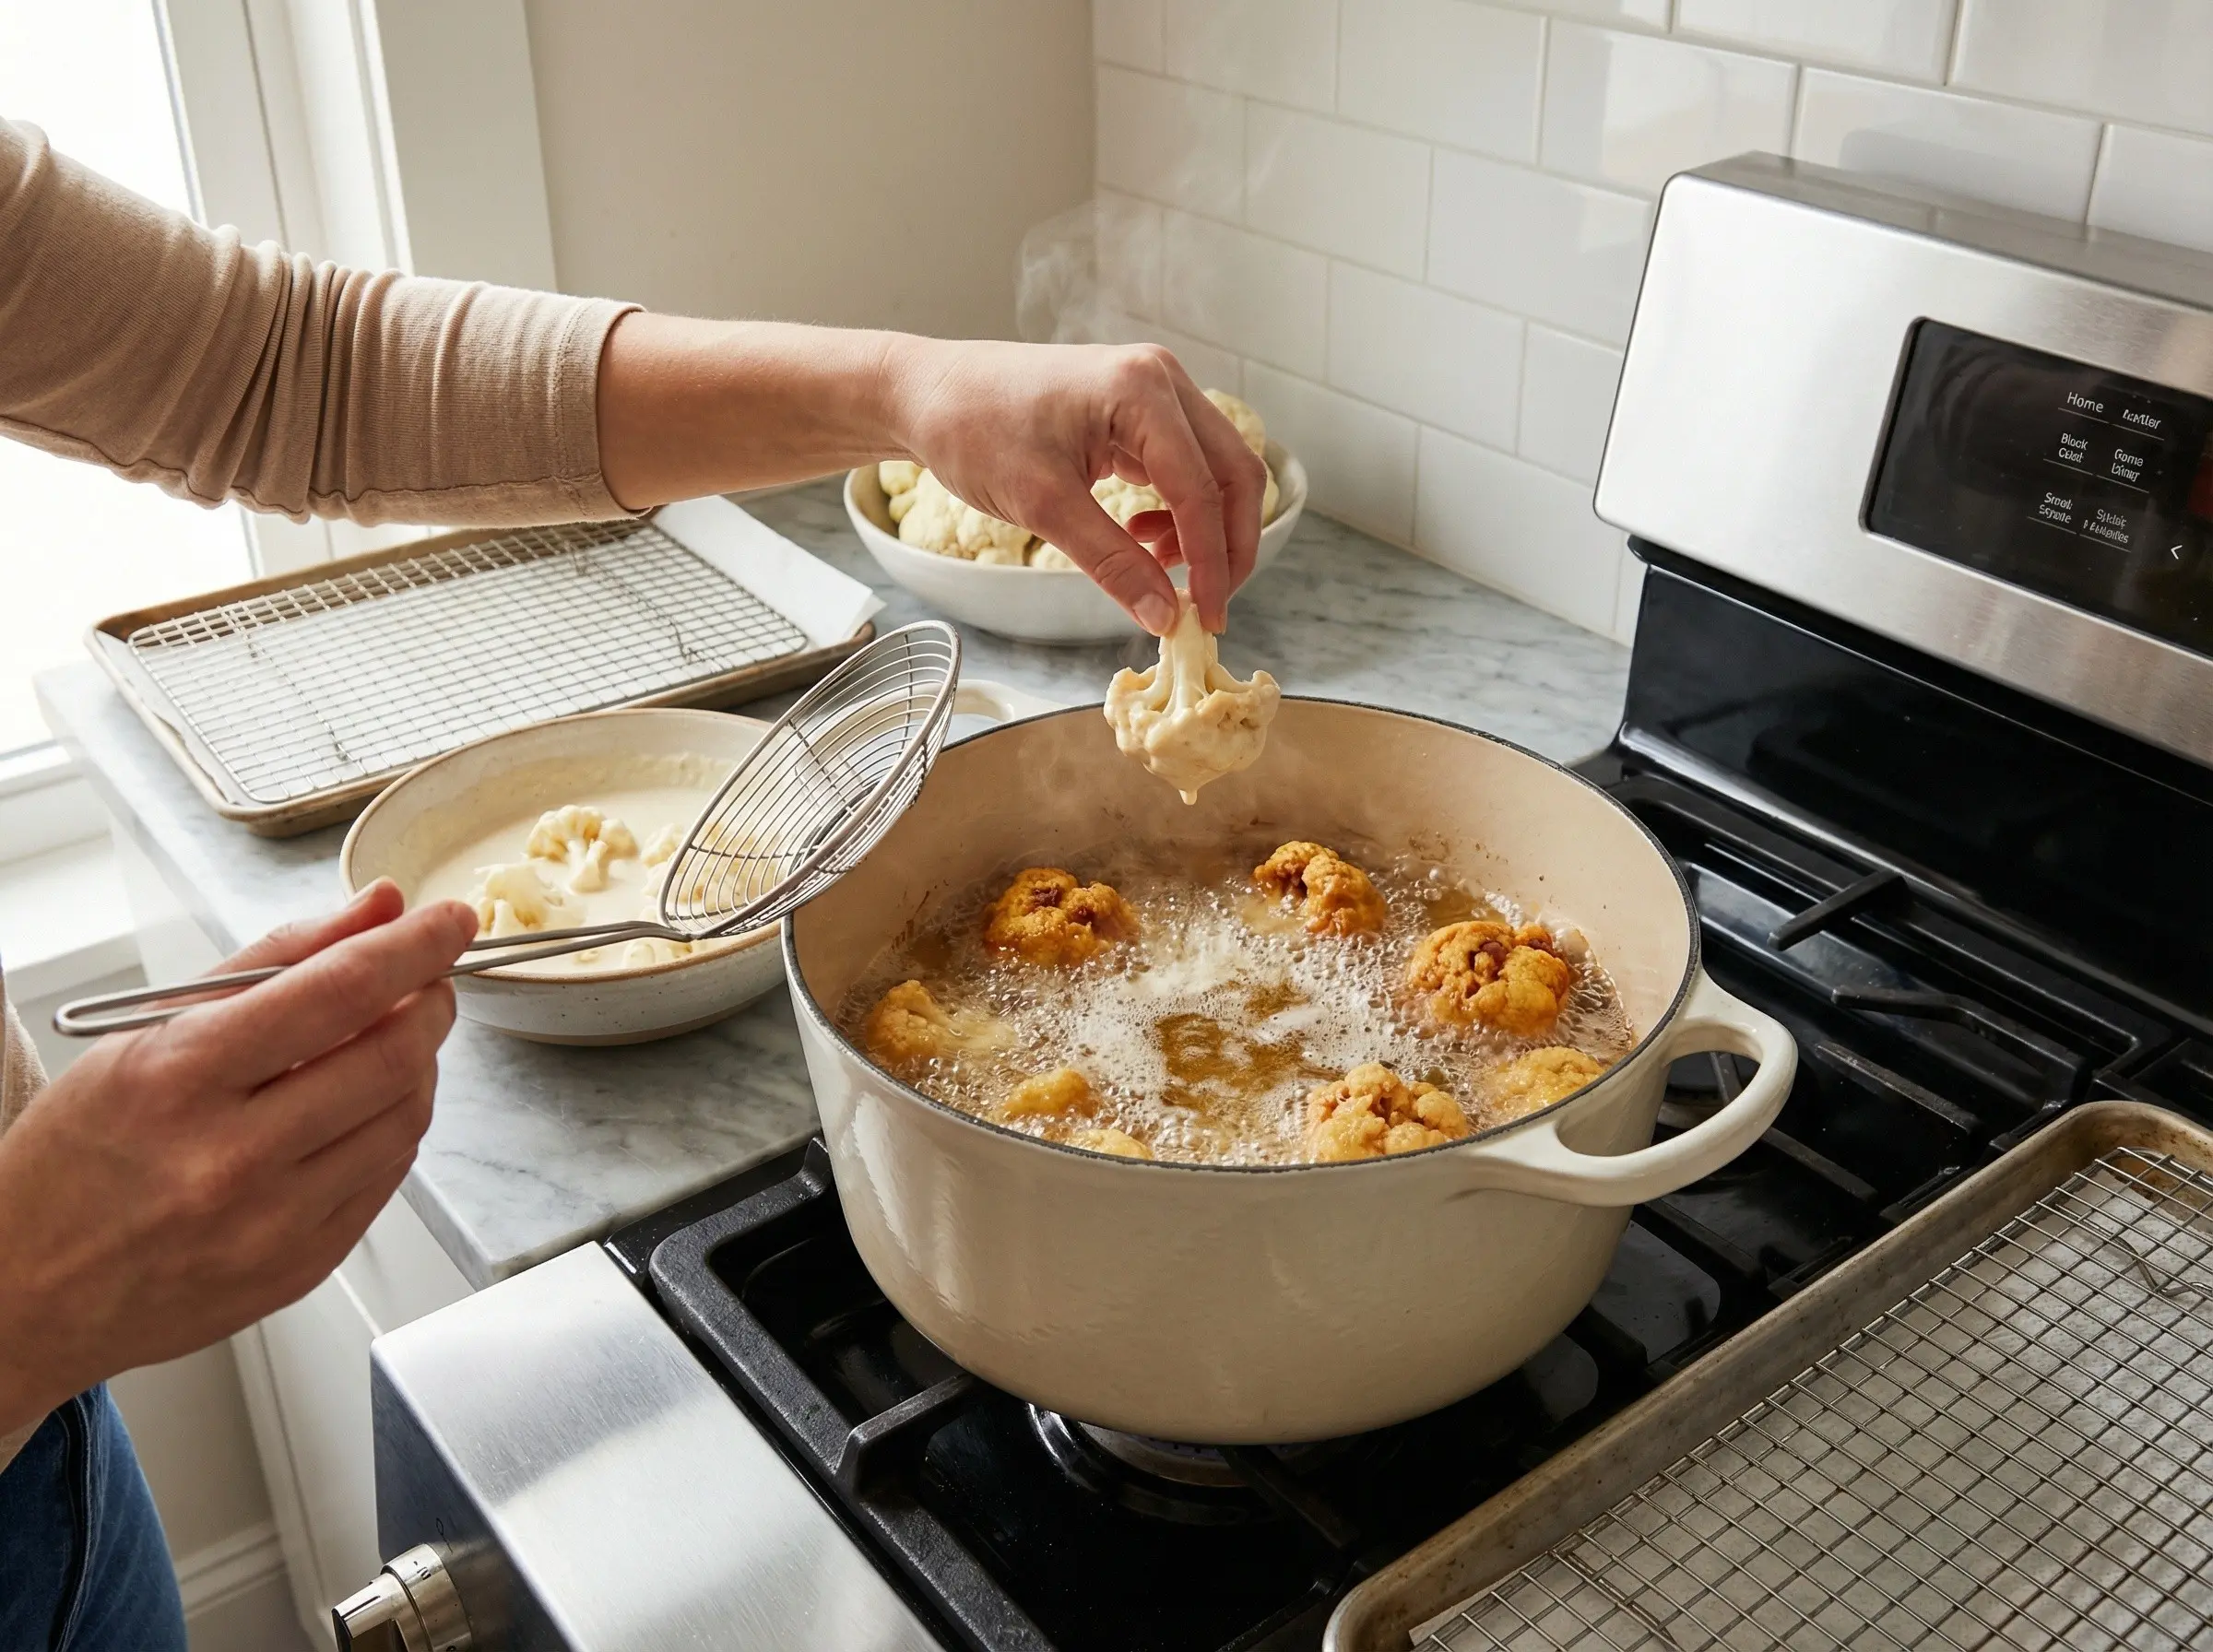
Heat vegetable oil in a deep pot, Dutch oven, or deep fryer to 375 degrees F. Use enough oil so the cauliflower can float freely - at least 3 inches deep. Use a thermometer to monitor the temperature accurately; maintaining proper heat is essential for crispy results. If the oil is too cool, the cauliflower will absorb oil and become greasy. If too hot, the outside will burn before the inside cooks through. Line a baking sheet with paper towels or a wire rack for draining the fried cauliflower.
Step 5
Working in batches to avoid overcrowding, dip each cauliflower floret into the batter, turning to coat completely and letting excess batter drip off for a few seconds. Carefully lower the battered florets into the hot oil - do not drop them from high up or the oil will splash. Fry 5-6 florets at a time, depending on the size of your pot. Cook for 3-4 minutes, turning occasionally with a slotted spoon or spider, until the cauliflower is deep golden brown and the batter is crispy and set. The florets should float when done and have a satisfying crunch when tapped with the spoon.
Step 6
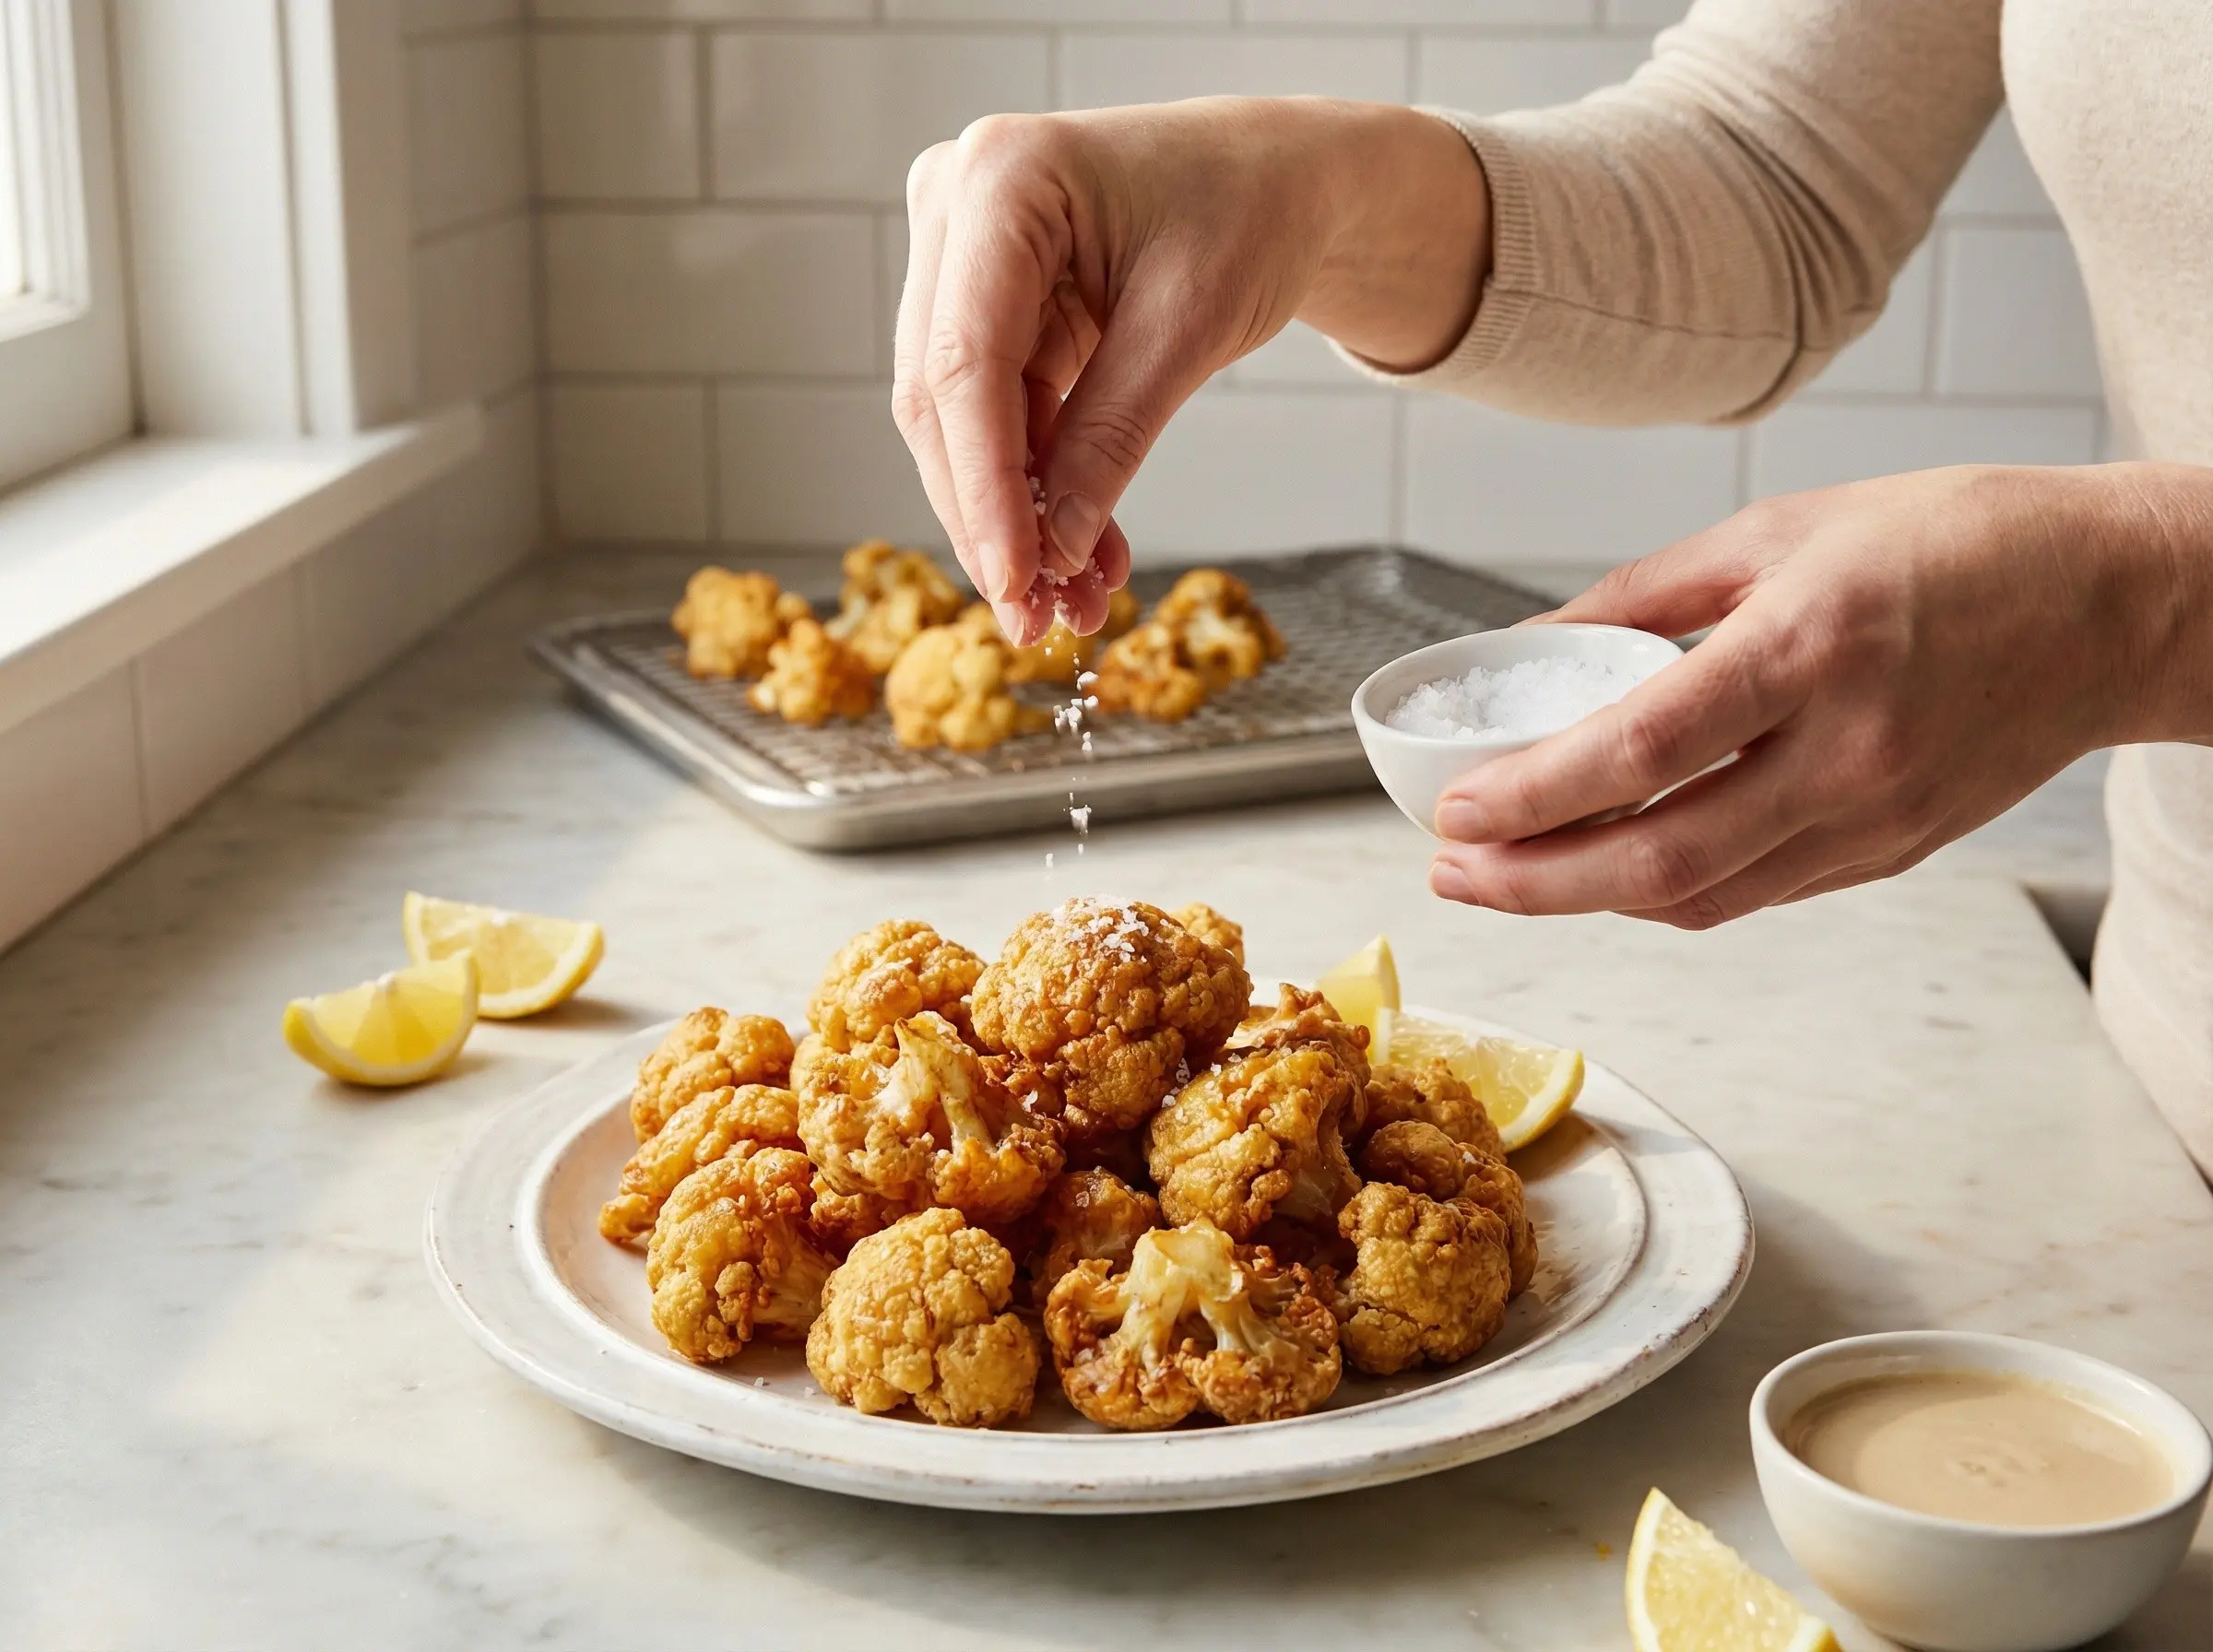
Transfer the fried cauliflower to the prepared baking sheet to drain briefly. Season immediately with flaky sea salt while still hot - this is when the salt will adhere best. Keep the first batch warm in a 200 degree F oven while frying the remaining batches, spreading them in a single layer to preserve crispiness. Allow the oil to return to 375 degrees F between batches. Serve the fried cauliflower immediately while hot and crispy, with lemon wedges for squeezing over the top and your choice of dipping sauce - tahini, spiced yogurt, ranch, buffalo sauce, or garlic aioli all pair beautifully. Fried cauliflower is best eaten right away; it will lose its crispiness within 15-20 minutes as steam from the interior softens the coating.
You Might Also Like