Castella
Learn how to make castella, the beloved Japanese honey sponge cake with a moist, fine crumb and caramelized bottom. This elegant cake has been perfected in Nagasaki for over 400 years!
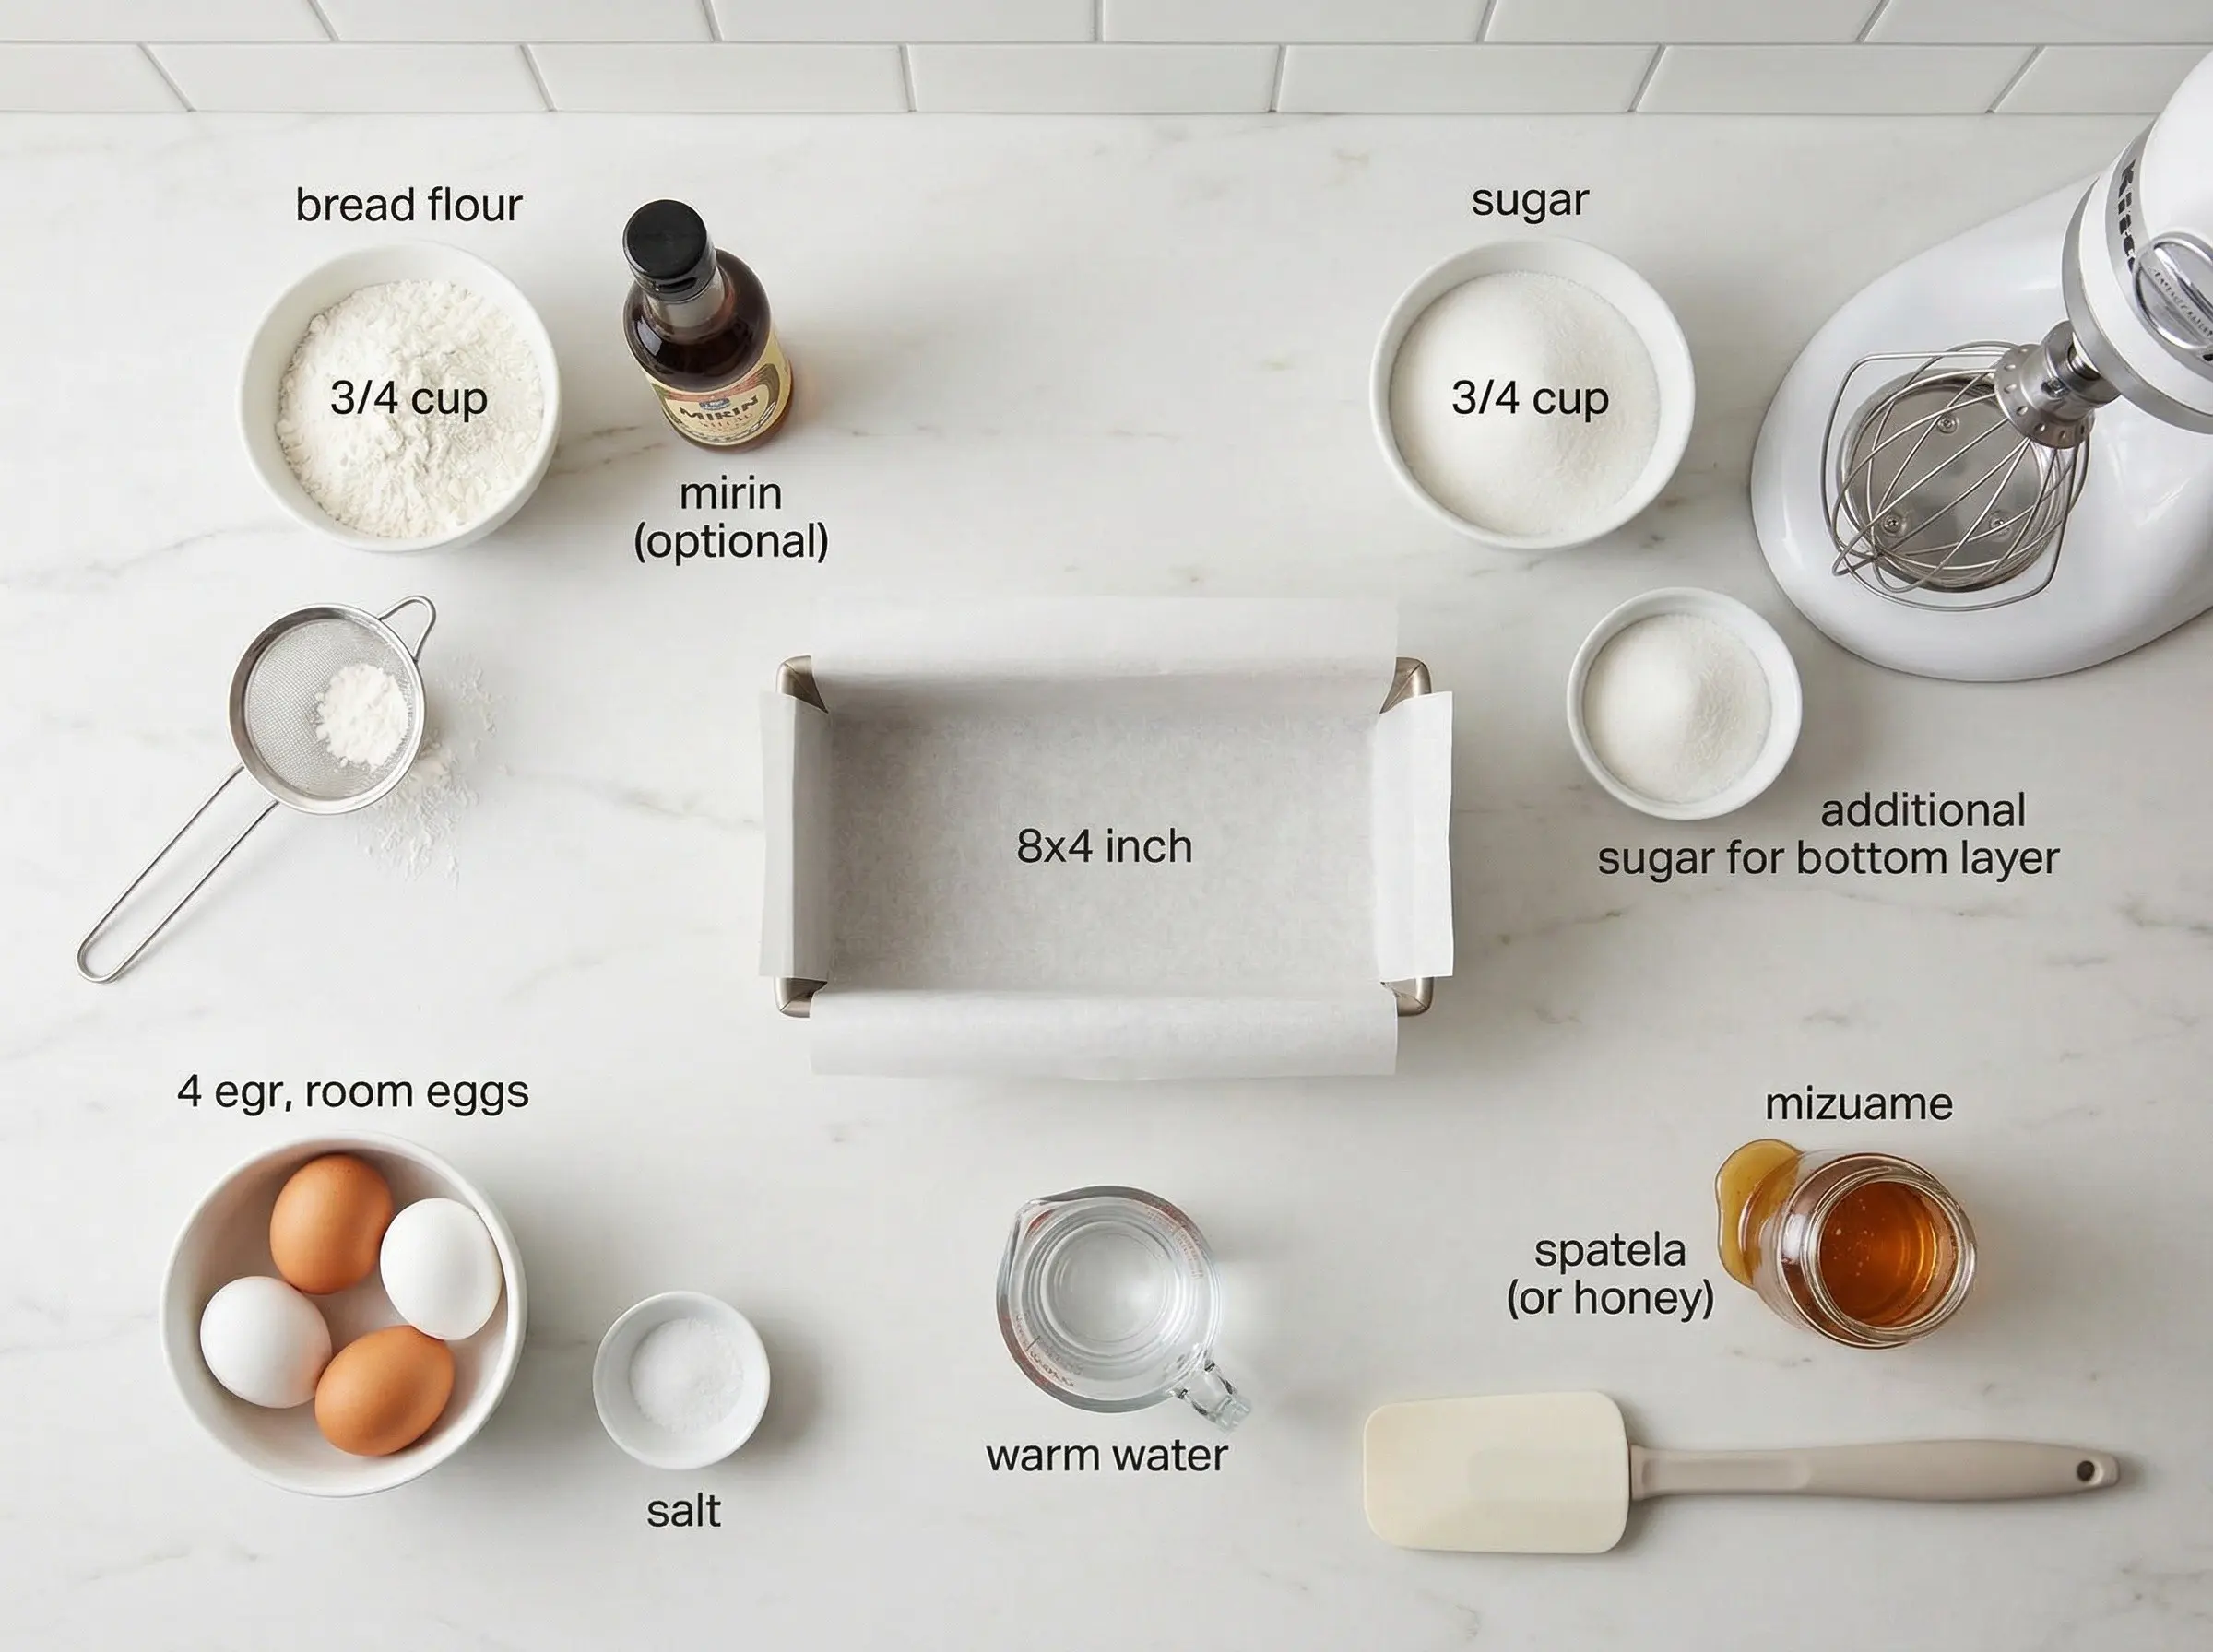
Ingredients
The Story
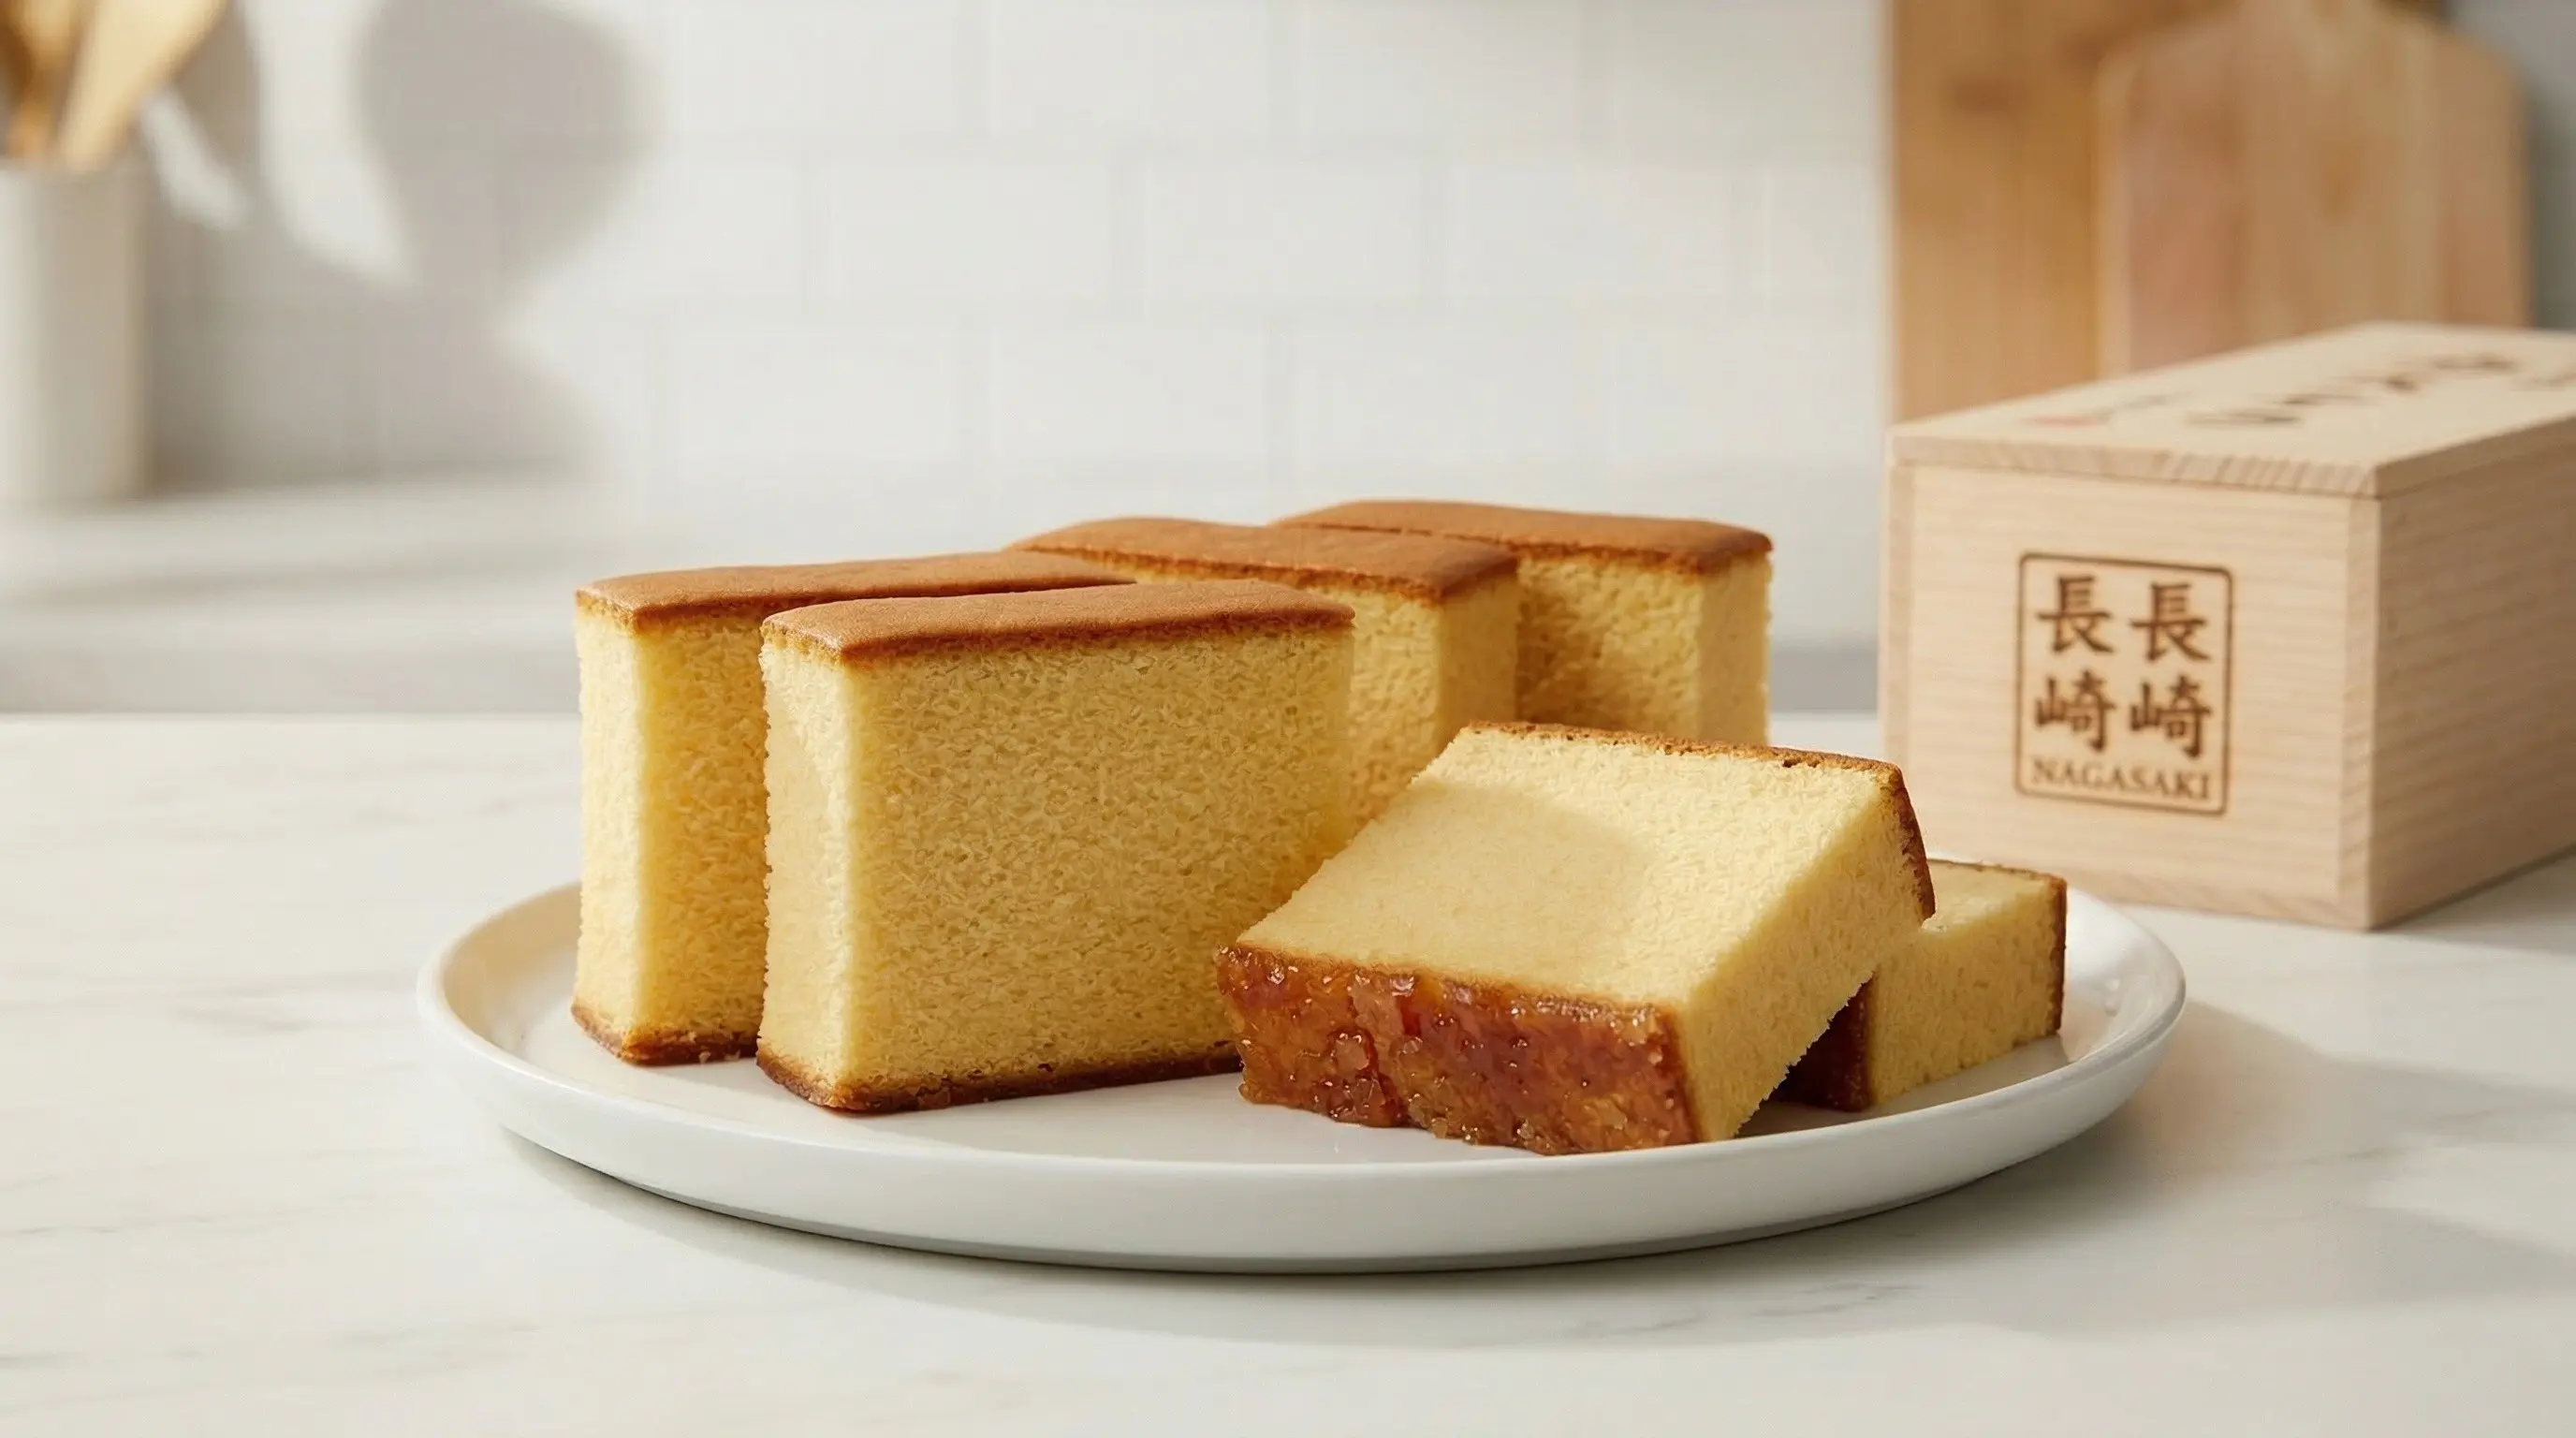
Castella, known as kasutera in Japanese, is a honey sponge cake with a fascinating history that bridges East and West. The cake arrived in Japan in the 16th century, brought by Portuguese missionaries and merchants who landed in Nagasaki during Japan's brief period of openness to foreign trade. The name derives from "Pao de Castela," meaning bread from Castile (a kingdom in Spain), though the cake itself was a Portuguese creation similar to pao-de-lo. When Japan closed its borders during the Edo period (1603-1868), Nagasaki remained the only port open to limited foreign trade, and the local confectioners continued refining the Portuguese recipe, transforming it over centuries into something distinctly Japanese. What began as a foreign curiosity became one of Japan's most treasured confections. Nagasaki bakers spent generations perfecting the cake, developing the characteristic fine, even crumb, the moist honey-scented interior, and the thin layer of caramelized sugar that forms on the bottom during baking. The most famous castella bakery, Fukusaya, has been making the cake since 1624 and guards its recipe and technique closely. Traditional castella is baked in large wooden frames and aged for a day or two to allow the moisture to distribute evenly, resulting in a cake of remarkable uniformity and delicacy. Today, Nagasaki castella is considered a premium gift, purchased by tourists and shipped throughout Japan as an elegant souvenir. What makes castella so extraordinary is its perfect simplicity and the meticulous technique required to achieve it. The cake contains only four main ingredients - eggs, sugar, flour, and mizuame (a Japanese starch syrup similar to honey) - yet produces a texture unlike any Western sponge cake. The crumb is incredibly fine and even, almost velvety, with no air pockets or irregularities. The cake is moist but not heavy, sweet but not cloying, with a honey fragrance that perfumes every bite. The signature feature is the thin, sticky layer of caramelized sugar on the bottom, formed when sugar settles during baking. Sliced into elegant rectangles and often presented in wooden boxes, castella embodies the Japanese pursuit of perfection through simplicity - a foreign recipe transformed over four centuries into an edible art form.
Instructions
Step 1
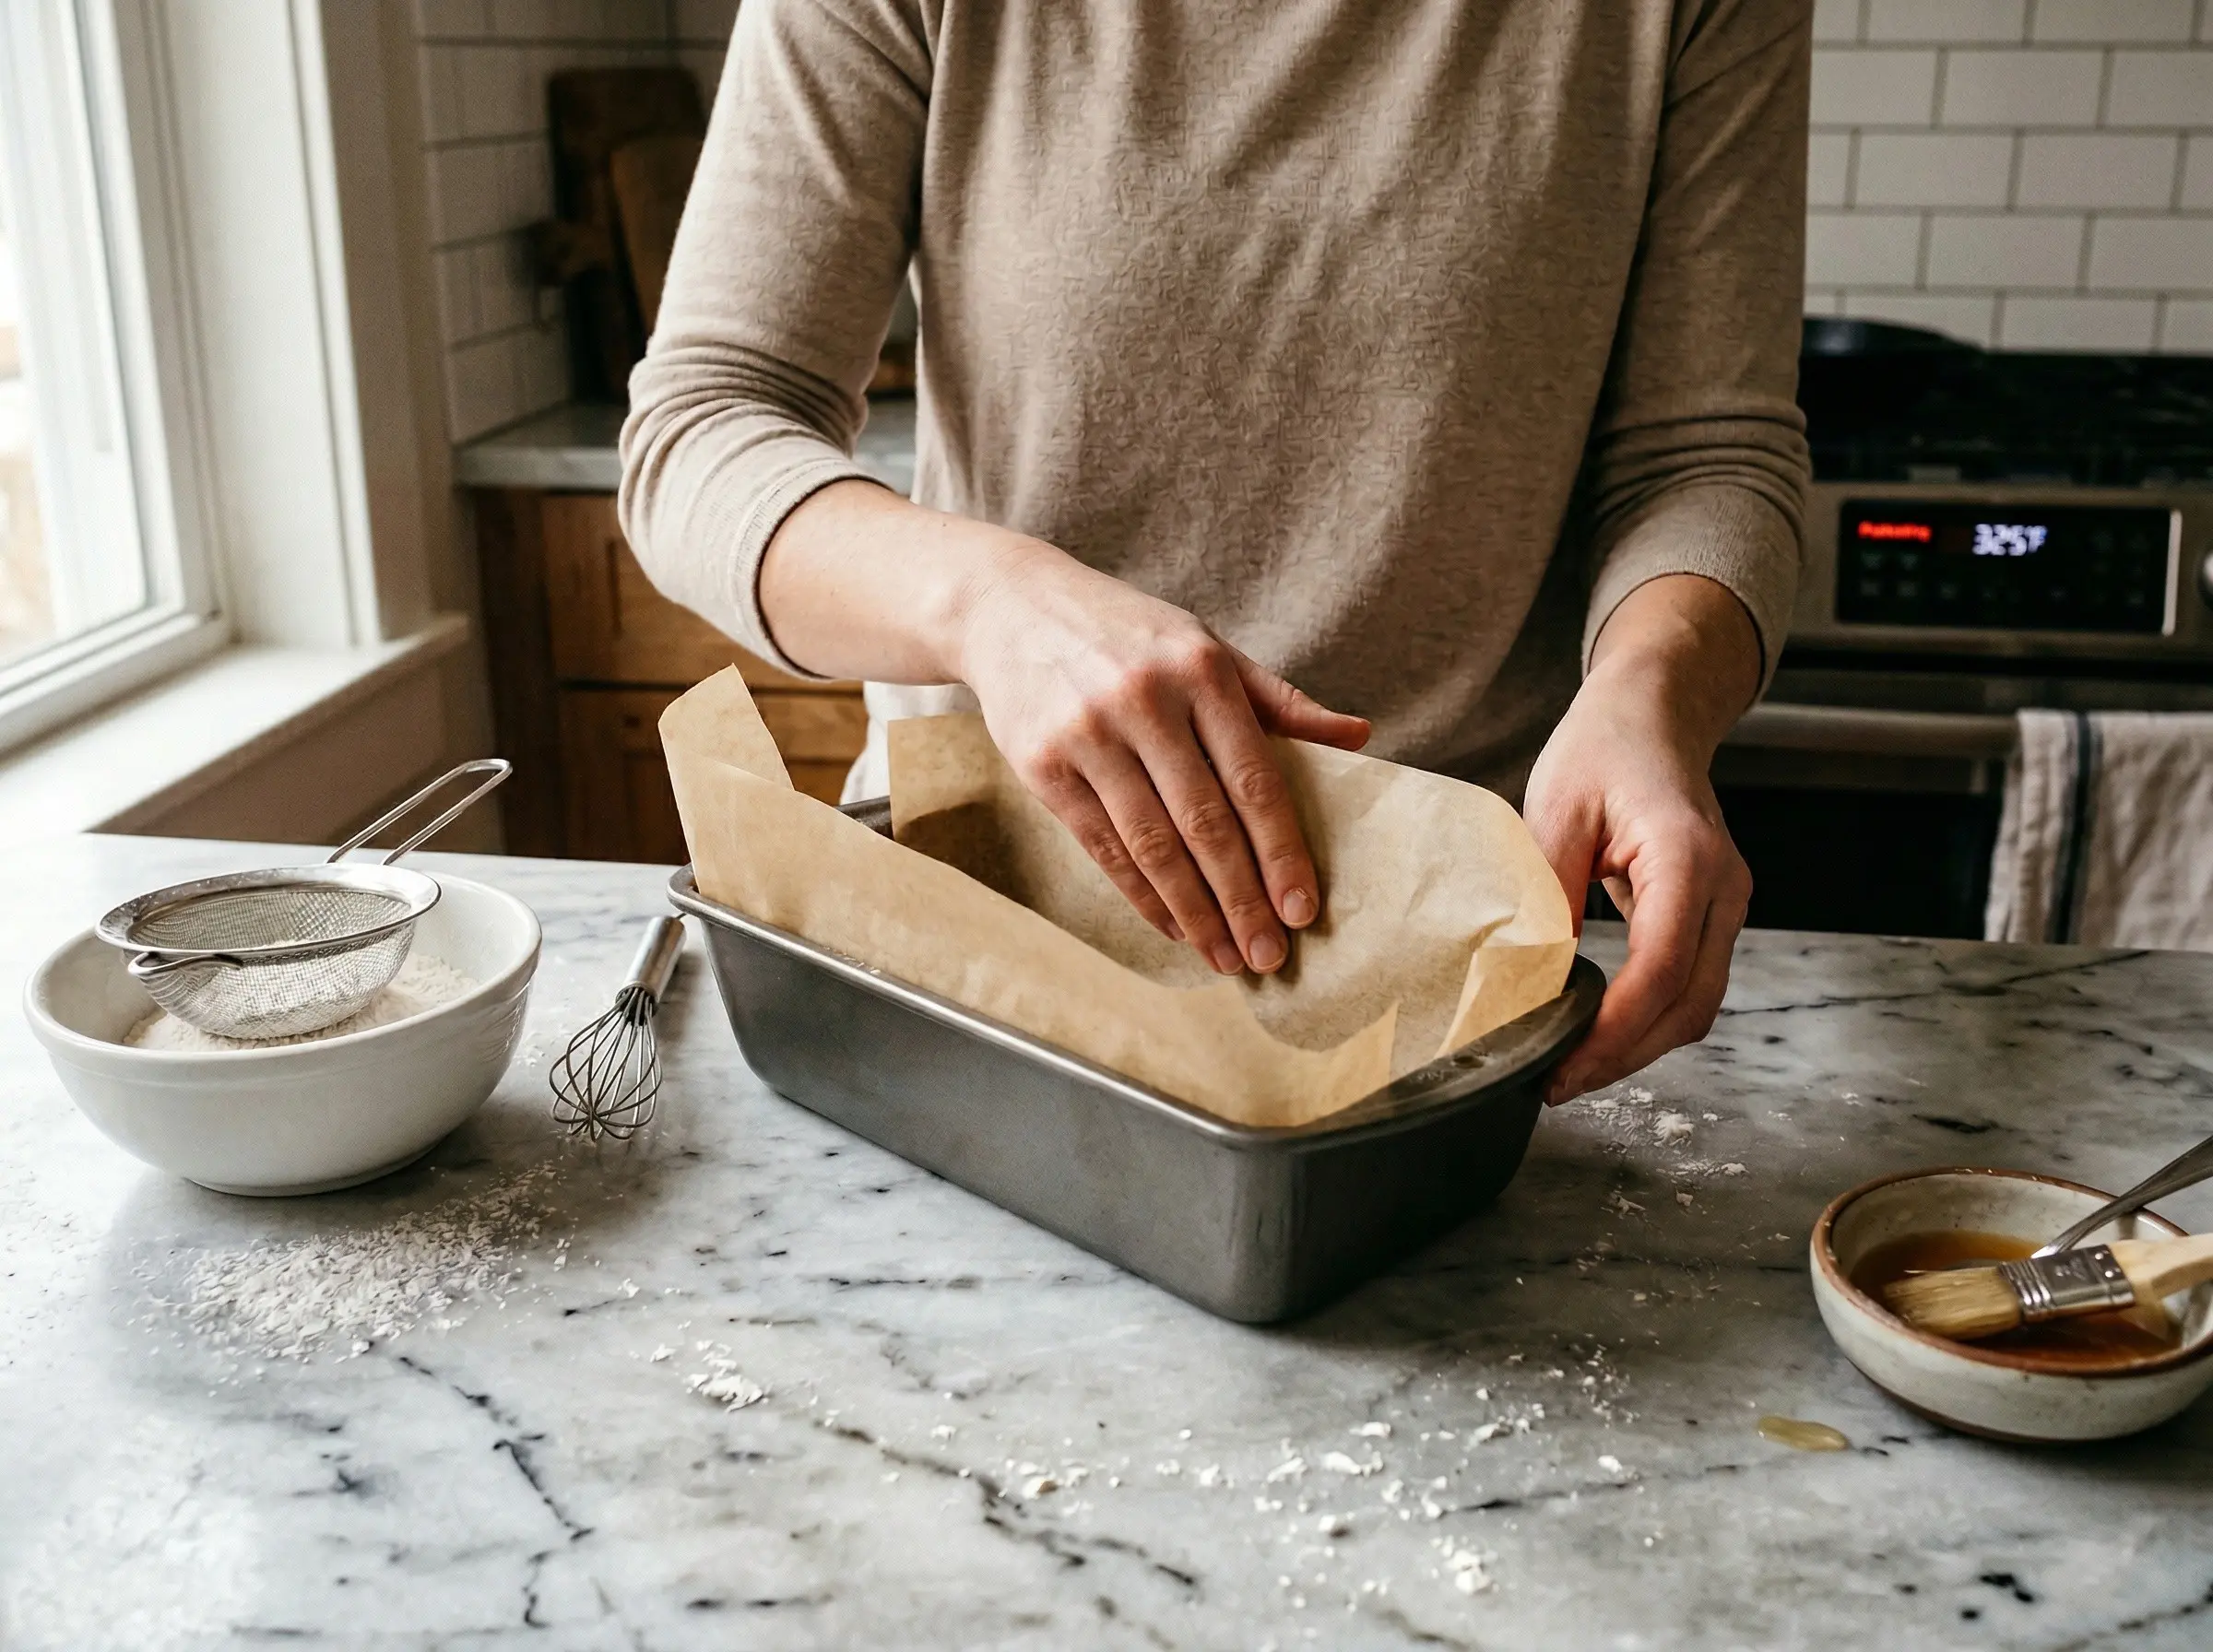
Prepare the pan and preheat the oven. Line an 8x4 inch loaf pan (or traditional wooden castella frame if you have one) with parchment paper, extending the paper above the rim by at least 2 inches on all sides - the cake will rise significantly. Preheat your oven to 325 degrees F. In a small bowl, combine the mizuame (or honey), warm water, and mirin if using. Stir until the mizuame dissolves completely. Set aside. Sift the bread flour twice - this removes lumps and aerates the flour for a finer crumb.
Step 2
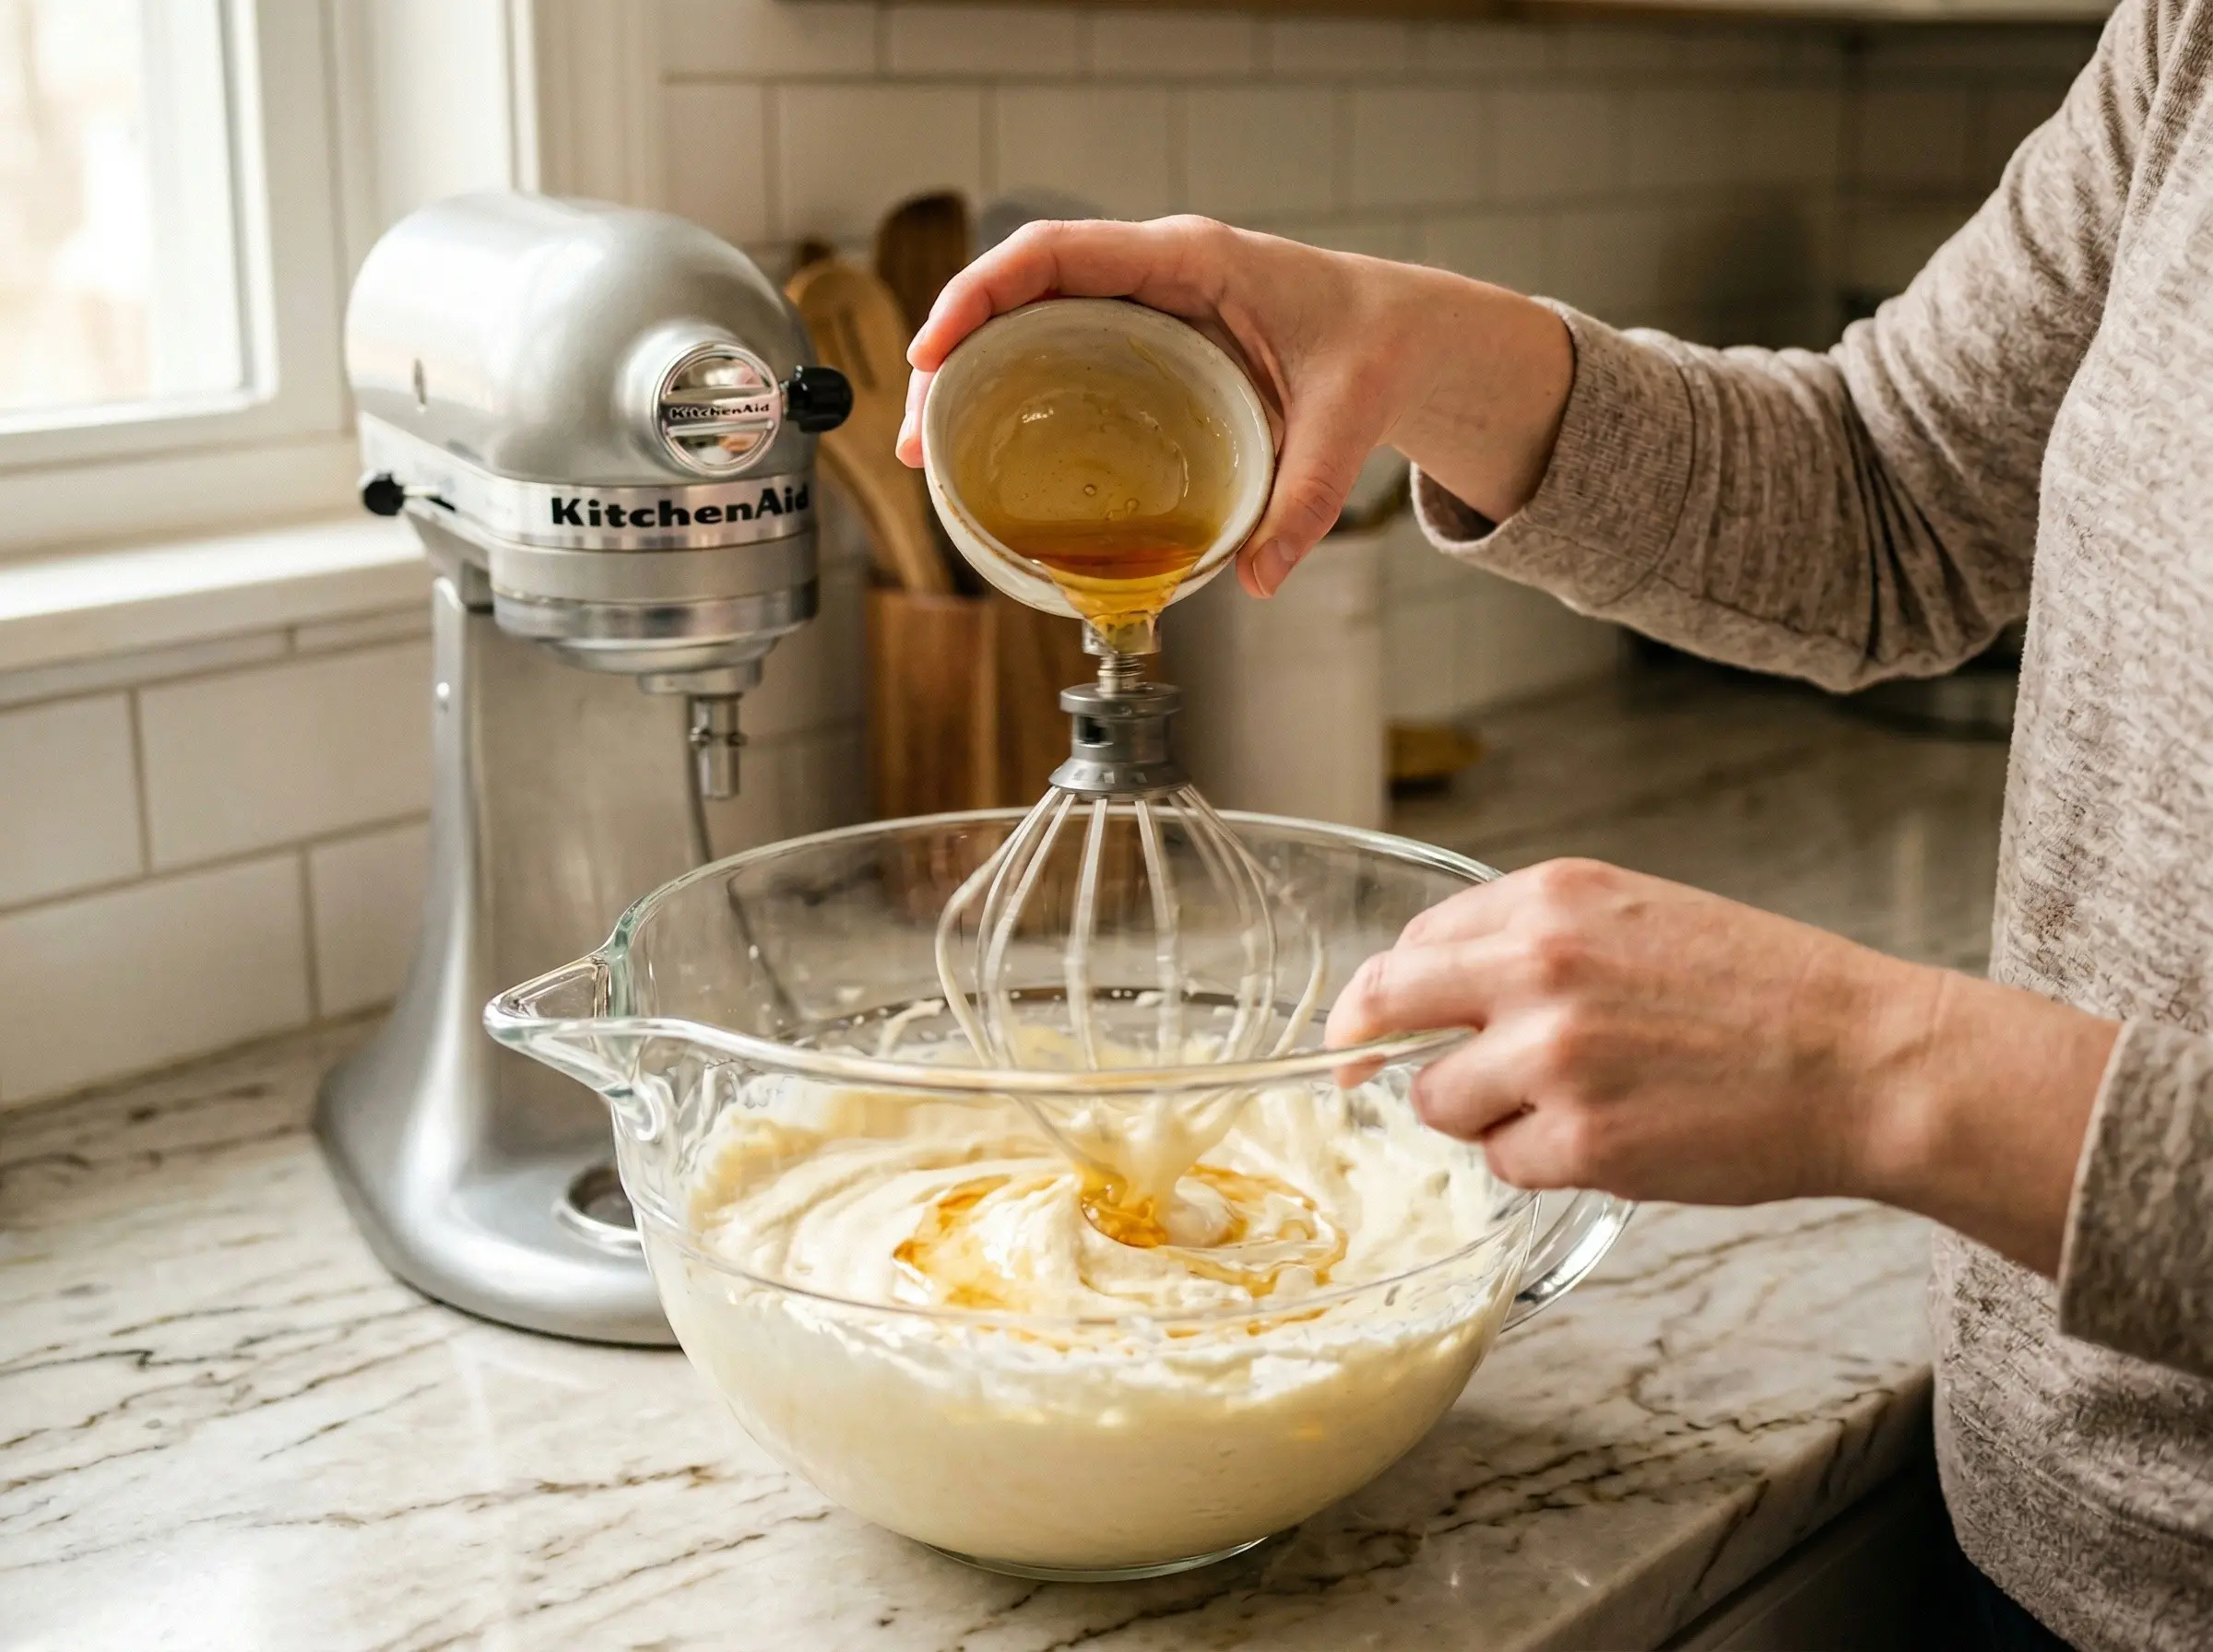
Whip the eggs and sugar. In a large bowl or the bowl of a stand mixer, combine the eggs and sugar. Using a hand mixer or stand mixer with the whisk attachment, beat on high speed for 10-15 minutes until the mixture reaches the ribbon stage - when you lift the beaters, the batter should fall in thick ribbons that hold their shape on the surface for several seconds before slowly dissolving. The mixture should be pale yellow, tripled in volume, and extremely thick and fluffy. This extended beating is crucial for castella structure.
Step 3
Add the mizuame mixture. With the mixer on low speed, slowly drizzle in the mizuame and water mixture. Mix just until incorporated. The mizuame provides moisture and the characteristic honey-like fragrance and keeps the cake tender for days. Do not overmix at this stage or you will deflate the air you worked so hard to incorporate.
Step 4
Fold in the flour. Sift the flour one more time directly over the batter in three additions. After each addition, use a large spatula to fold gently but thoroughly, scraping from the bottom and folding over the top. Continue folding until no flour streaks remain and the batter is smooth and homogeneous. This typically takes 40-50 folds total. Be gentle but thorough - undermixing leaves flour pockets, while overmixing deflates the batter. The final batter should be thick, smooth, and flow slowly like lava.
Step 5
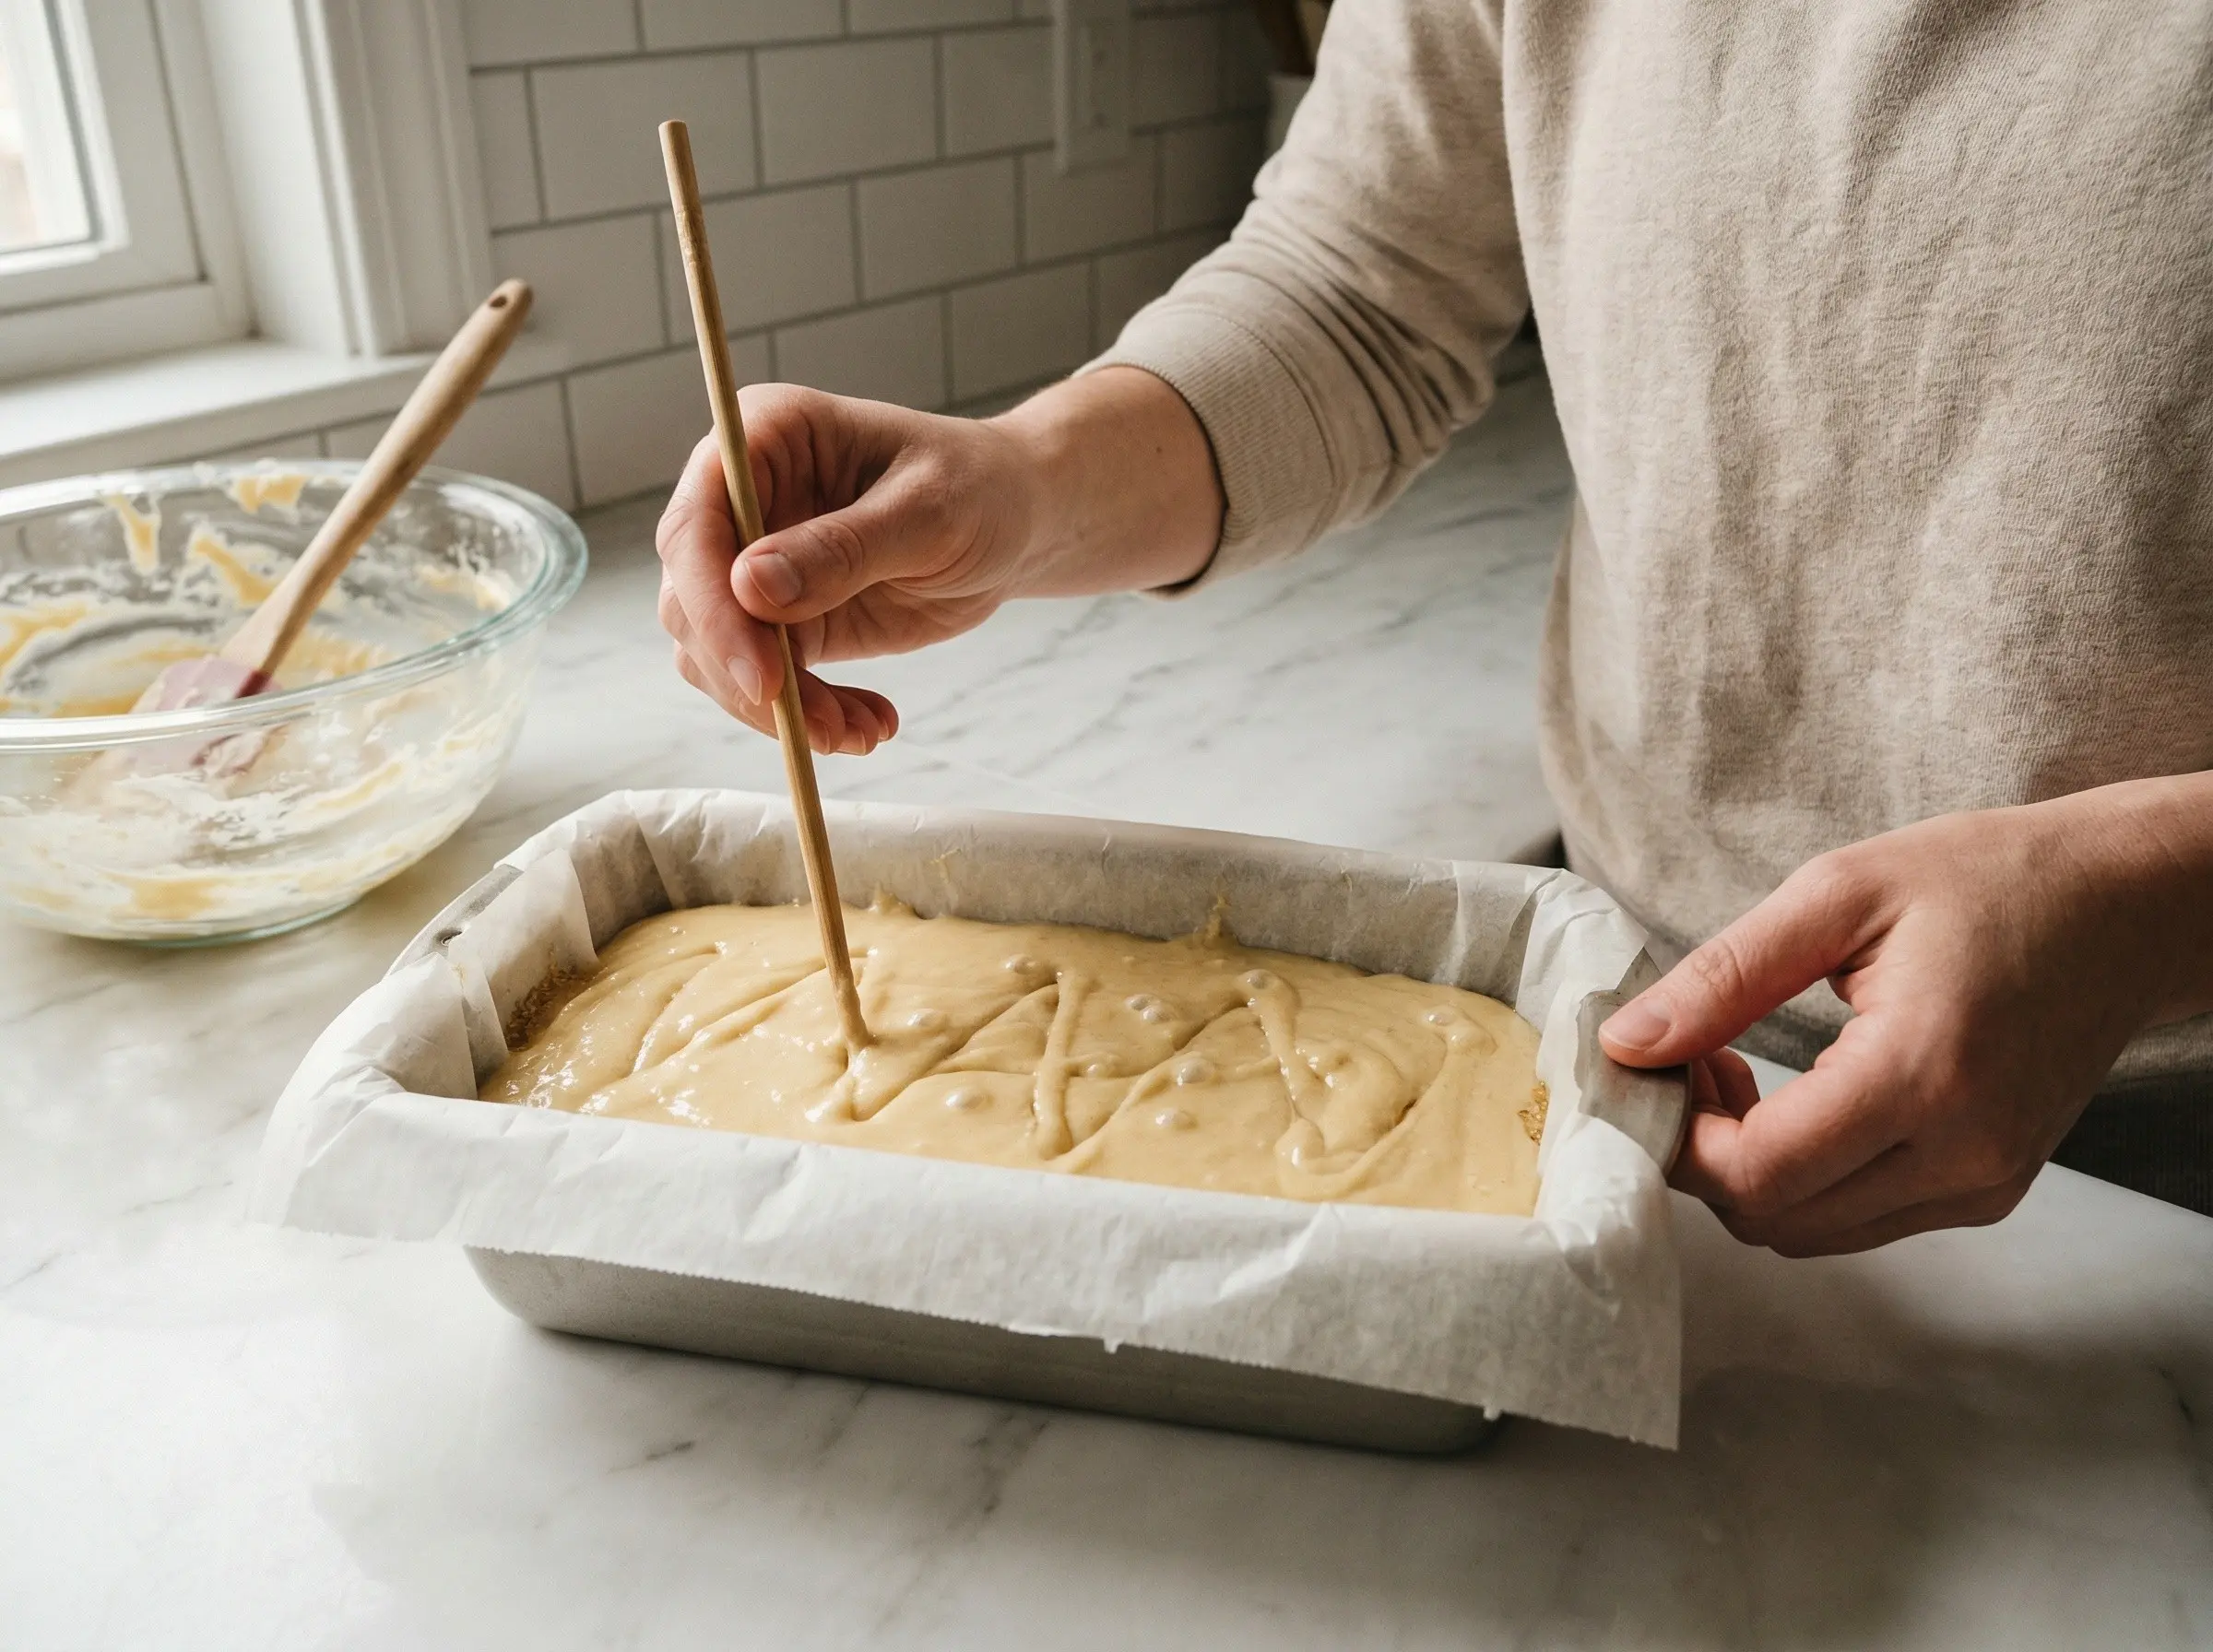
Pour and prepare for baking. Sprinkle the additional 2 tablespoons of sugar evenly over the bottom of the prepared pan - this will caramelize to form the characteristic castella bottom layer. Slowly pour the batter into the prepared pan from a height of about 6 inches - this helps remove large air bubbles. Use a chopstick or skewer to run through the batter in zigzag patterns to pop any remaining large bubbles. Gently tap the pan on the counter several times to release air bubbles and level the surface.
Step 6
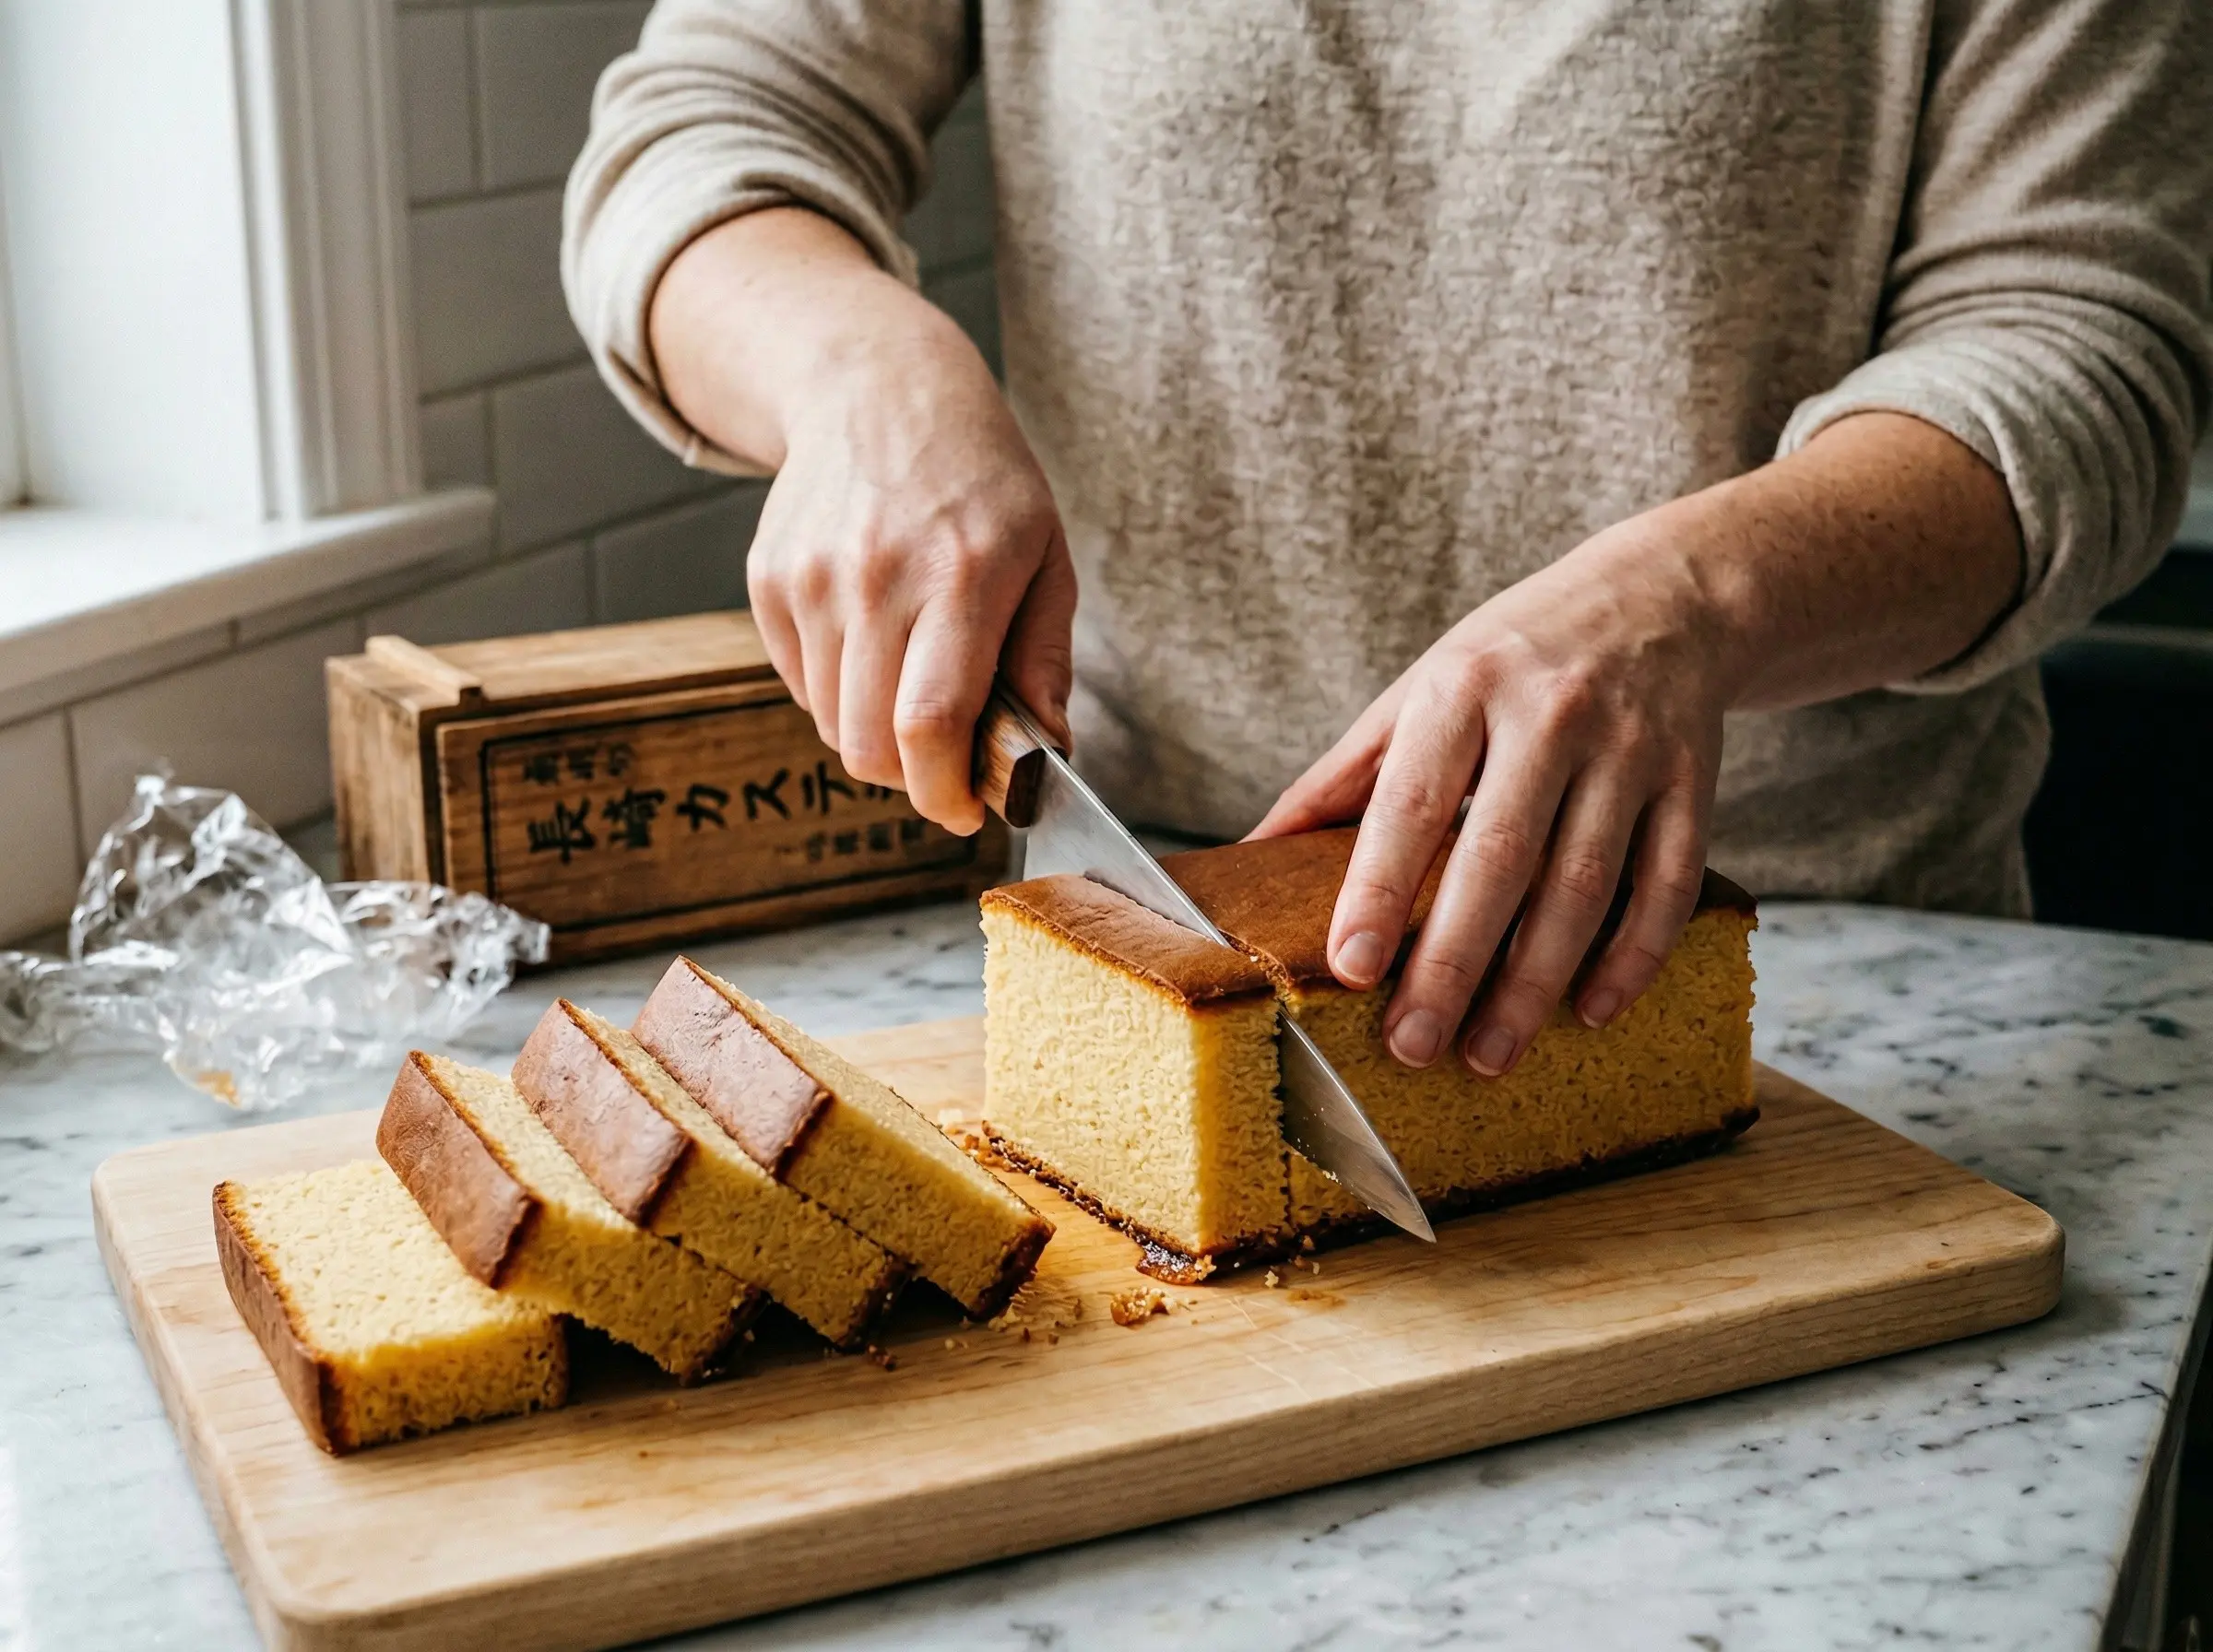
Bake with care and patience. Bake at 325 degrees F for 50-60 minutes until a skewer inserted in the center comes out clean and the top springs back when gently pressed. The top should be deep golden brown. If the top browns too quickly, tent loosely with aluminum foil for the last 15-20 minutes. Traditional castella is baked low and slow to achieve its even crumb. Remove from the oven and immediately drop the pan from a height of about 6 inches onto the counter - this shock prevents the cake from shrinking. Let cool in the pan for 10 minutes, then lift out using the parchment paper overhang. Wrap the cake tightly in plastic wrap while still slightly warm - this traps moisture and creates the characteristic moist texture. Rest at room temperature for at least 12 hours, preferably 24 hours, before slicing. The resting period allows moisture to distribute evenly throughout the cake. Trim the edges for the cleanest presentation, then slice into elegant rectangles about 1 inch thick. Traditional castella is served plain, showcasing the perfect crumb and caramelized bottom. Store wrapped at room temperature for up to 5 days - the cake actually improves for the first 2-3 days as it becomes more moist.
You Might Also Like